As you plan your handmade wedding it's easy to become over-eager in the crafts department. In some ways Pinterest sets us up to fail. So many ideas... so little time.
To avoid turning into a glitter covered, sleep-deprived, glue-gun wielding bride of Pinterest nightmares, I recommend picking a handful of meaningful DIY projects that satisfy your inner craft goddess.
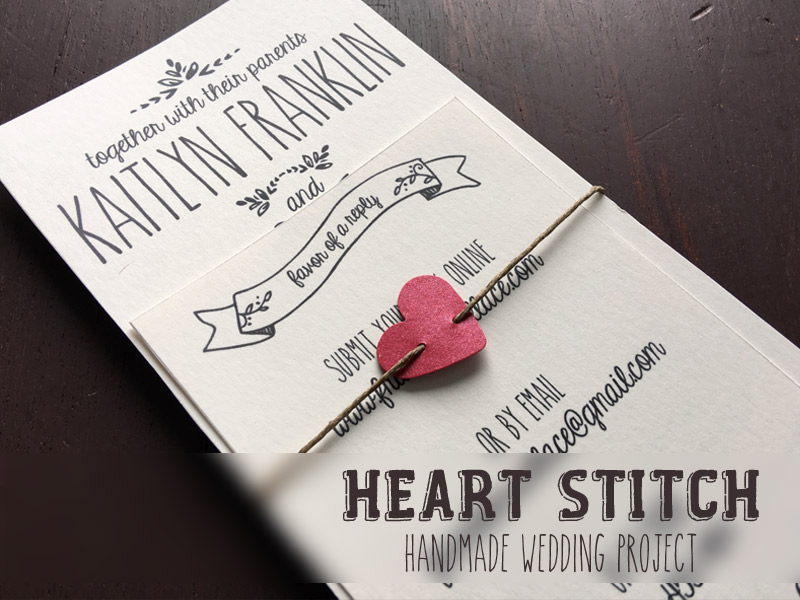
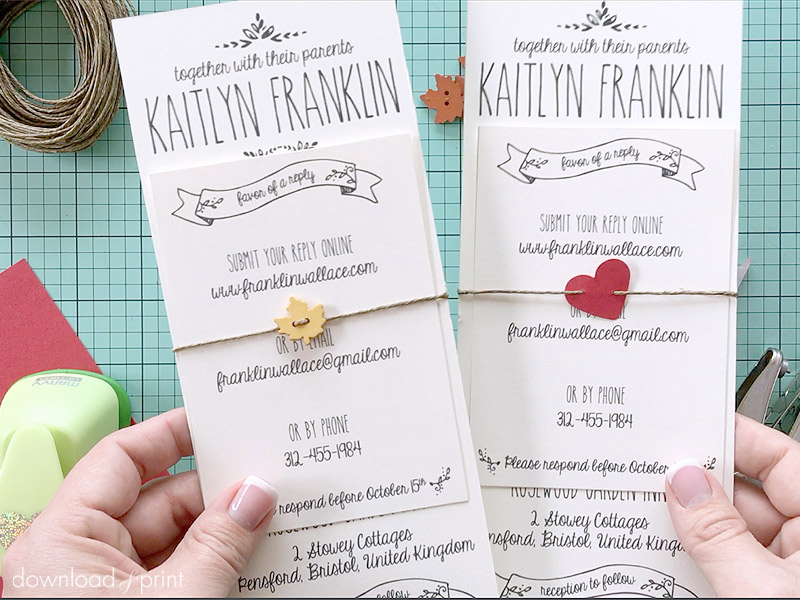
This handmade paper heart belly band is sweet and simple and conveniently holds your invitation and RSVP together in a neat package. It's also quick and inexpensive to make along with adds a personal touch to your invitations. That's a win all round for me.
In this tutorial I've made the belly band with a paper heart. If you would like a more folksy feel a decorative button would be equally adorable and save you on DIY time. Dress It Up has a huge array of themed buttons, you're bound to find something to tie in with your wedding theme.
I've paired the belly band with our tall Doodle Love invitation and RSVP. I like the way the simple heart looks with the doodles, and it adds a pop of color to the black design.
SUPPLIES:
- Hemp Cord
- Card stock
- Mini hole punch
- Heart punch
- Invitation suite
Step 1: Punch Hearts
If you are using buttons, skip this step.
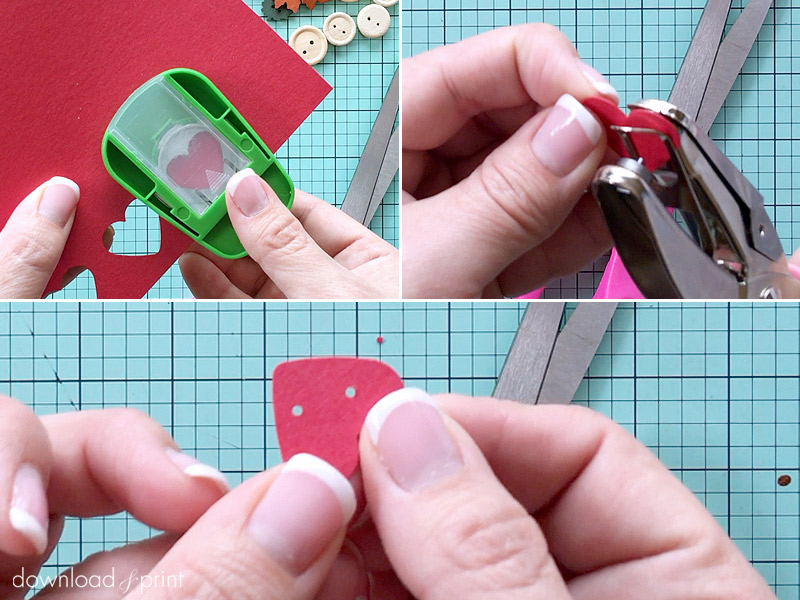
Punch hearts from card stock.
Use your mini hole punch to punch two holes into each heart for threading. There is no right or wrong way to punch the holes, just make sure they are not too close to the edge. I wanted my hearts at an angle on the thread, so I punched them along one of the straight edges of the heart.
Step 2: Thread Cord
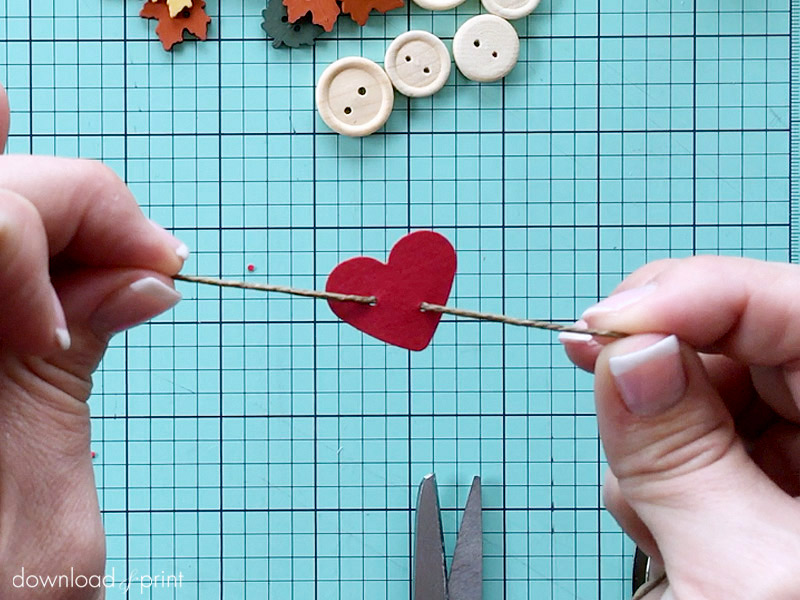
Cut a length of hemp cord long enough to reach around your invitation and knot.
Thread the cord through your heart or button, moving the heart to the center of the cord.
Step 3: Tie
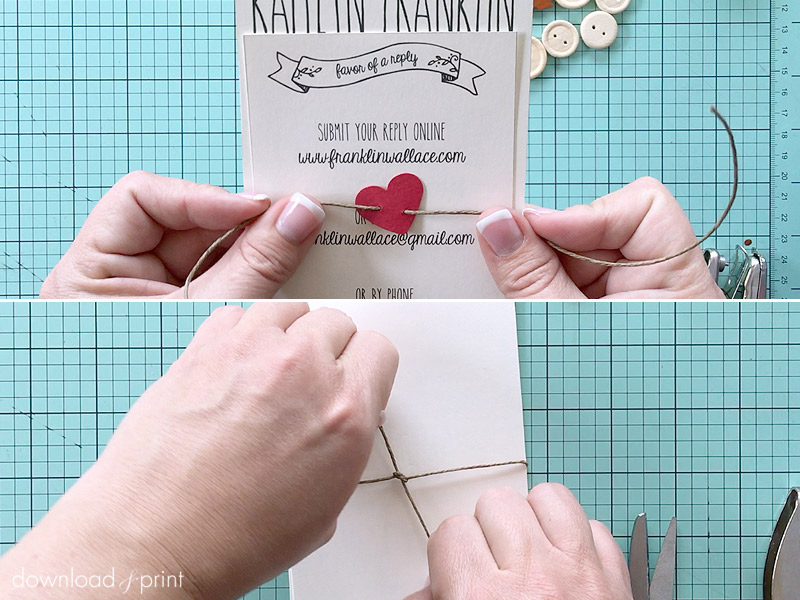
Stack your invitation, RSVP and envelope, and enclosure card. Tie the heart and cord around the stationery stack, knotting at the back. Center the heart on the front and trim the cord tails at the back.
YOU MAY ALSO LIKE THESE DIY WEDDING INVITATIONS:
With template love,
(Although all the products listed in this tutorial are products I personally use, I will be compensated just a tiny bit if you make a purchase through some of the links provided. Thanks for supporting small biz!)

