
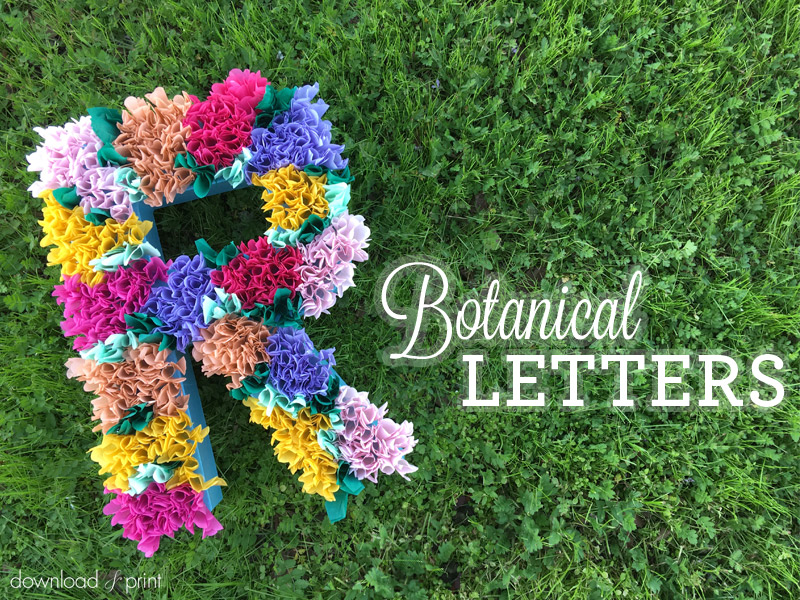
A few weeks ago I gave you a sweet and quick paper heart belly band for your whimsical invitations. Today, I will be the first to admit that the project does not fall into the quick category. It does however fall into the easy basket. There's nothing hard about this botanical letter, just fold, glue, repeat.
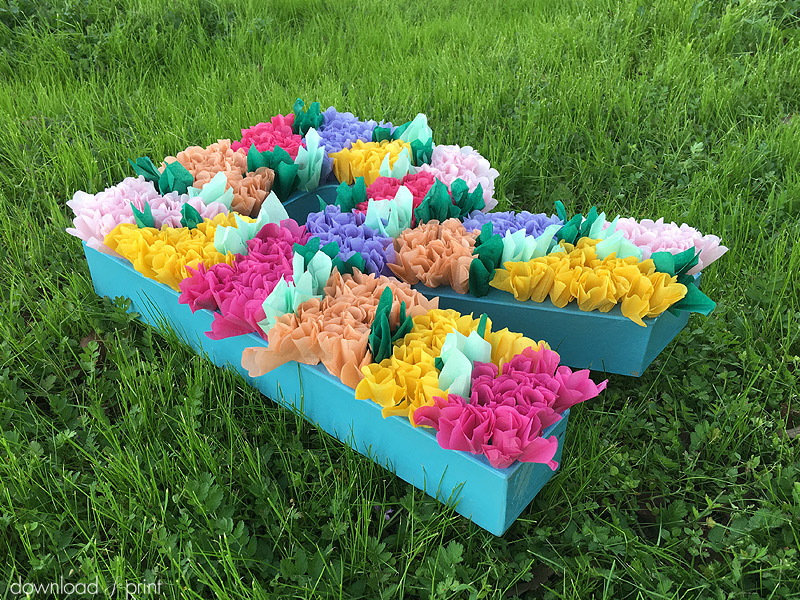
The letters are a bit of a show stopper. If you are planning a garden or whimsical wedding they would make gorgeous décor. I'm showing you how to make one letter in this tutorial, but I think having both the bride and grooms first initial would be stunning, add an ampersand and the set is complete.
This project was inspired by the save-the-date card from my Artisan Botanical invitation suite. The entire collection features gorgeous blooms, but it's the floral lettering on the save-the-date that stands out for me.
So lets talk about time. It took me about 1:15 to complete this letter. If you are thinking of two letters and a smaller ampersand I'd allow about 3 1/2 hours. A perfect amount of time to get in a Netflix binge session. The letter that I used is 12" tall.
For a detailed view on how to create the flowers start at 5:15 in the video at the end of this post. For a cool time lapse on the entire letter coming together start at 7:20.
The letters can be used as reception décor, on your guest book table, at the top of your aisle, in the lobby of your church, anywhere you like really.
SUPPLIES:
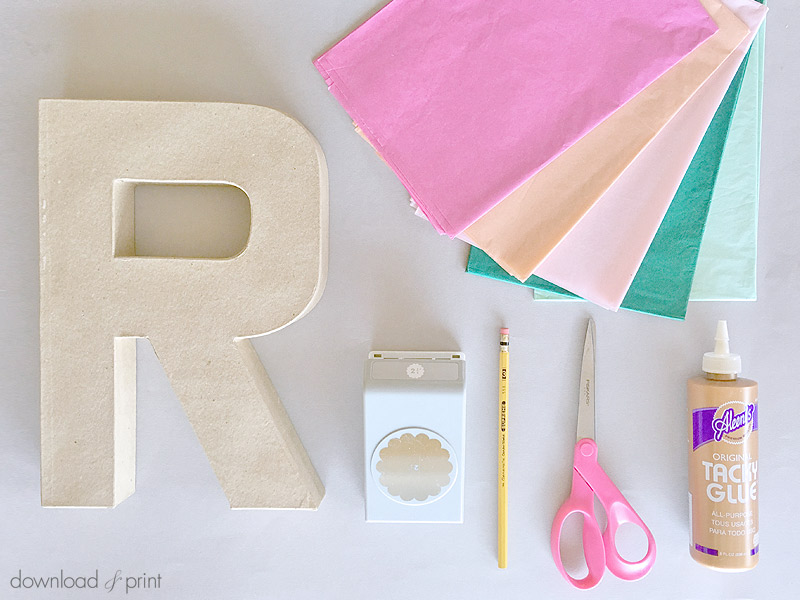
- Paper mâché letters
- Color tissue paper
- Circle scallop punch - I'm using a scallop punch for extra detail, but a plain circle would also work
- Wooden pencil
- Tacky glue
- Scissors
Step 1: Paint Letter
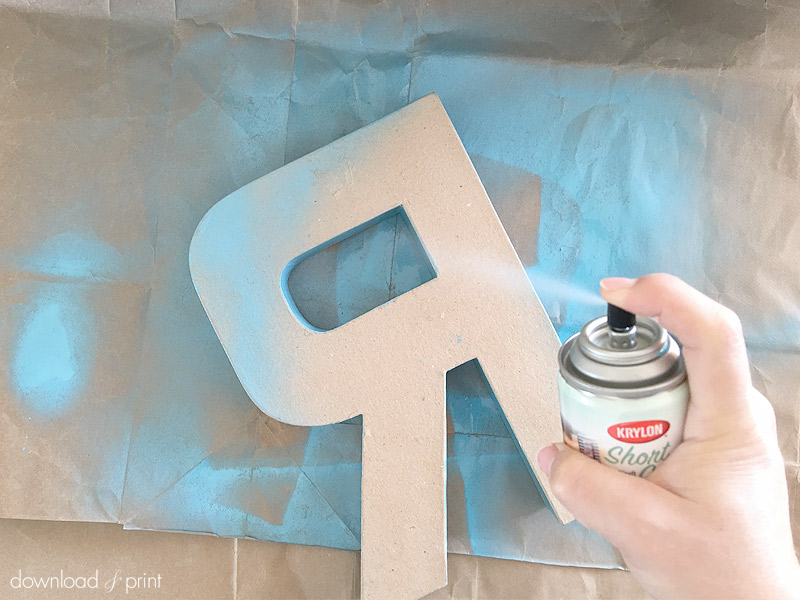
This is an optional step and will depend on what your letter looks like to begin with.
I choose to spray paint my letter light blue. I used a mini can of spray paint as it doesn’t take much.
You can also brush on paint, but I don’t like washing brushes so spray paint is my paint of choice.
Step 2: Punch Petals
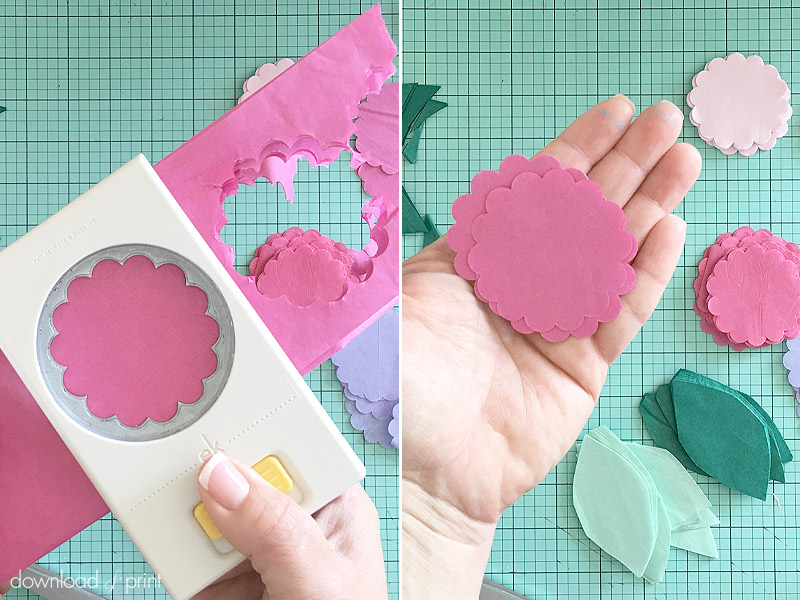
Fold a sheet of tissue into a strip slightly wider than your punch. Punch along the tissue strip to make the petals. You can experiment with how many layers of tissue your punch will go through, typically these punches are pretty robust.
Repeat this step for each petal color.
Step 3: Cut Leaves
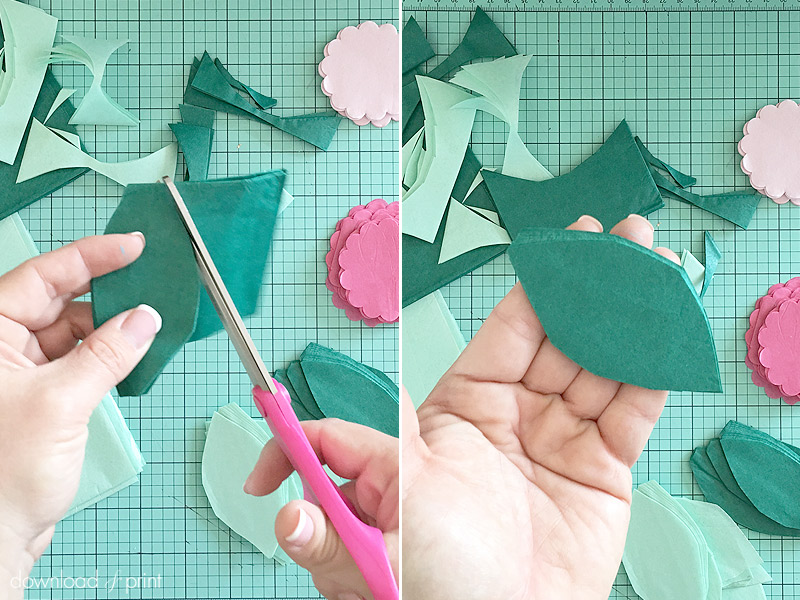
The leaves need to be cut into leaf shapes (my descriptions are awesome!). It’s best to hand cut these with scissors. Fold your tissue so that you can cut leaves that are about 3” in length. Don’t over think the shape, just go ahead and cut. You want to aim for a point at each end with a fat, round middle.
Step 4: Create Flowers
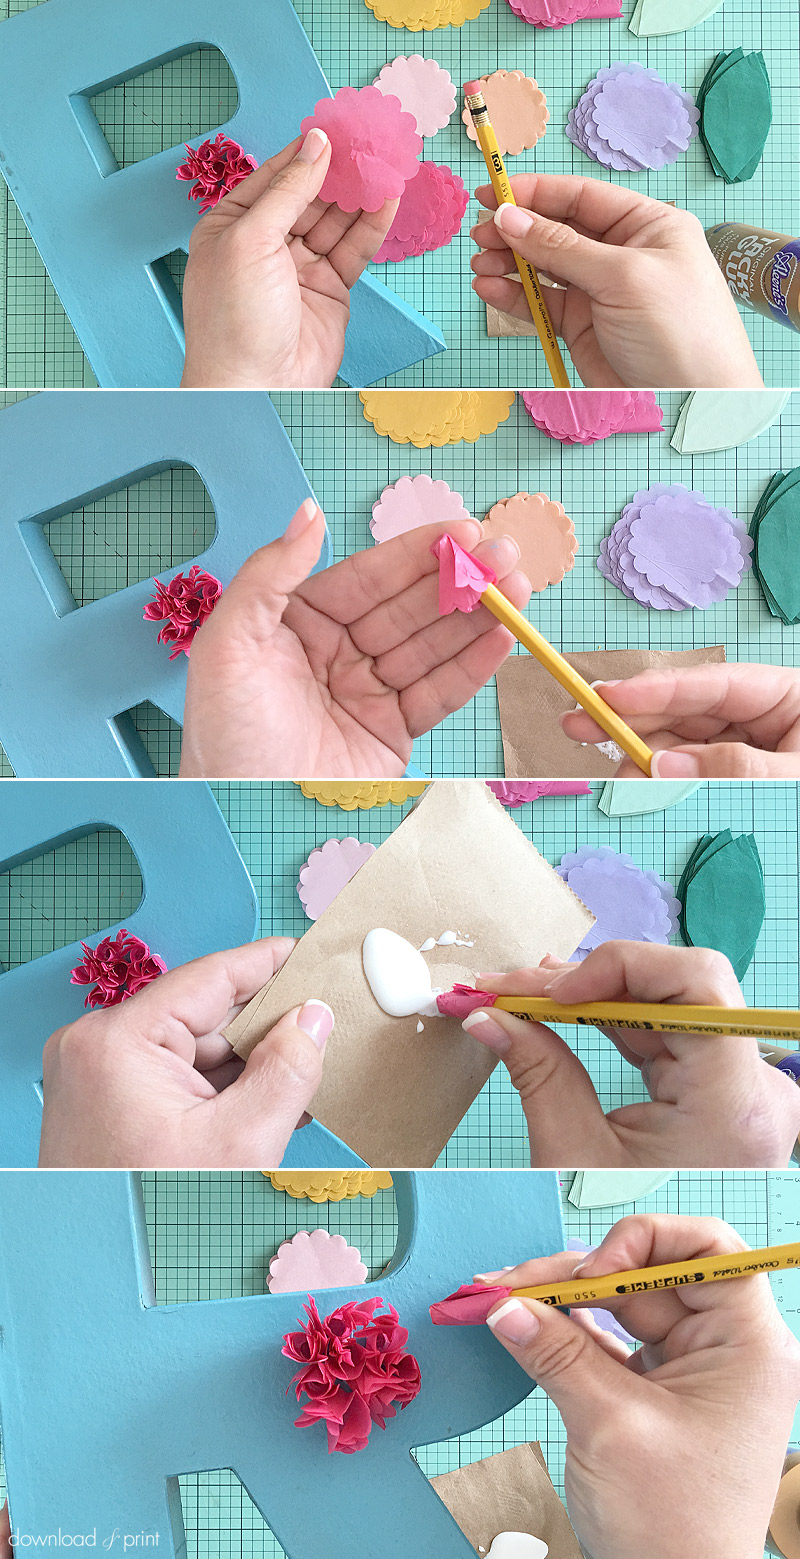
Take one petal and push the blunt end of a pencil into the center. Fold the petal down over the pencil and wrap it around the pencil.
Dip the point of the wrapped tissue into the tacky glue and push the tissue onto your letter. Remove the pencil.
You can also use a dowel rod or any other type of stick that has a flat end. Don’t use anything with a point or it can push through your tissue.
Step 5: Fill In Letter
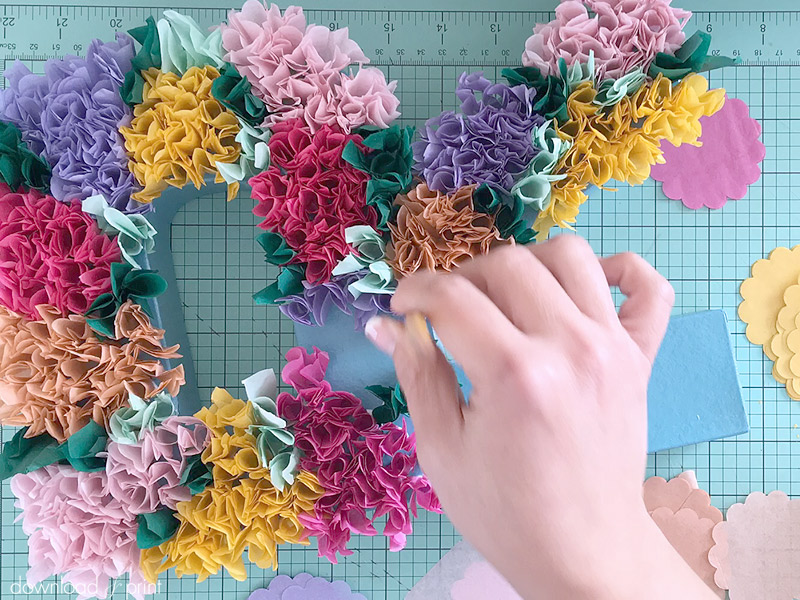
Repeat this technique until you have filled in the top of your letter. Create clusters of color to resemble flowers.
Mix in leaves in smaller clusters. Leaves are applied in the same way as petals, pushing a pencil into the center of the leaf, wrapping around, dipping in glue and attaching to the letter. They should end up being a little taller than the petals to create extra contrast.
Settle down with your favorite Netflix series and wrap, glue, repeat. Just don't get so lost in your show that you end up with an entire botanical paragraph!
With template love,

(Although all the products listed in this tutorial are products I personally use, I will be compensated just a tiny bit if you make a purchase through some of the links provided. Thanks for supporting small biz!)