Did you fall for any good April fools this week? I completely forgot about the first of the month until a round up of the days best tricks appeared in my news feed.
Of course I took a look at what I didn't fall for this year.
I was hoping it would be a quick look. But alas, most of the fools were videos and I did not have time to sit through and watch 20 videos, no matter how short. When did life become so complicated... I've always been a fan of words. Write me a joke, send me a card, show me a quote. That's all I need. I'm a simple girl.
Anyhoooo, the arrival of April 1st signals Easter is close by.
I'm hosting brunch this year. My kiddos are finally old enough to get excited about events, so we're planning an egg hunt and going to make it a fun day for them.
The fun part for me is decorating the table. No matter the holiday I love creative table displays.
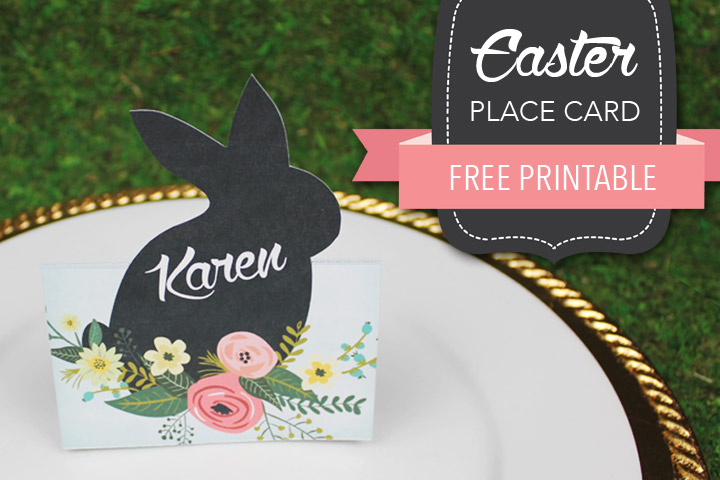
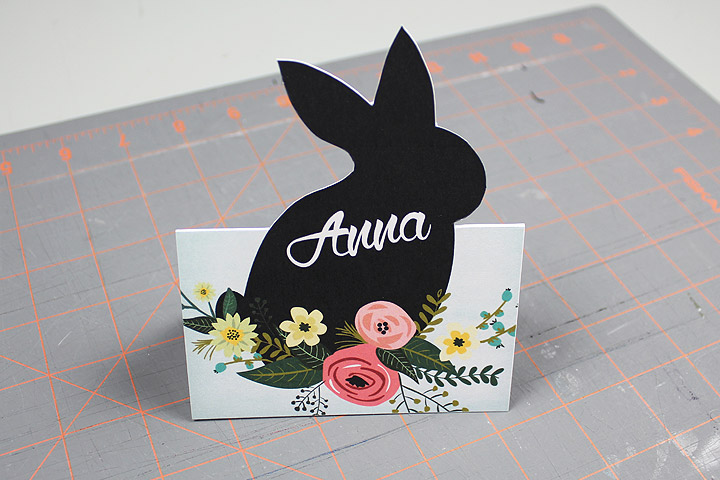
Anna designed this cute bunny place card a few years back and I thought I'd bring it out of the archives for you today.
The chalkboard-esque bunny is still in fashion and the spring flowers will never go out of style. It's an easy and cheap DIY, and will work for a table of kids or an adult focused brunch (mimosas anyone?).
Let me know in the comments what decorations must be on your table.
I'm a fan of place cards, rules out the awkward shuffle often seen at the beginning of a meal.
I hope you enjoy these.
SUPPLIES:Download Template
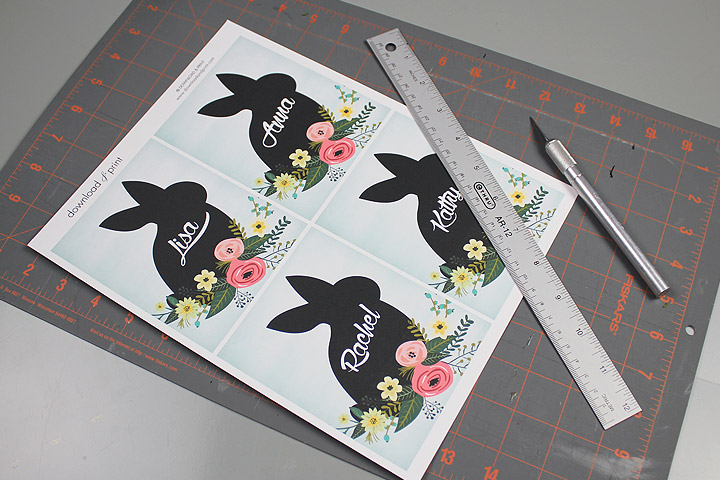
- Printable template
- White card stock
- X-acto knife and ruler
- Scissors or paper trimmer
- Scoring tool
- Bone folder - or fingernails work too
Step 1: Download + Print
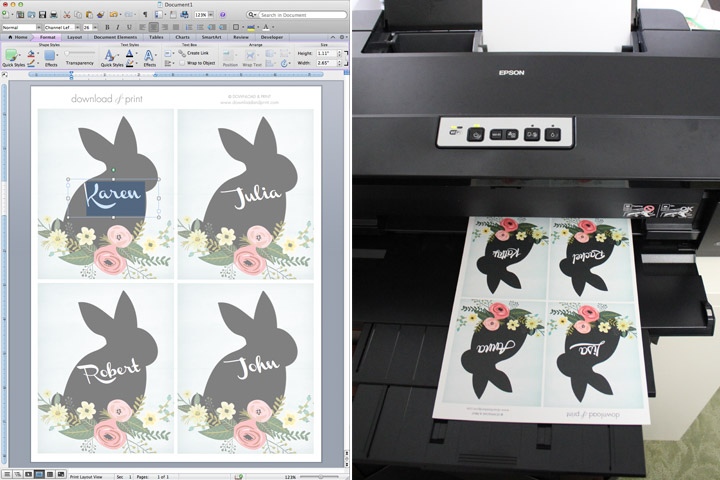
Download the template in MS Word, add your names, and print on white card stock.
The font I chose is Channel, which can be downloaded here. If you don't have this font installed on your computer Word will substitute a different font. Choose any font that you like.
Step 2: Cut
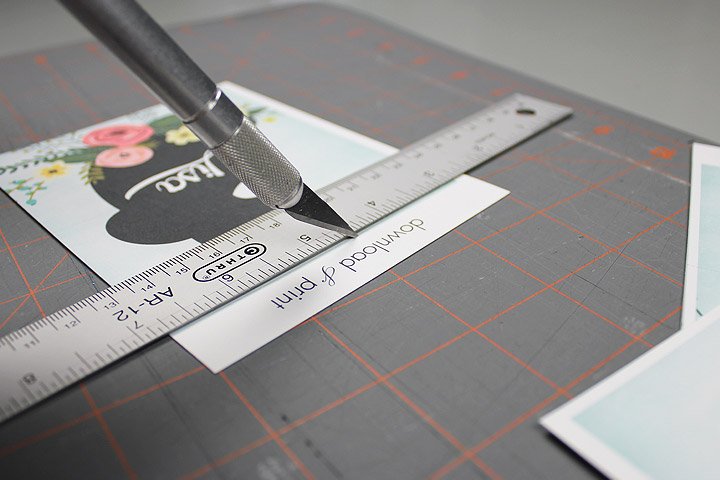
Cut out each place card around the shaded area. You can do this using an X-acto knife and ruler, scissors, or a paper trimmer.
You will end up with four place cards for each sheet of paper printed.
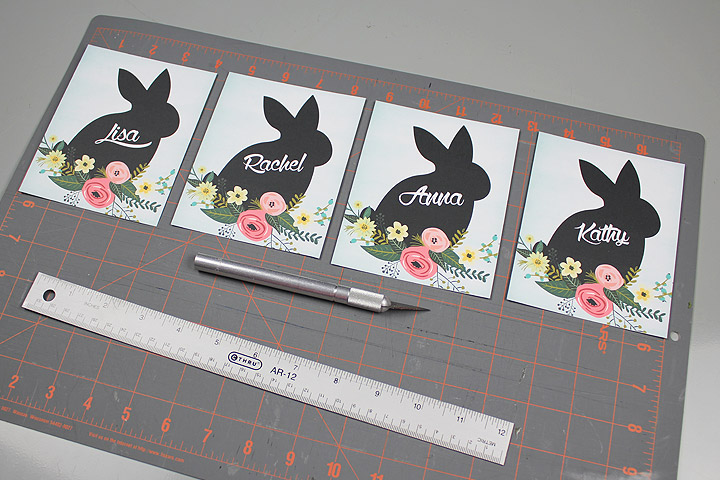
Step 3: Score + Trim
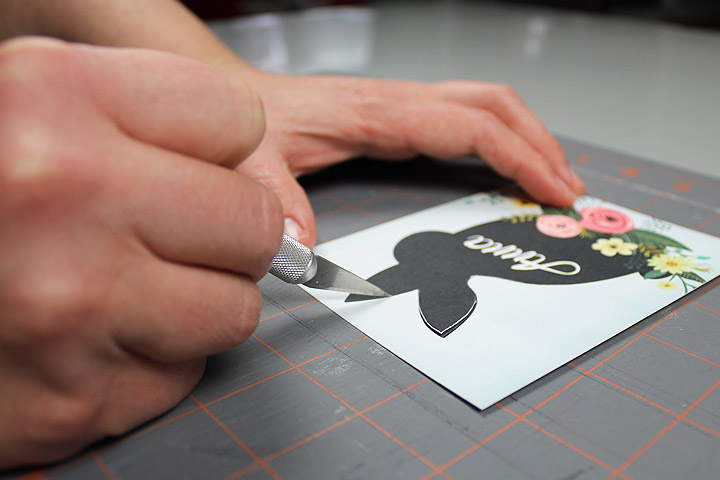
Using your scoring tool, score the card along the dotted lines either side of the bunny. Do not score through the bunny! Scoring the card starts a crease, and prepares the card for the fold that is to come.
If you don't have a scoring tool on hand, use the back side of an X-acto knife (not the sharp side!) or a closed mechanical pencil to start the crease.
Using your X-acto knife (use the sharp side this time), cut along the outline of the bunny above the score line. Cut from one fold line, up and over the ears, and finish at the opposite fold line. Starting with a sharp blade in your knife will make this step a lot easier.
Step 4: Pop Out
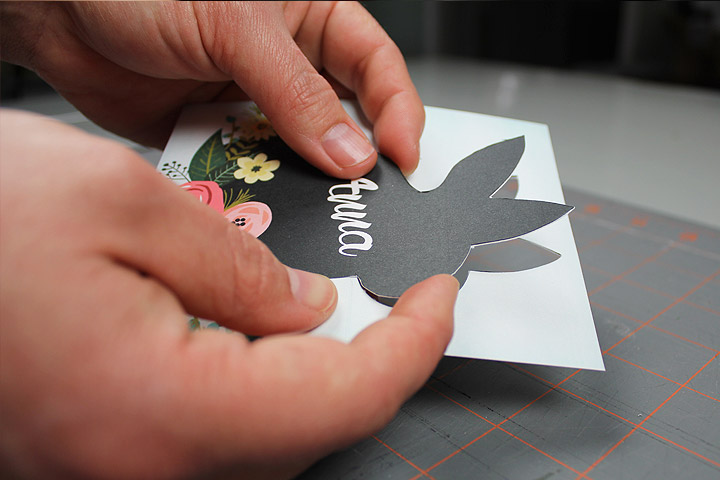
Carefully press the top half of the bunny forward and fold the card in half along your score lines.
The place cards are now ready to be added to your Easter table.
YOU MAY ALSO LIKE THESE EASTER TEMPLATES:
(Although all the products listed in this tutorial are products I personally use, I will be compensated just a tiny bit if you make a purchase through some of the links provided. Thanks for supporting small biz!)

