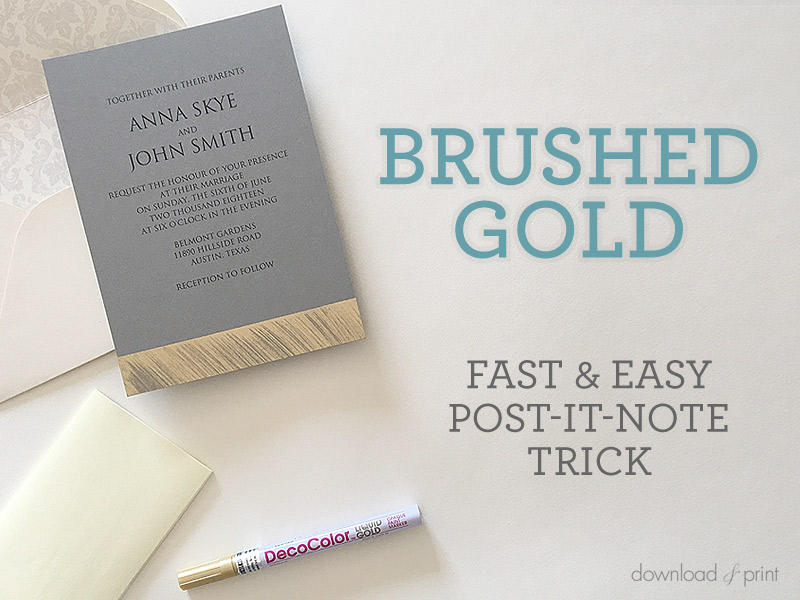
If you've been following along with my DIY wedding invitations for a while you know that one tool I love to pull out of my bag of tricks is a gold paint pen. It does a killer impersonation of gold foil.
There's a time and a place (when is there NOT a time and a place) for metallic accents. They are elegant, glitzy and glamorous, cheesy if you please, can be dressed up or dressed down, and always 100% fun.
A little sparkle goes a long way and my paint pen has gilded the edge of DIY wedding invitations, created a faux foil scallop, and added a shimmer effect to floral invitations.
Now my paint pen is lending it's skill to a modern gold wedding invitation with a brushed metal border. You can also use this template for a New Year's Eve dinner menu or party invitation. I've kept the text portion of the invitation simple, one font and a classic layout, and let the metallic accent do all the talking.
I've paired gray and gold together for a really crisp look, mix up the color combination to tie in with your wedding theme.
Best news of all, the invitation is a freebie. Start to change it and make it yours, by using the green button below and let your DIY skills shine.
access & customize FREE Invitation >
SUPPLIES:Access & Customize FREE Invitation
- Free invitation
- Gray card stock (or any color that you like) - I'm using Gravel Gray
- Gold paint pen
- 5 x 3.5" Post-It Notes
- A7 envelope
- Printer - I like Epson printers
- Scissors or paper trimmer
Step 1: Customize, save, Download, Print & Trim
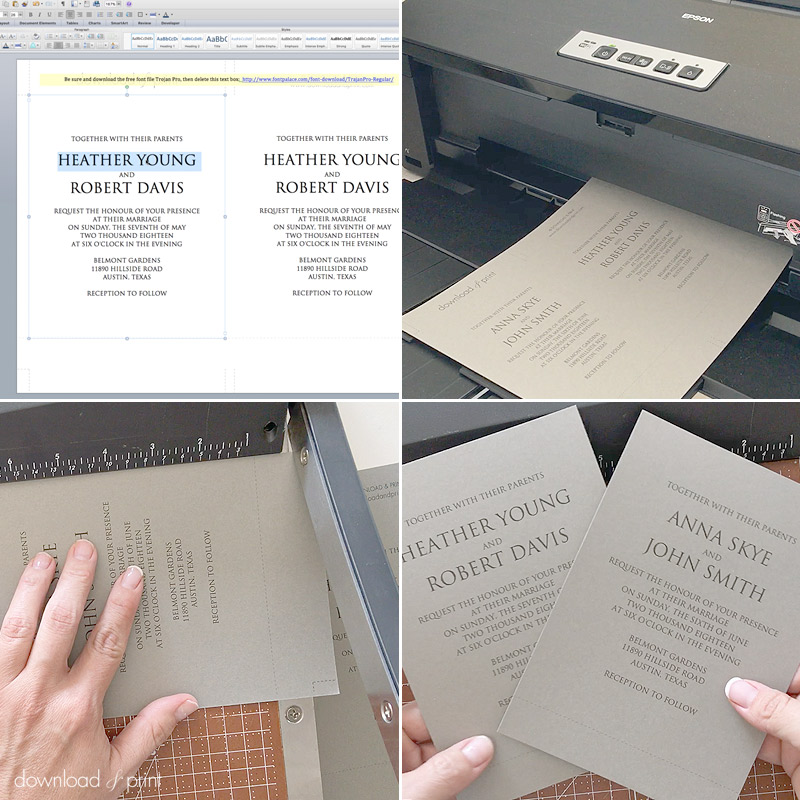
Change the colors, text and fonts. Save your changes.
Download the invitation file on to your computer. You are now ready to Print!
Double check your spelling and text formatting. Print one copy and check your spelling again!
Print off as many copies as you need on gray card stock. I love the look of the gray and gold, but you can use any color card stock and metallic accent.
PRO TIP: This invitation would also make an elegant birthday, Christmas or New Year's invitation.
Trim the invitations along the dotted guide lines using a paper trimmer or scissors.
access & customize free invitation >
Step 2: Brush on Gold
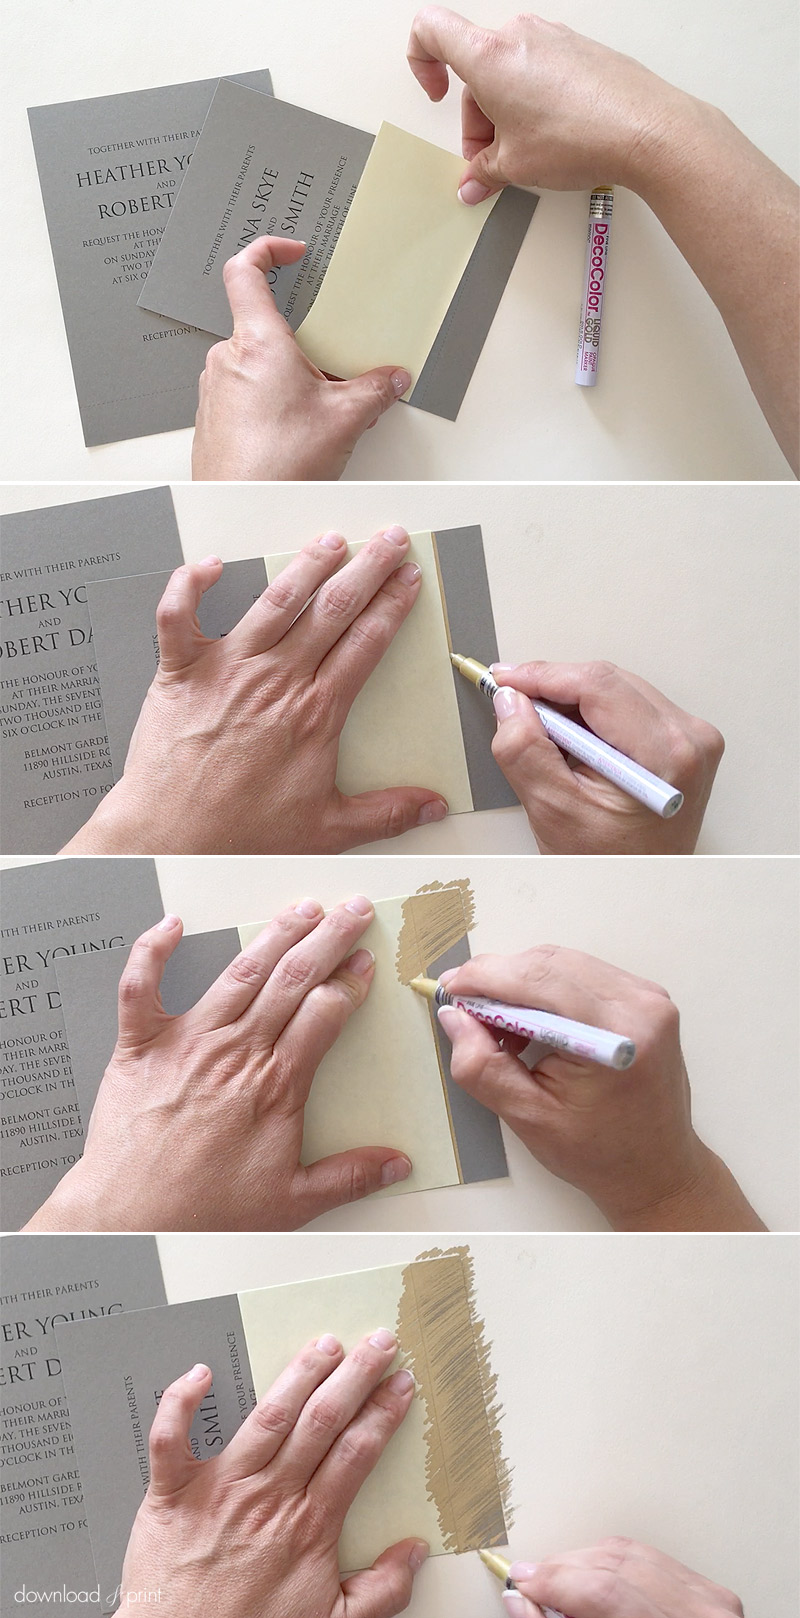
Use a Post-It Note to mask the lower section of the invitation, below the dotted line. Stick the Post-It along the dotted line.
Draw a gold line along the Post-It Note using your gold paint pen.
Fill in the lower section by "brushing" on gold, starting in one corner and using long strokes on the diagonal brushing from from the Post-It Note to the edge of the invitation.
By brushing from the Post-It Note out you will avoid gold paint bleeding under the paper and keep a crisp gold edge.
Step 3: Peel & Reveal
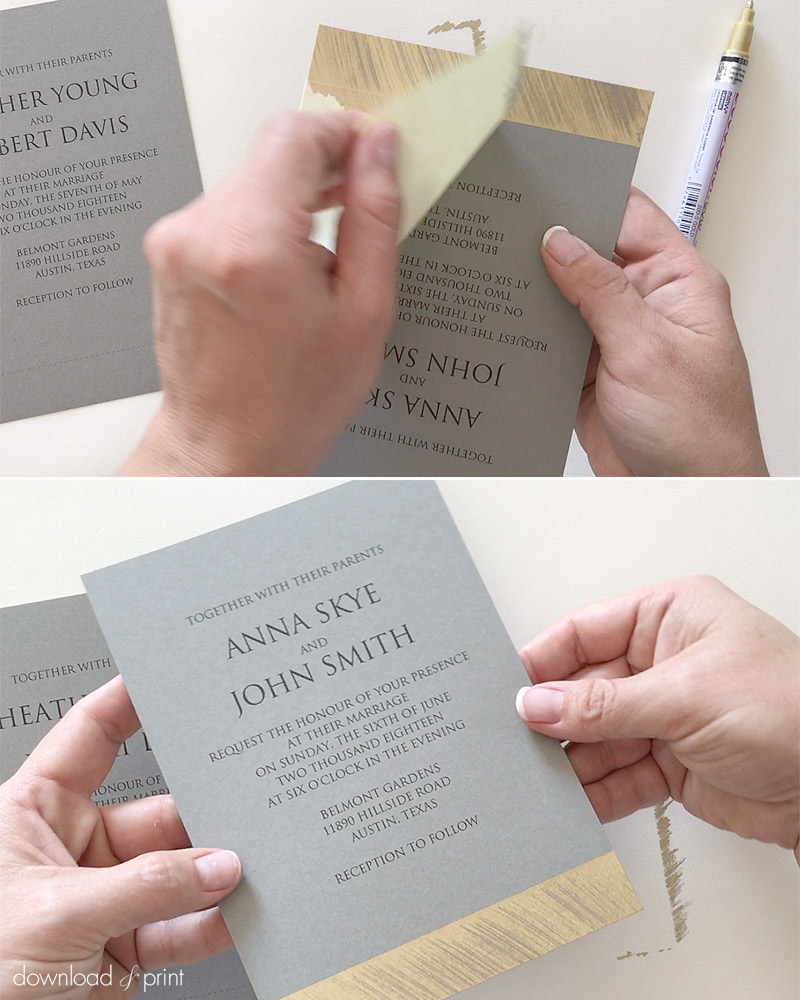
Peel off the Post-It to reveal the gorgeous gold accent in it's full glory!
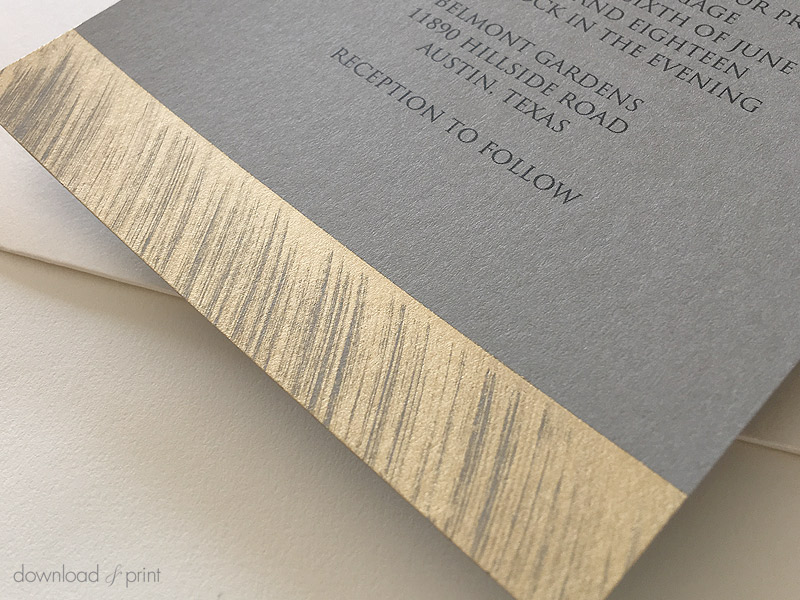
Stuff the invitation into an A7 envelope, pop in the mail, and get ready to be showered with praise for your jaw-dropping invitation.
YOU MAY ALSO LIKE THESE DIY WEDDING INVITATIONS:
Art Deco Wedding Invitation
View Tutorial
Shimmering Embossed Vellum Pouch
View Tutorial
With template love,
(Although all the products listed in this tutorial are products I personally use, I will be compensated just a tiny bit if you make a purchase through some of the links provided. Thanks for supporting small biz!)

