
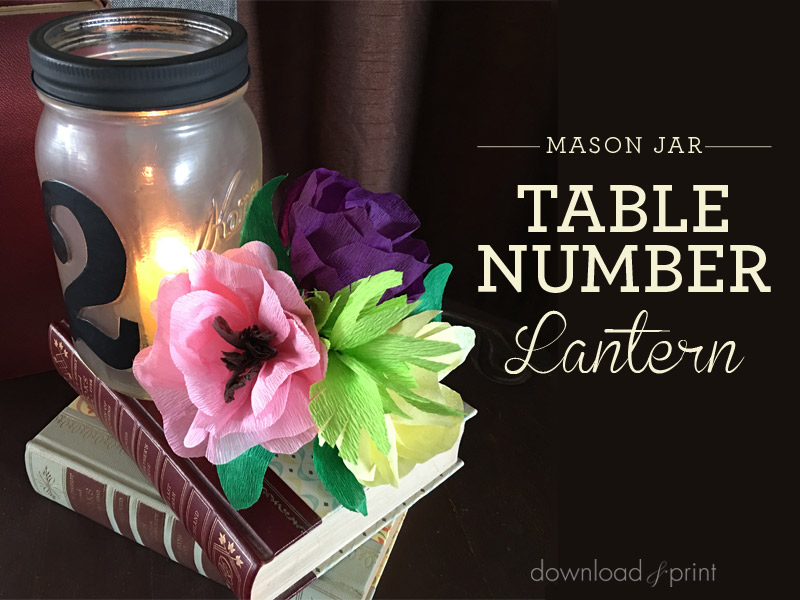
Today's project features the ever popular Mason jar. I'm not a canner, but thanks to the vintage revival Mason jars are now ubiquitous with crafters the world over. I have a soft spot for the glass jar with the screw top lid that Mr. Mason patented in 1858. It's just so darn versatile.
I have them lined up neatly in my sewing room full of buttons, ribbon, thread and bits and bobs.
My pantry features neat rows of Mason jars packed to the brim with nuts, grains, seeds, and flours.
Of course my craft room has it's own collection of jars holding pretty things and sparkly delights.
I've made hanging vases with them, I've packed a salad in a jar, I've tied pretty ribbon around them when gifting homemade goodies, and now I'm turning them into frosted lanterns that double as table numbers.
Perhaps that's the appeal of Mason jars, they are equally at home in my pantry as they are as a centerpiece on one of the biggest days in a girl's life.
Love 'em or hate 'em, you can't deny how useful and cost effective these little jars are. Read on for my trick to create a frosted effect on the glass, and my tip on how to turn them a fab shade of vintage green or blue. I've included a free template for the table numbers, just click the link at the bottom of the page.
I'm trying out a new style of video. Less me babbling on and more let's get down to the nitty gritty of the project.
SUPPLIES:
- Quart sized wide-mouth mason jars
- Matte Mod Podge
- Paint brush
- High heat spray paint
- Card stock
- Number template
Step 1: Download & Print
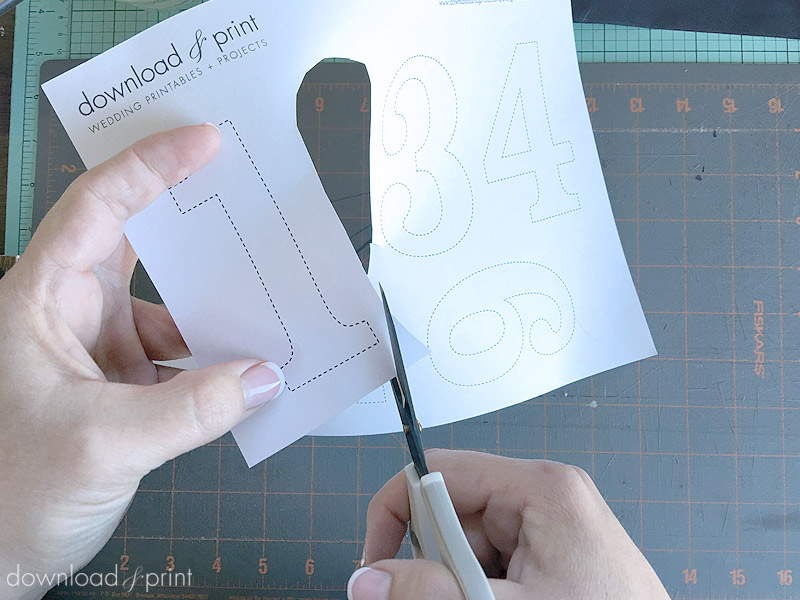
Download the number template and print onto standard paper. Cut out each number. A small pair of detail scissors works best.
Step 2: Trace & Trim
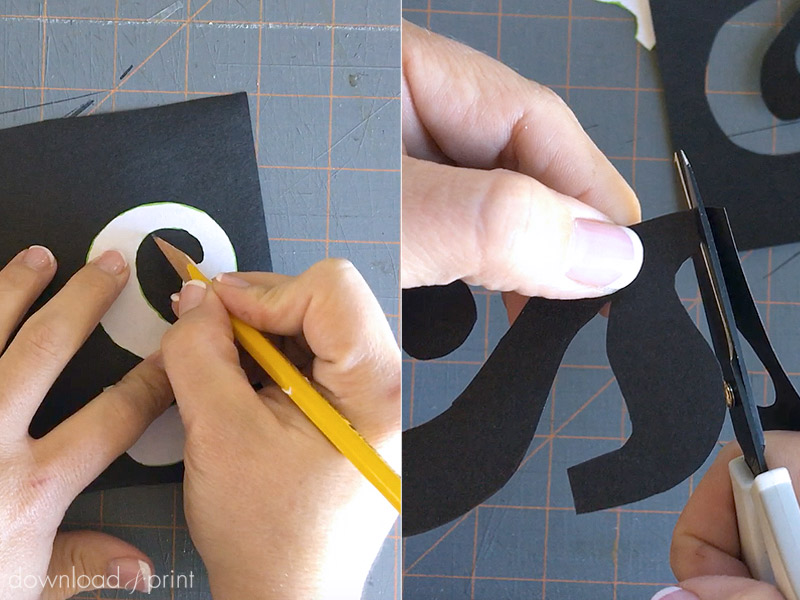
Trace each number onto black card stock. Reverse the number so that the pencil lines end up on the back of the card.
Cut out each number.
If you are using light card to tie in with your wedding colors you can print the number template onto your colored card and skip the tracing step.
Step 3: 'Frost' Glass
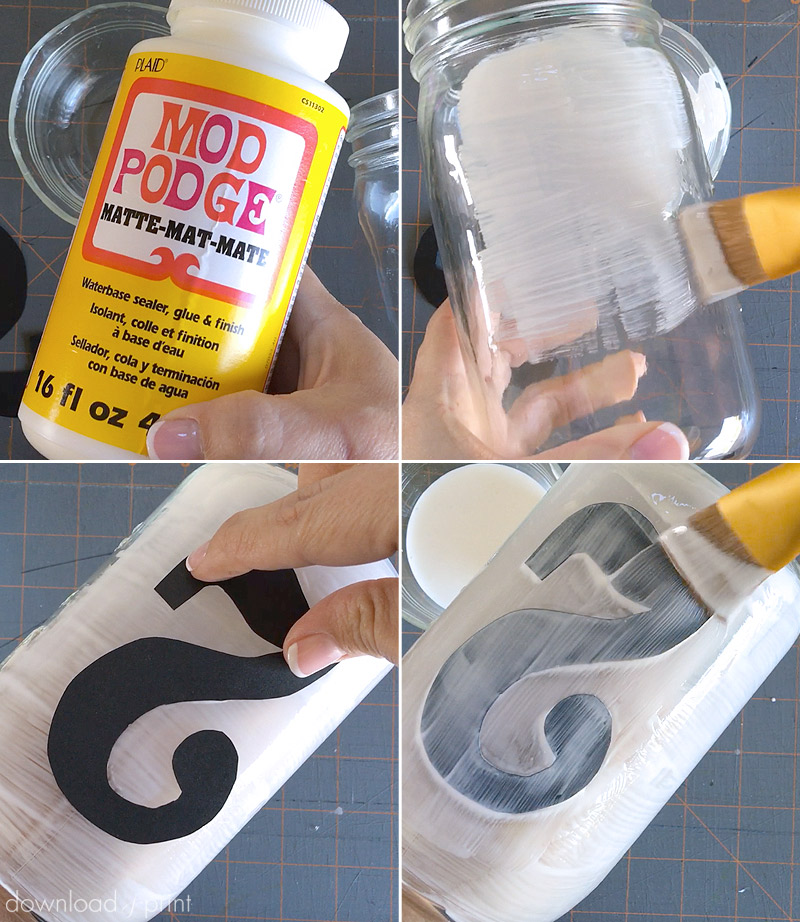
Remove the lid from each mason jar. Apply a generous coating of matte Mod Podge to the jar, there's no need to do the base or top thread. Place one number on the jar and apply a layer of Mod Podge over the number.
Allow to dry for 1-2 hours.
Pro Tip: For a vintage vibe tint your jars blue or green by adding food coloring to your Mod Podge.
Step 4: Paint Ring
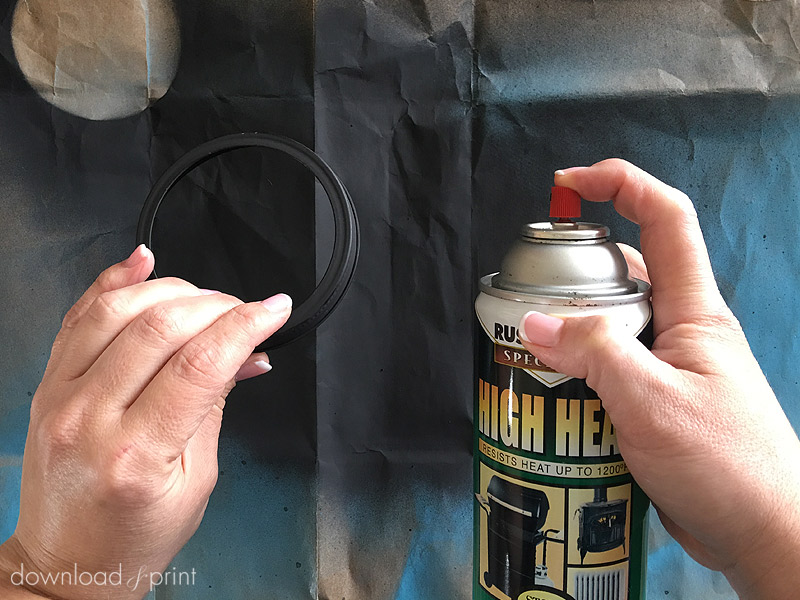
Spray the lid ring with high-heat spray paint. I know this doesn't come in a rainbow of pretty colors, but if you plan on using real candles in the jars you are going to want to play it safe and use the high heat paint. If you are going to use LED candles use any pretty color spray paint that you like.
You will not be using the lid cover, but if you plan on using the jars after your wedding to store craft supplies etc, you can also paint the lid covers and save them for later use.
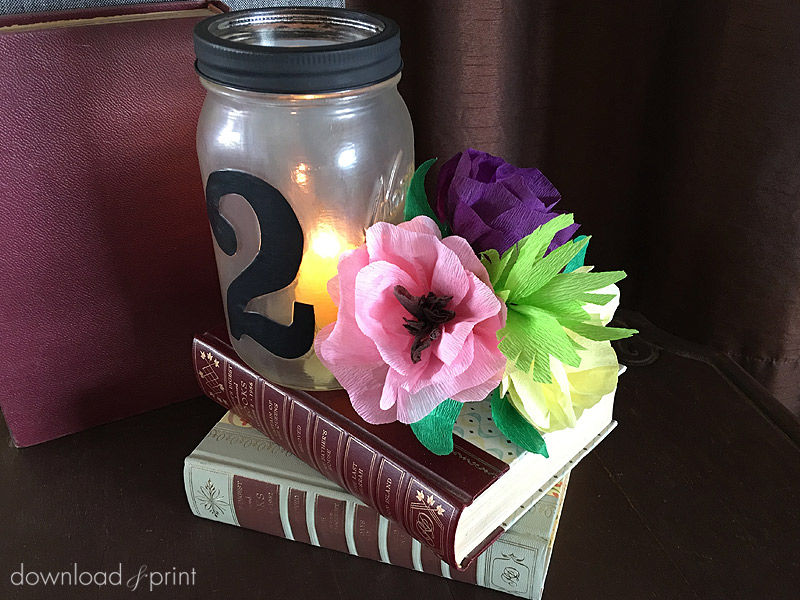
Step 5: Add Ring & Candle
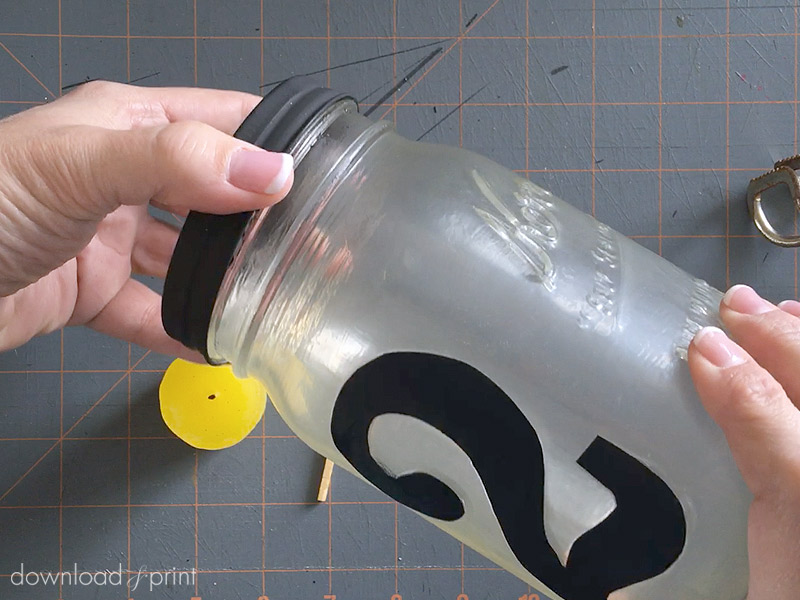
When the paint and Mod Podge is dry screw on the top ring.
When you are ready to use the table numbers light a small candle and place in the jar. Using kitchen tongs will save burning your fingers!
With template love,

(Although all the products listed in this tutorial are products I personally use, I will be compensated just a tiny bit if you make a purchase through some of the links provided. Thanks for supporting small biz!)