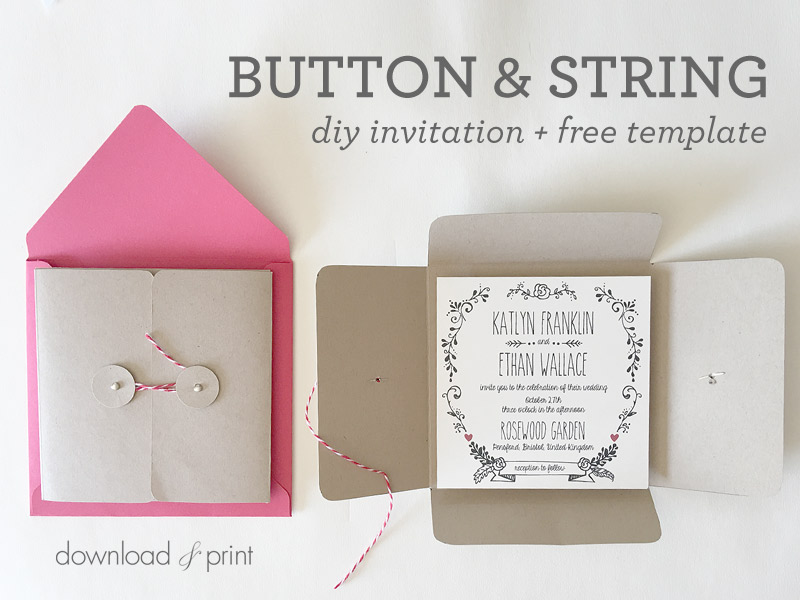
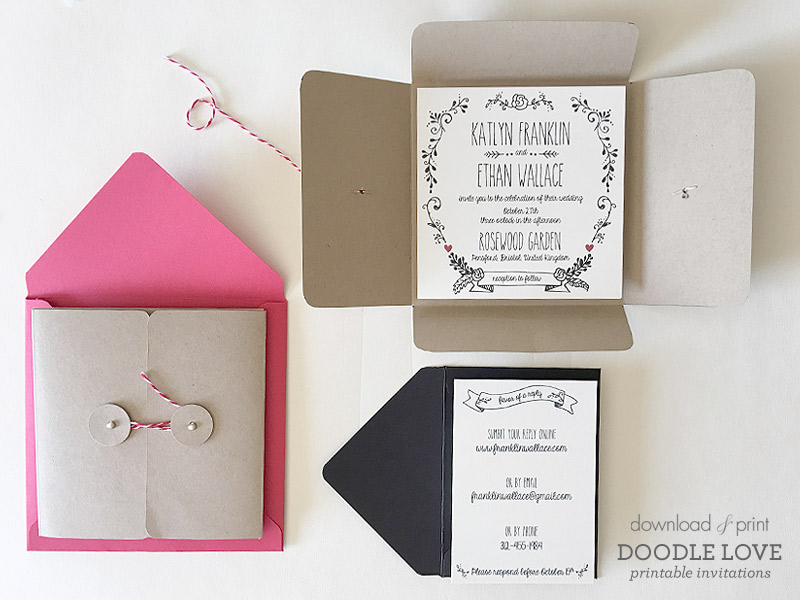
I'm calling this a pocket invitation though technically it doesn't have a "pocket" for your invitation to slide into. Let me roll with it though as this is hands down the most inexpensive way you can get the pocket look for your wedding announcements.
I've showed you how to make pockets and pochettes before, but all required either 12 x 12" paper (not the cheapest) or several stationery items crafted together.
This pocket however, requires just one sheet of 11 x 8.5" paper. It doesn't come any easier or budget friendly than that! Paper comes in every color under the sun so matching your invitations to your wedding theme couldn't be easier.
I'd pick card stock with a little weight for the pocket so the flaps don't easily crumple when your guests open their package.
If you are feeling super fancy you can first print on the card before creating your pocket, because... you guessed it, this is regular sized paper and will fit in your printer. You could put your initials on the back center, or your wedding logo if you have one.
I've finished the pocket with a simple button and string closure. I like this option if you are staying away from frills and ribbon, or just want something a little more masculine.
The pocket fits a 5.25" square invitation. I've gone with a whimsical theme using the invitation from our Doodle Love invitation collection inside a kraft paper pocket.
SUPPLIES:Download Free Pocket Template
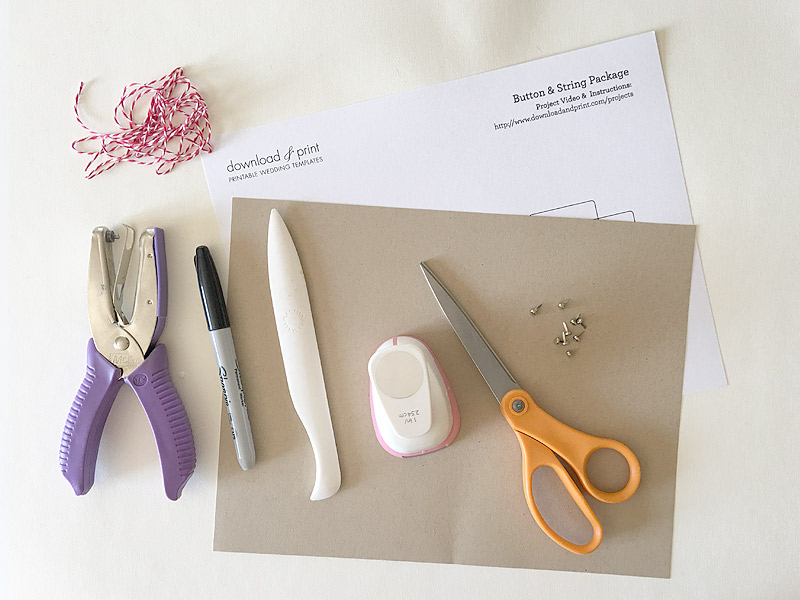
- Free pocket template
- 8.5 x 11" card stock
- Bone folder
- Ruler
- Scissors
- 1" circle punch
- 1/8" hole punch
- 4.5mm metal fasteners
- Twine
Step 1: Download + Trace
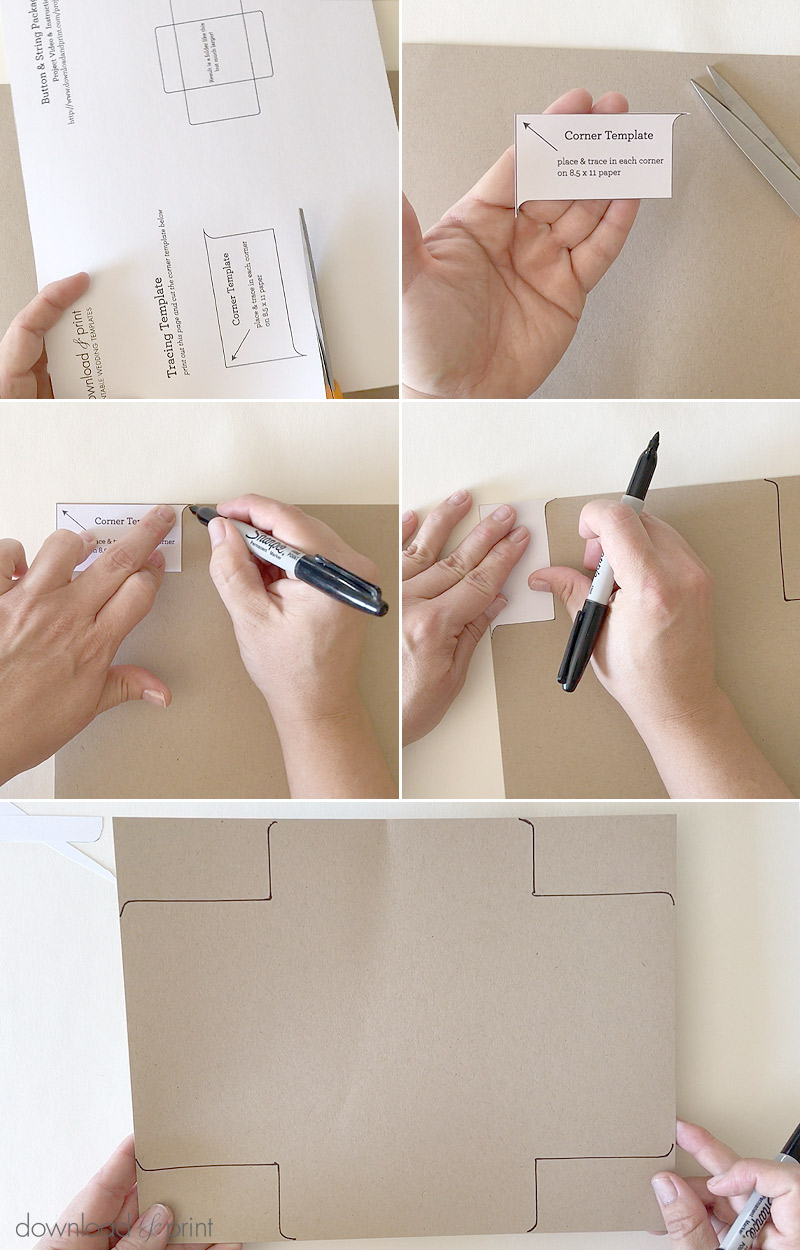
Download the free pocket corner template and print on regular paper. Cut out the corner template.
Place the template onto the corner of an 8.5 x 11" sheet of card stock. The arrow on the template should point to the corner of your card stock.
Trace along the template.
Place the template in the next corner and trace, repeat this for each corner of your card stock. You will need to flip the template over on two corners to ensure the arrow points to the corner.
Download FREE Pocket Template (PDF) >Step 2: Score + Trim
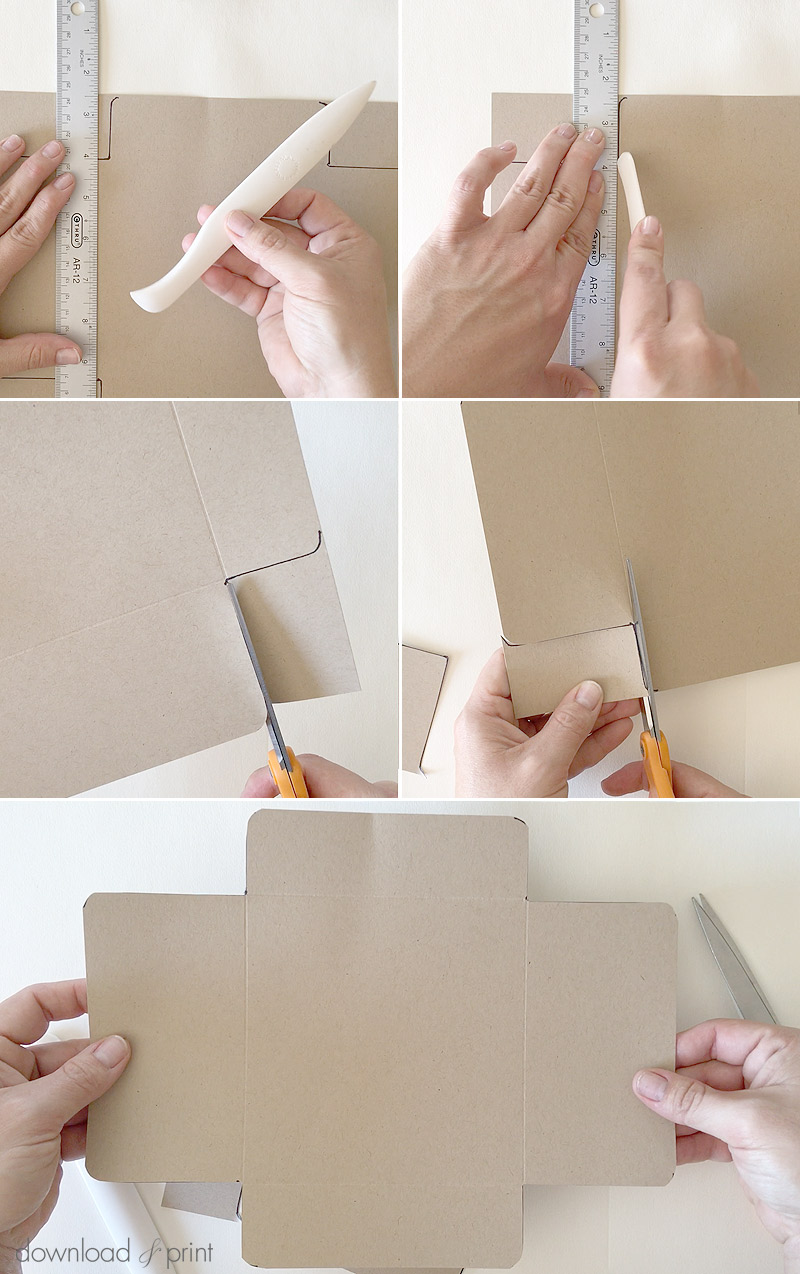
Score a line along the base of each flap on the pocket. I'm using a ruler and bone folder.
This starts the crease for the flap, making folding in the flaps much easier and will give you crisp edges. Your fingernails will thank me!
PRO TIP: If you don't have a bone folder handy use any pointy object that won't cut the card, a closed mechanical pencil or the wrong side of a utility knife will work in a pinch.
Cut along your trace lines to give you the shape of the pocket. Don't discard the excess card yet.
Step 3: Make Buttons
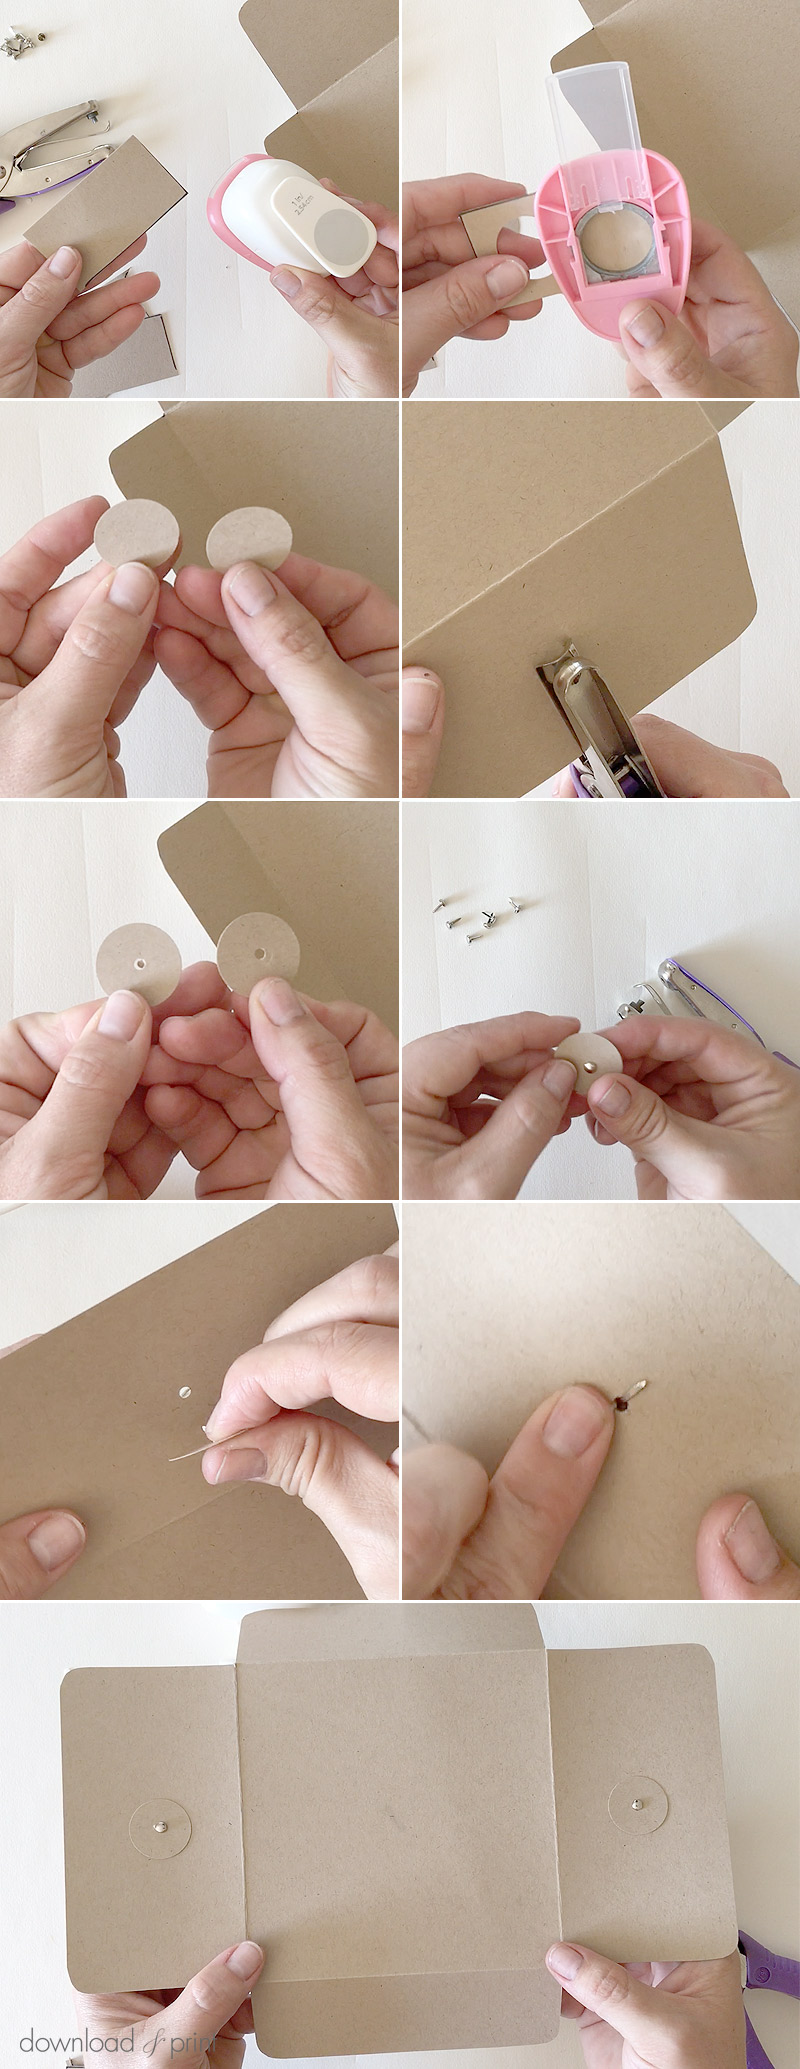
On a scrap piece of card that you cut from the corners, punch two 1" circles using a circle punch. Punches are fairly inexpensive and will really save you time here and give you perfect circles, but you can also find something approximately 1" wide to trace around and cut out the circles with scissors.
Using an 1/8" hole punch make a hole in the center of each circle.
Make two corresponding 1/8" holes in the center of the larger flaps on the pocket. I eyeballed finding the center, but if the perfectionist in you doesn't like this idea, you can first measure to find the center.
Attach one circle to each flap using a 4.5mm brad. The circle should be on the outside of the flaps when the flaps are folded in.
Step 4: Add String
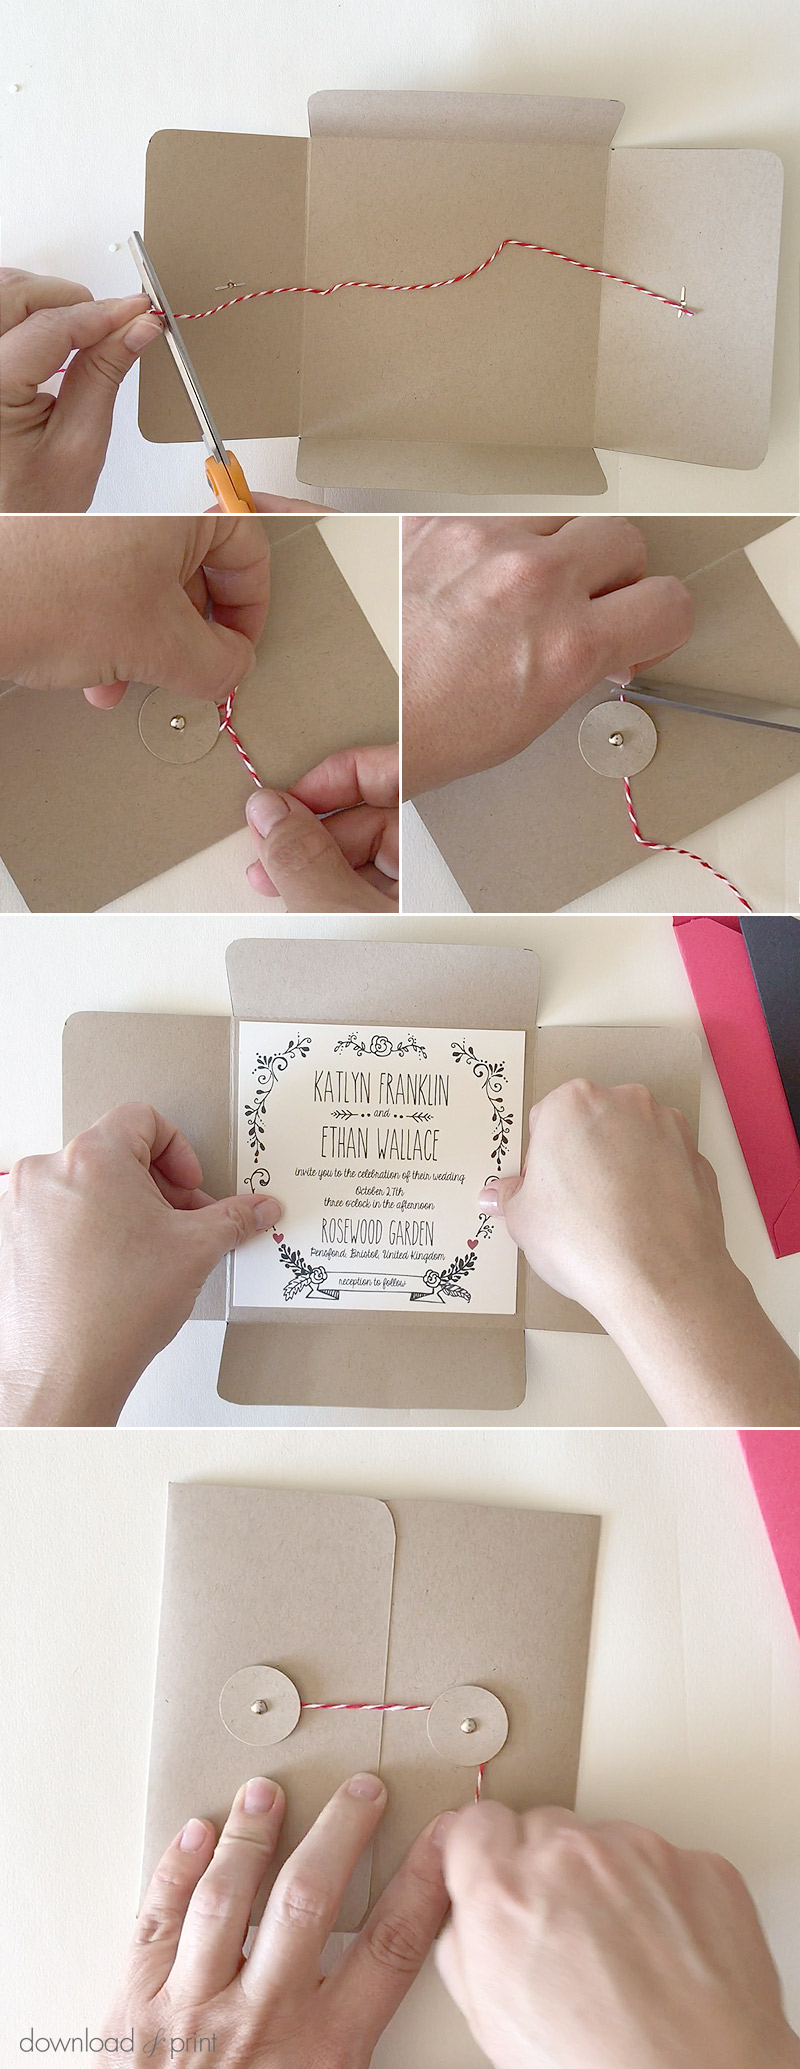
Cut a 10" length of twine. Tie one end to a brad, between the button and the flap.
Place a 5.25" square invitation, RSVP card and return envelope in the pocket. I'm using templates from our Doodle Love collection.
Close the smaller flaps then fold in the two larger flaps.
Wrap the string around the buttons in a figure 8 to seal the pocket closed.
The pocket fits in a 6" envelope for mailing.
View the Doodle Love Invitation collection >
YOU MAY ALSO LIKE:

Telescoping Pocket Invitation
View Tutorial
Whimsical Ribbon Stitch Invitation
View Tutorial
Easy No-Sew Fabric Belly Band
View Tutorial
With template love,
(Although all the products listed in this tutorial are products I personally use, I will be compensated just a tiny bit if you make a purchase through some of the links provided. Thanks for supporting small biz!)

