
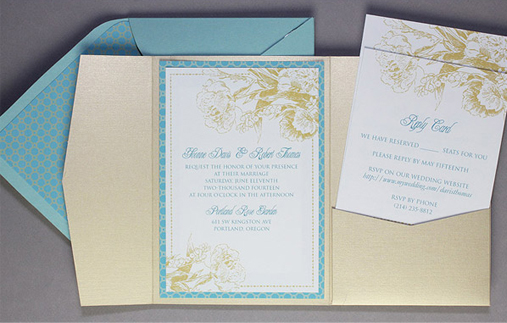
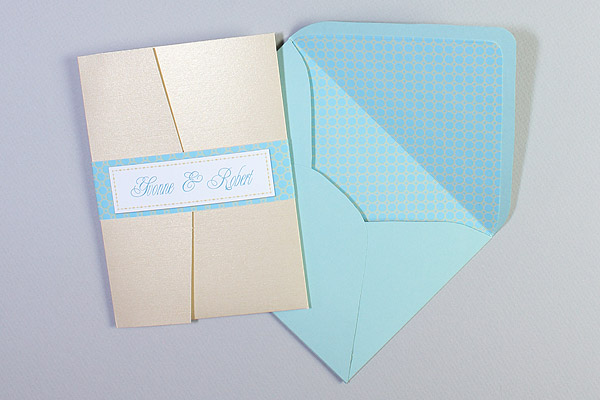
If you need further convincing that DIY invitation suites don’t have to compromise on style and quality, I have a project for you that I think would wow Miss Emily Post. If you have a paperclip, piece of string, and gum… hang on, that’s MacGyver. With a printer, some cardstock, and double sided tape you can easily create this beautiful aqua and gold pocketfold set.
Supplies:
Step 1: Download and Print
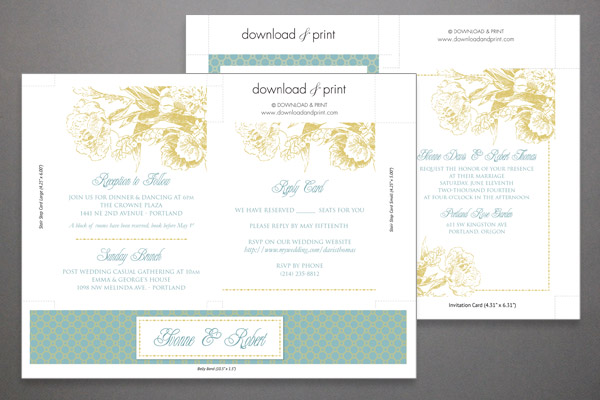
Download the template files and save to your computer. Open the invitation and backer, inserts and belly band in MS Word and type in your details. Open the envelope liner in Acrobat. Print the files.
Step 2: Trim
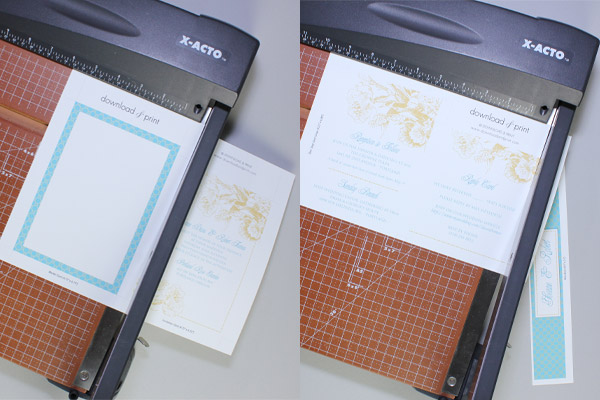
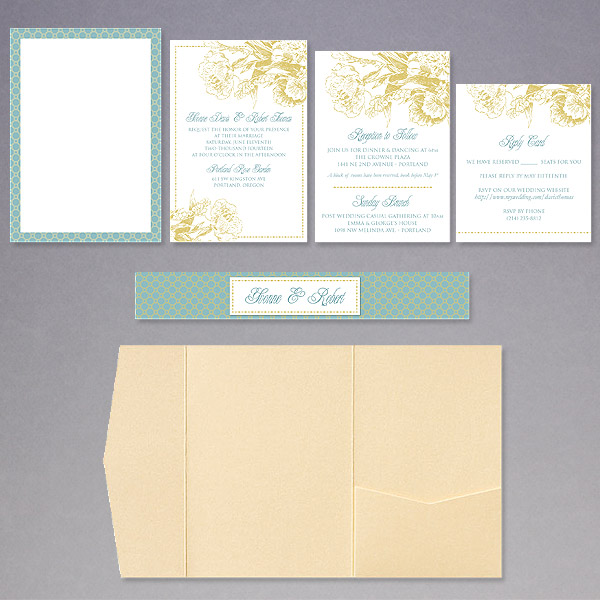
Use a paper cutter to cut along the dotted lines. Scissors will also work, but your edges won’t be as perfect and this will be a little more time consuming. When you have trimmed all the print outs you will end up with a set looking like this:
Step 3: Tape
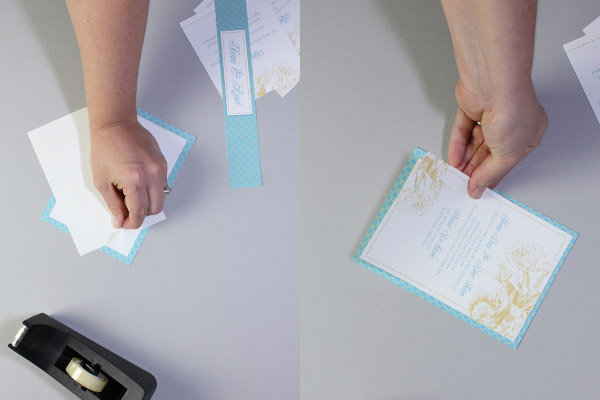
Place two strips of double sided tape on the back of the invitation, each about 4” in length. You are aiming to leave approximately 1/8” of the backer showing around the invitation. Eyeball the top edge and right and left sides and lower the invitation onto the front of the backer card, pressing it gently into place.

Using the same process, place two 4” strips of tape on the back of the backer. Eyeball the top, right, and left edges, then lower into place. Insert the enclosure cards into the pocket, layering them with the shorter card at the front.
Step 4: Wrap the Belly Band
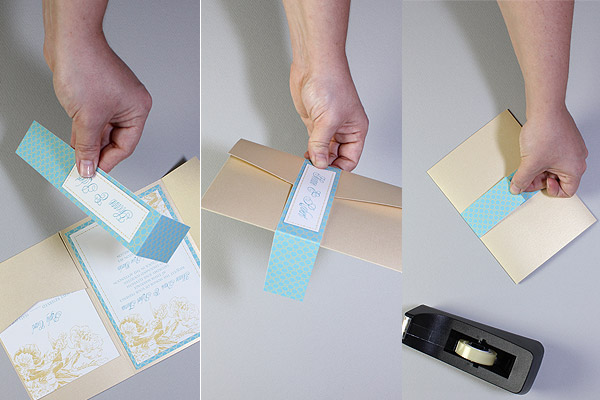
Score the belly band along the two dotted lines to the right and left of the name frame, or just make a nice, crisp fold with your hand. Align the band on the pocket fold, wrap around and tape with double sided tape.
Step 5: Insert the Envelope Liner
Insert the liner into the envelope with the design facing toward you. Center the liner onto the envelope, leaving an even space around the flap. Fold the liner flap down, creating a crisp fold in line with the envelope’s fold. Apply double sided tape to the reverse of the folded down liner, two strips approximately 3” long is ideal. Close the envelope flap onto the liner and press firmly to secure.
And there you have it, the MacGyver method to wedding invitations. Super simple, with amazing results. Enjoy!