
Jessica Bishop of the Budget Savvy Bride designed this addition to the BSB Collection at Download & Print. This invitation is called Allison, and is inspired by a modern garden party. The floral color palette can be customized online to match your wedding garden theme in any color.
I'm on a bit of a die-cut kick right now thanks to the Martha Stewart punches, and as soon as I saw the Allison design I knew I had the perfect punch in my stash to coordinate with the flowers. I came up with a pocket invite edged in flower cut-outs. I chose a toned down color to the bright florals, but you might choose to make the pocket out of an equally vibrant color. It's all personal taste! The square invitation from the Allison set mounts to one side of the pocket, and on the reverse is the floral flap to hold the RSVP, enclosure card and 4-bar envelope. Download the free pocket template from the link below, and click on the invitation, RSVP and enclosure card template links to begin customizing them online.
Follow along with the video tutorial to see the easy steps involved in creating the pocket, or read on for the pictorial.
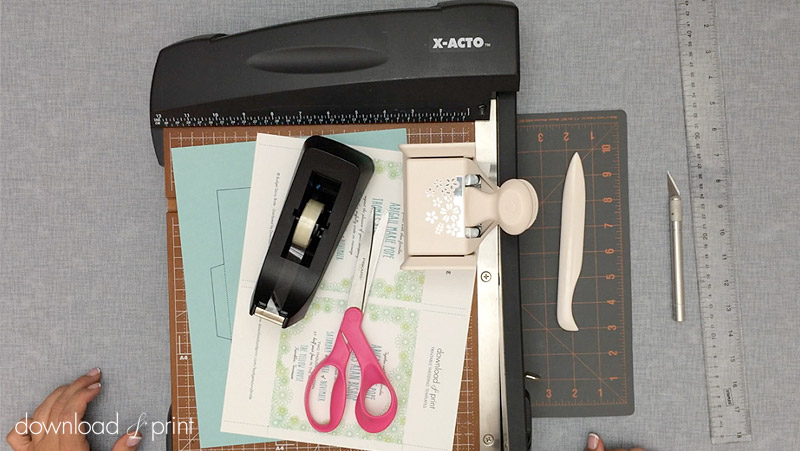
SUPPLIES:Download the Pocket PDF Template
- Square Invitation (customize online)
- RSVP Card (customize online)
- Enclosure Card (customize online)
- Download the Pocket PDF Template
- Paper cutter and/or scissors
- 8.5 x 11” colored card stock
- 6.5" Square envelope
- Floral border & corner punch (other options are available with this link)
- Bone folder
- Double sided tape
- Ruler
Step 1: Customize online, save & Download and Print
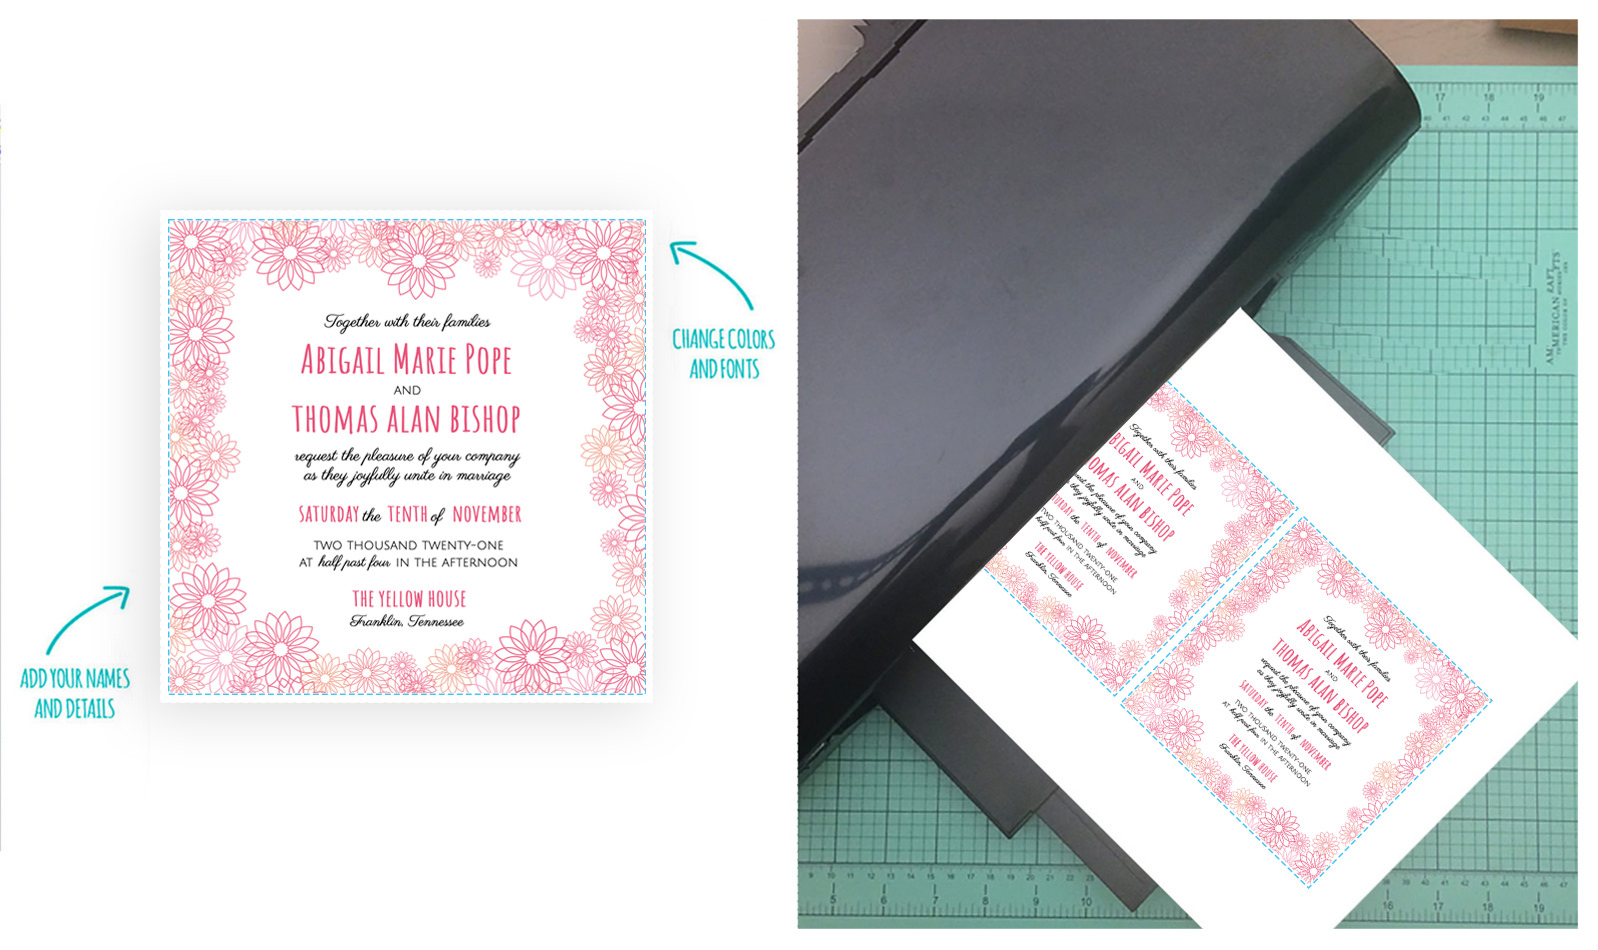
Download the pocketfold PDF and print on colored card stock. I like card stock that is between 65 lbs and 90 lbs in weight. This is a nice weighty paper, but not so thick that it will cause your printer trouble. I can vouch that if I go up to 110 lb paper my printer is not happy! I have to feed each sheet individually and I get lots of paper jams. Each printer is different however.
Customize the invitation, rsvp and enclosure cards online! Change the colors, fonts and text and make sure to save your changes before downloading on to your computer. Print them on white card stock. Be sure to double check your spelling before printing all that you need.
Step 2: Trim the invitation, rsvp & enclosure cards
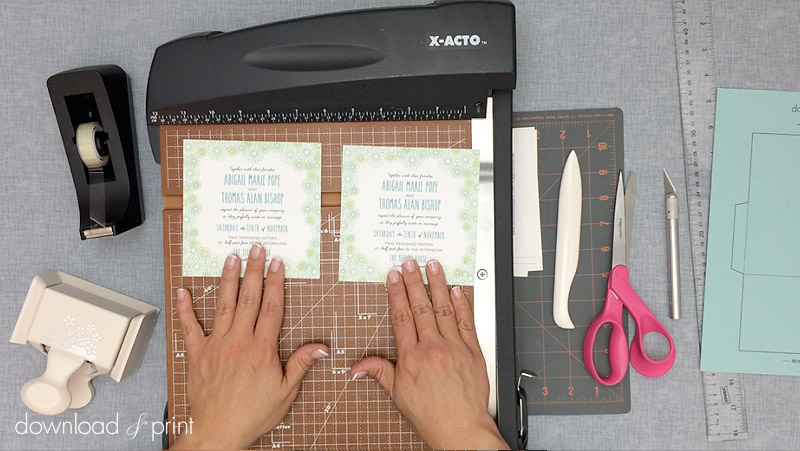
Use scissors or a paper trimmer to cut out the invitations. The template prints two invitations per page and a paper cutter is the quickest and easiest way to cut them out. By printing the invitation on an 8.5 x 11 sheet of paper and trimming to size we can get the design all the way to the edge of the invitation, giving it a professional (and expensive!) look.
Step 3: Trim & Score Pocket
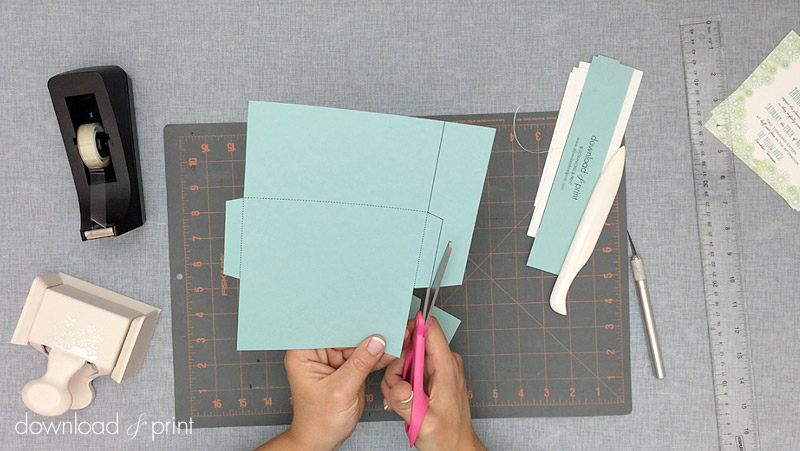
Use scissors to cut around the solid line on the pocket template. Do not cut across the dotted lines! These are fold lines. You will discard the logos and web address from the pocket and invitation during the trimming process.
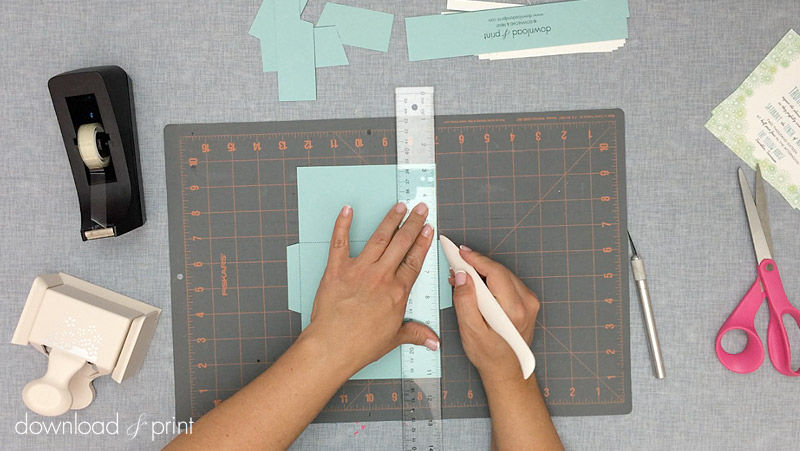
Use a ruler and scoring tool to score along the dotted lines. Scoring the folds makes for nice crisp creases. If you skip this step you will end up with rounded and crinkly folds, particularly if you are using very heavy card stock. If don’t have a scoring tool on hand use a closed mechanical pencil or blunt side of an X-acto knife. Anything that’s slightly pointy that won’t cut the paper will work.
Step 4: Fold Pocket
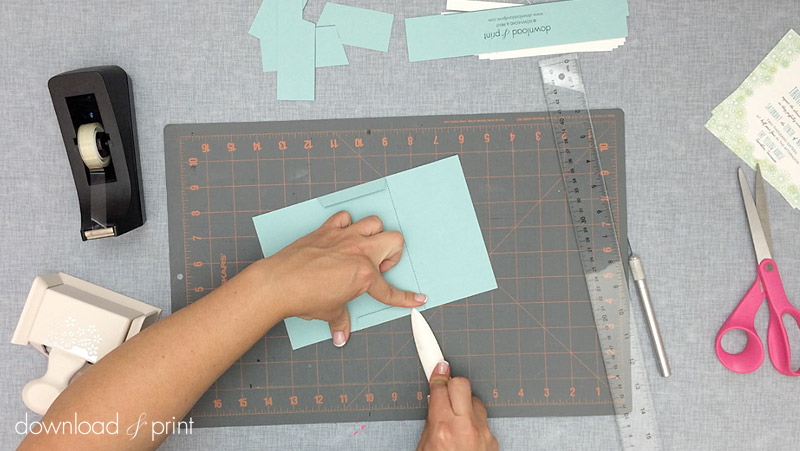
Now that you have started the creases, fold along your score lines and create a sharp crease. A bone folder is specially designed to help with this step, but your fingernails will also do the trick (only if you have scored first). If you have lots of pockets to fold your fingernails may end up a little worse for wear, so a bone folder is an inexpensive yet worthwhile investment.
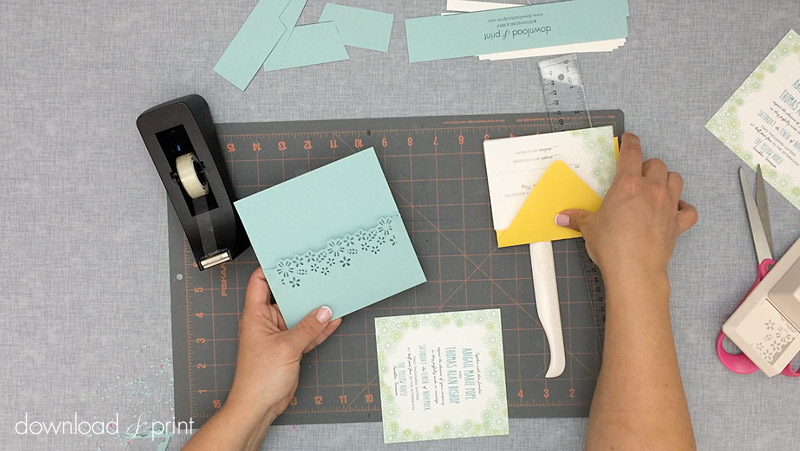
Step 5: Punch Pocket
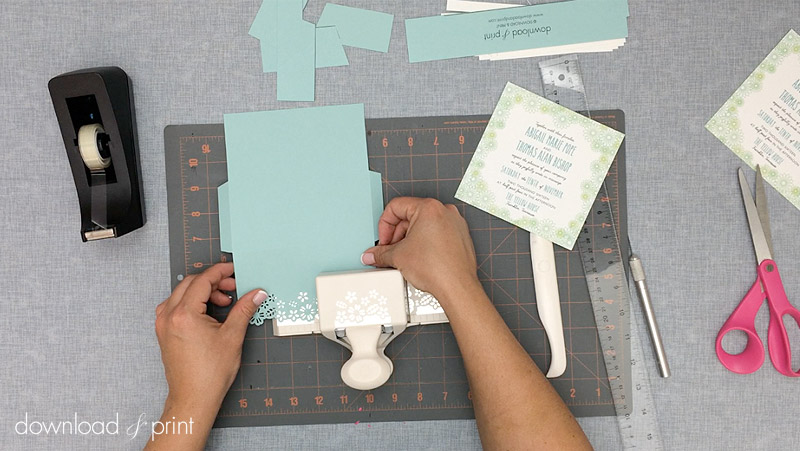
Punch along the edge of the pocket flap to create the floral cut outs. I adore how this looks! The punch has marks to help you line up the paper to create a perfect continuous design.
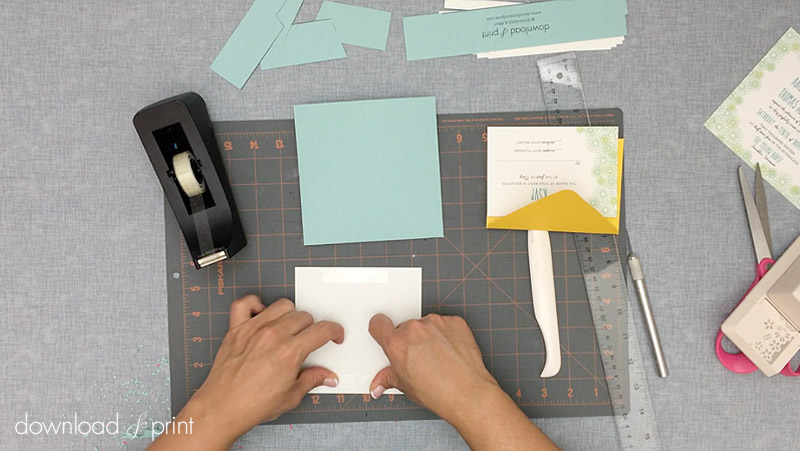
Step 6: Tape Tabs
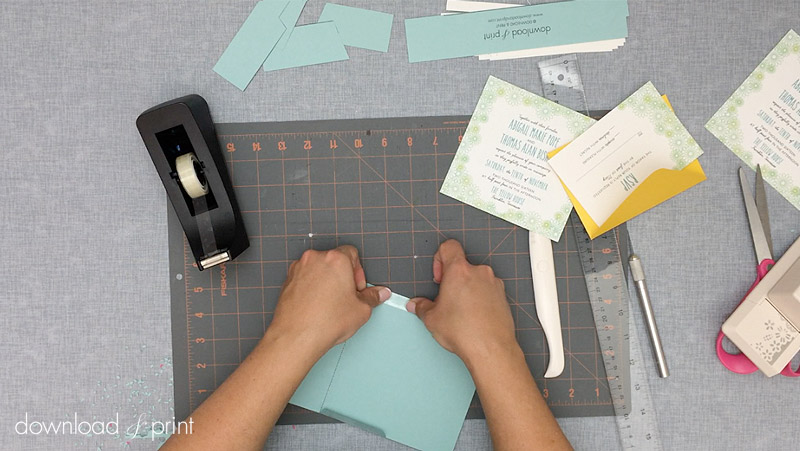
Fold in the pocket tabs and place a strip of double sided tape on each tab. Fold down the floral punched flap and press firmly onto the tape to create the pocket.
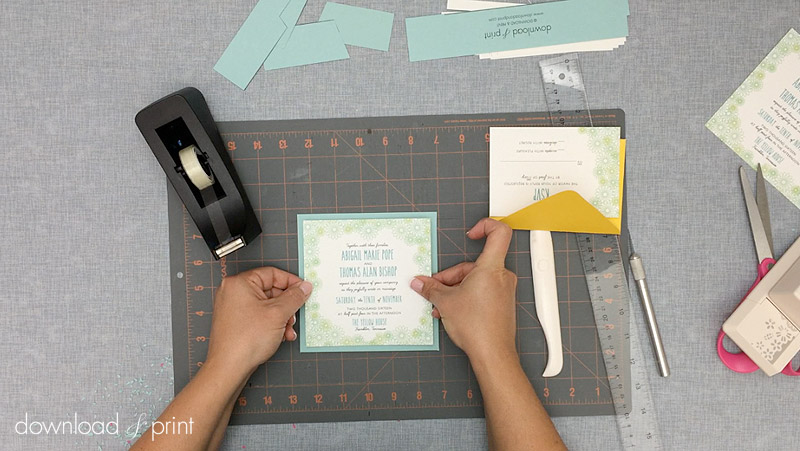
Step 7: Mount Invitation
Grab a couple more strips of double sided tape and adhere them to the back of an invitation. The adhesion is fairly strong so no need to overdo it with the tape. Mount the invitation to the back of the pocket fold. Make sure that you mount the invitation the correct way! The floral flap needs to be at the bottom of the pocket on the reverse side. Eyeball the placement of the invitation. First line up the top and sides, then press down to secure the invitation to the pocket.
Flip over the pocket and insert the Allison RSVP, Enclosure card and a 4-bar envelope into the flap. Get ready to send out this adorable invitation to your garden party wedding!
Download the pocket pdf template >
(Although all the products listed in this tutorial are products I personally use, I will be compensated if you make a purchase through some of the links provided.)