
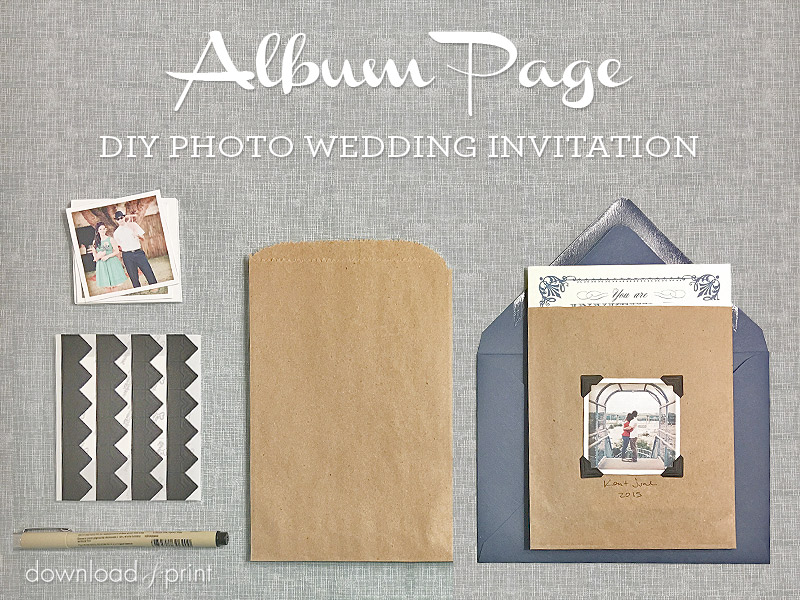
I can't believe that January 2021 is almost over! Time seems to have quickened this year. I have been pondering this very simple project since last year and decided to take some time and just do it. I'm thrilled that it turned out better than I had hoped. It's a vintage photo album inspired wedding invitation pouch.
I think that wraps, bands, pockets, and pouches are often underestimated when putting together wedding invitation packets. A concise way to neatly hold together all your invitation paper goods adds an element of class and thoughtfulness. Traditionally your invitation and other enclosures were inserted into an inner envelope before being placed in the outer mailing envelope. However there are so many fun and stylish ways to hold your paper goods together beyond an envelope.
[enter stage left] My Vintage Album Style DIY Photo Wedding Invitation Pouch. That's a mouthful. The actual project is far easier to put together than the title is to say! This project is:
- Economical.
- Easy.
- Quick.
- And looks bang smashing great.
It centers around these awesome little pictures I found at Social Print Studio. Go check 'em out. This is an unbiased review, I get nothing out of it except knowing you'll be so happy with your cute little picture squares.
For $17 you get 48 (2.4 x 2.4) size prints, so for the invitation pocket you can choose the same pic for all, or mix and match. How fun! The picture ends up being a memento for your guests to keep and is a great way to show off your engagement photos. I can also see invitation pockets with your baby pictures, pictures from your early dating life, anything that is special to you. And you don't need to decide on one type of picture as you can print off 48 different pictures! I'm in love.
The invitation set I'm using in this tutorial is the Ornate Vintage design in navy. You'll see the invitation, RSVP and enclosure card in the pictorial below. Of course any of our invitation designs will work in this pouch. If you don't use a 5 x 7" invitation adjust the kraft bag size accordingly. You can view all our vintage invitation designs here if you are going with this style of wedding. Any of them will be lovely in this album style pouch.
SUPPLIES:
- Instagram social print mini-squares (or any print that you like)
- 5 x 7.5" kraft bags
- Peel and stick photo corners
- Micron archival ink pen
Step 1: Trim Bags
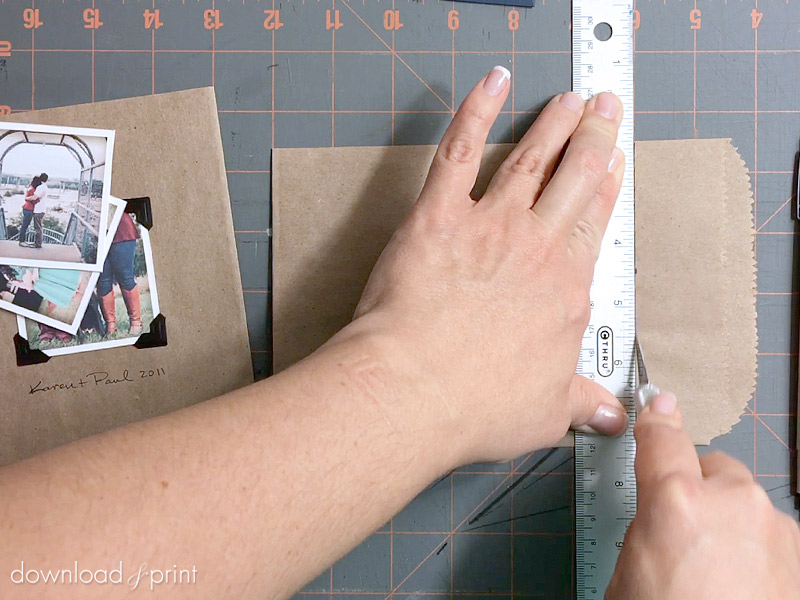
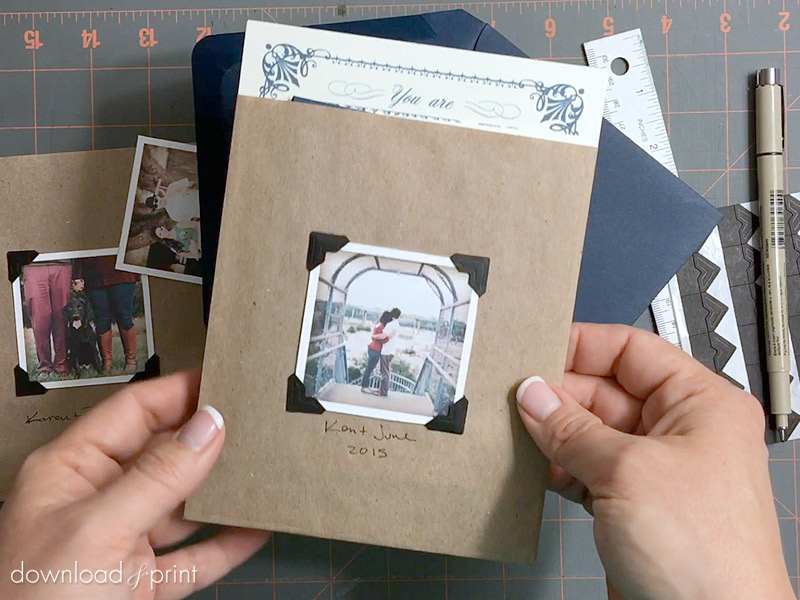
The kraft bags are 5 x 7.5”, which is a little long for our needs. Trim about an inch off the top of the bag so that the invitation shows out the top and creates a nice display. I trimmed my bags to 6”.
Step 2: Add Photo
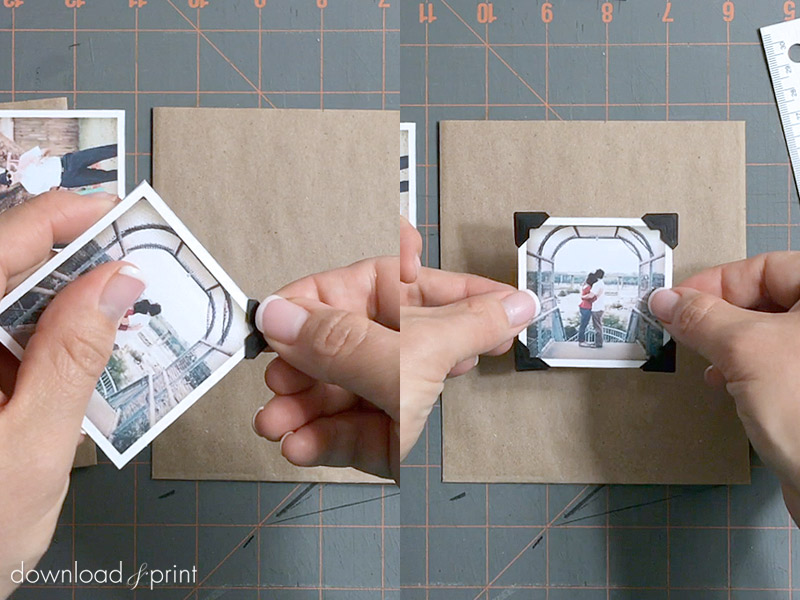
Slide a photo corner over each corner of a photo and press onto the kraft bag. I eyeballed the center of the bag and was happy with the result. This saved precious measuring time. The photo corners are peel and stick, sticking to the bag but not the photo. The photo can be removed quite easily so is a nice memento for your guests, but not too easily that the photo is likely to fall out unwarranted.
Step 3: Personalize with a Note
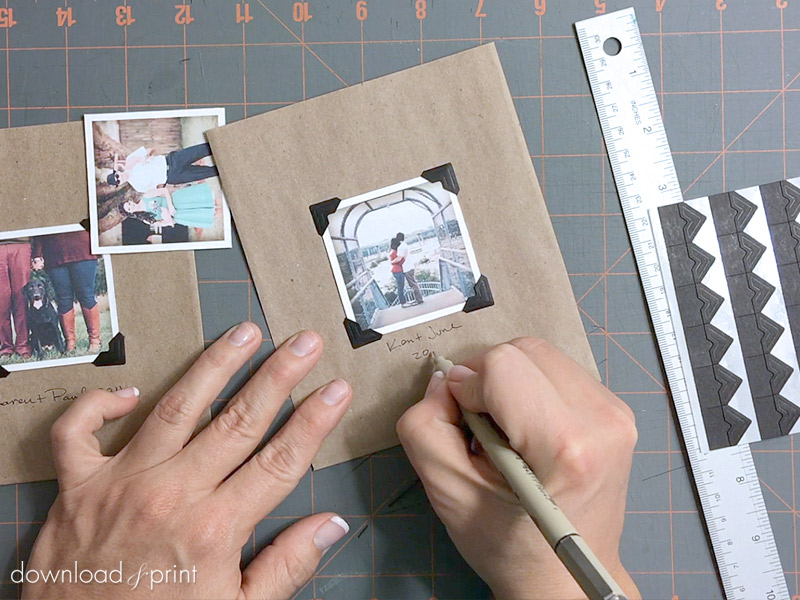
I used an archival ink pen to add a personal note. If you are using different photos you can write a note relating to the pic, or personalize toward the recipient, or keep things simple and write your name and the date on each bag.
Step 4: Insert Invitation
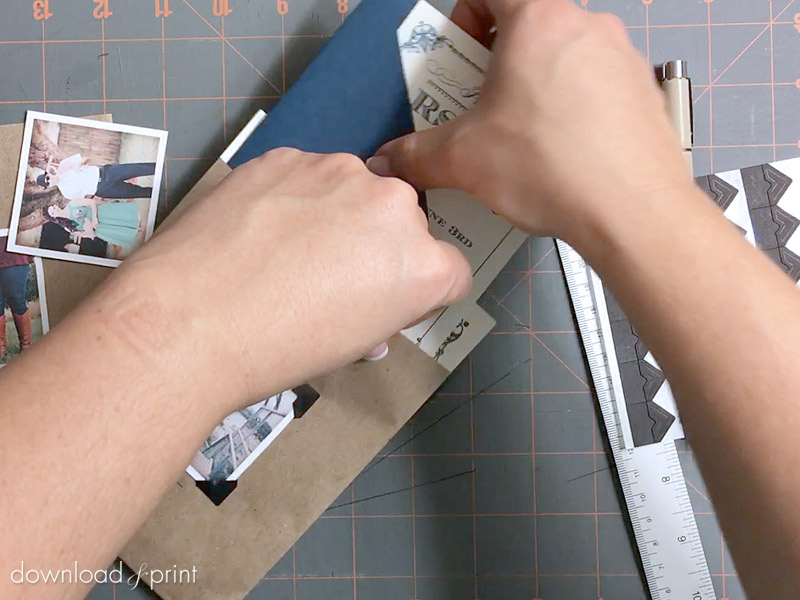
Slip your invitation package into the bag. It will be a snug fit. You’ll want to include your invitation, RSVP card and return mailing envelope, and things like a direction or enclosure card, wishing well card, map, song request, and any other personal enclosure.
I love the way this looks. I love that it’s a neat package for you to mail. I love that is has a vintage vibe. I absolutely adore the square prints from Social Print Studio. And the fact that this project is easy to put together and super cheap makes me happy too.
After you get rave reviews on your invitations start planning a coordinating thank you card. It would be a nice way to draw the beginning of your wedding journey and the conclusion together. You could cut kraft cardstock into 4 x 6” rectangles, mount a picture toward one edge, just as in the invitation tutorial, and write your note of thanks next to the picture. The kicker here is you could use a picture of your guests. Nominate someone to take happy snaps at your wedding and use these pics on your thank you cards. This would be such a cool surprise in the mail.
I’d love to hear what you think.
Until next time, with template love,

(Although all the products listed in this tutorial are products I personally use, I will be compensated if you make a purchase through some of the links provided.)