I made this elegant invitation using an amazing pearl embossed paper from Paper Mojo and a printable invitation template from Download & Print. Because the embossed paper comes in large (22" x 29") sheets you could make 8-10 pochettes per sheet. That's about $0.60 per pochette! The invitation template includes the botanical artwork and you can add your invitation wording to the card with Microsoft Word.
Project Materials:
- Flower Garden Embossed Paper
- Cream or Ivory Card Stock
- Black Card Stock
- Paper Trimmer
- Scissors
- Pencil
- Ruler
- X-acto Knife or Score Tool
- 3/8” Black Satin Ribbon
- Bone Folder for sharp creases
- Adhesive Transfer Tape
- Free Pochette Template
- Free Wedding Invitation Template

Step #1:
Print the Pochette Invitation Template Master on 8.5 x 11 paper. Trim along the dotted lines. This will create the master template for tracing the Pochette shape onto your paper.

Step #1:
Use a pencil to trace the pochette shape onto the pretty embossed paper.

Step #3:
Use a ruler and the non-blade edge of an x-acto knife to score the folds. This helps to get a perfectly square pochette.

Step #4:
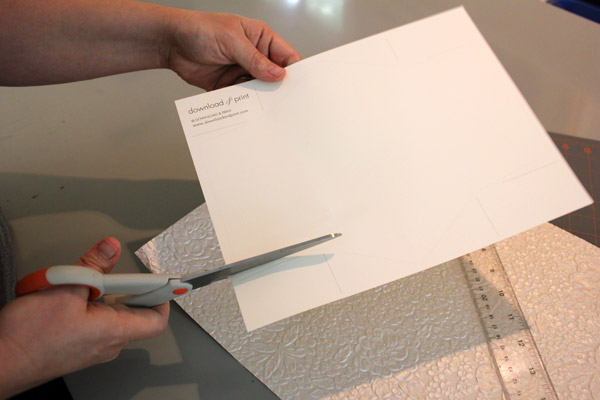
Cut the pochette out with scissors. If you are making several pochettes you can stagger them on the sheet to maxamize your embossed paper.

Step #5:
Fold the pochette along the score lines and press with your fingers.

Step #6:
(optional) Press your folds with a bone folder. This helps the card to lay flat with crisp folds.

Step #7:
Cut the black backer sheet using a paper cutter to 4 7/8" x 5 1/8" (12.5 x 13.2 cm)

Step #8:
Download the Free Invitation Template here. Open the template in Microsoft Word and add your event wording. Print on 8.5 x 11 cream card stock, cut the invitation template along the dotted lines.

Step #9:
Using ahdesive transfer tape, apply tape to the back of the invitation card. You could use a glue stick or alternative paper adhesive. I like the transfer tape because it's a one handed application, fast, and no drying time.

Step #10:
Mount the invitation to the backer card. I like to align the layers on three edges then lay the card down. This helps get a perfect border all the way around. It should be about a 1/8" border of black paper showing.

Step #11:
Apply tape to the back of the backer card, then position and adhere to the pochette. I like to position the invitation just inside the crease mark of the pochette. Check your left and right edge alignment and then drop the card into place.

Step #12:
use a 3/8" black satin ribbon, about 18" long, wrap around and tie a bow for a finishing touch.

Done!
Here is a look at the final invitation. It will slip inside a 5.5" Square envelope. You can find these envelopes in black at EnvelopeMall.com
Credits: Photography by Rachel Sollee & Invitation Design by Anna Skye.
