
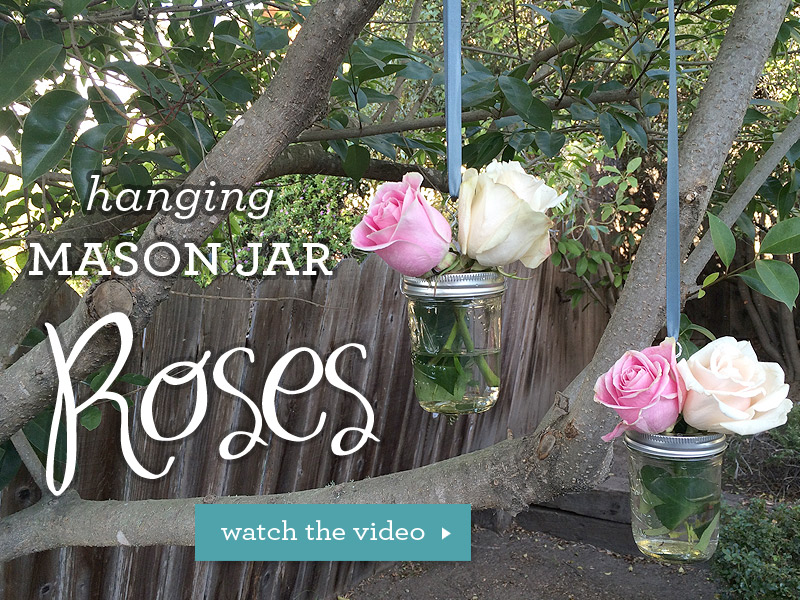
It's rose week here at Download & Print in honor of our ever popular Garden Rose templates now being a 17-piece bundle in every color under the sun. Today's project is so simple yet is versatile and has such a romantic look. I've created a hanging mason jar vase that can be used for decor at your wedding ceremony and reception. Of course with it being rose week I used the jar to display roses, but you can use any flowers that you like. These are lovely on their own, but the moment you see a collection of them is when you realize they are wedding worthy. It's so dreamy! Imagine them hanging off the end chairs to line the aisle at your ceremony, or groups of jars hanging from trees at your outdoor reception. I've even got the hook up for submersible tea lights you can use to illuminate the vases at night.
I'm using 8oz mason jars, which are the little ones, and only fit two blooms. This makes the jars a really economical project that if executed well is quite breathtaking.
Now lets talk blooms. I'm a rose fan, I had roses at my wedding. They do represent true love. Consequently I spent many hours trying to find the best deal on roses. As a DIY gal at heart I didn't mind putting in some effect and ended up creating all the floral arrangements for my wedding. Let me tell you fellow DIYers, the best place to buy roses is from Costco. Yep. Costco. Look them up in the wholesale section of Costco's website. For about $100 you get nearly 100 roses, and I can tell you from experience that you will have more roses than you'll know what to do with!
Now lets move onto the project and follow along with the video or pictorial below.
SUPPLIES
- 8 oz mason jars
- Aqua Brites submersible floral lights
- 26 gauge floral wire
- Water, fresh cut flowers and ribbon
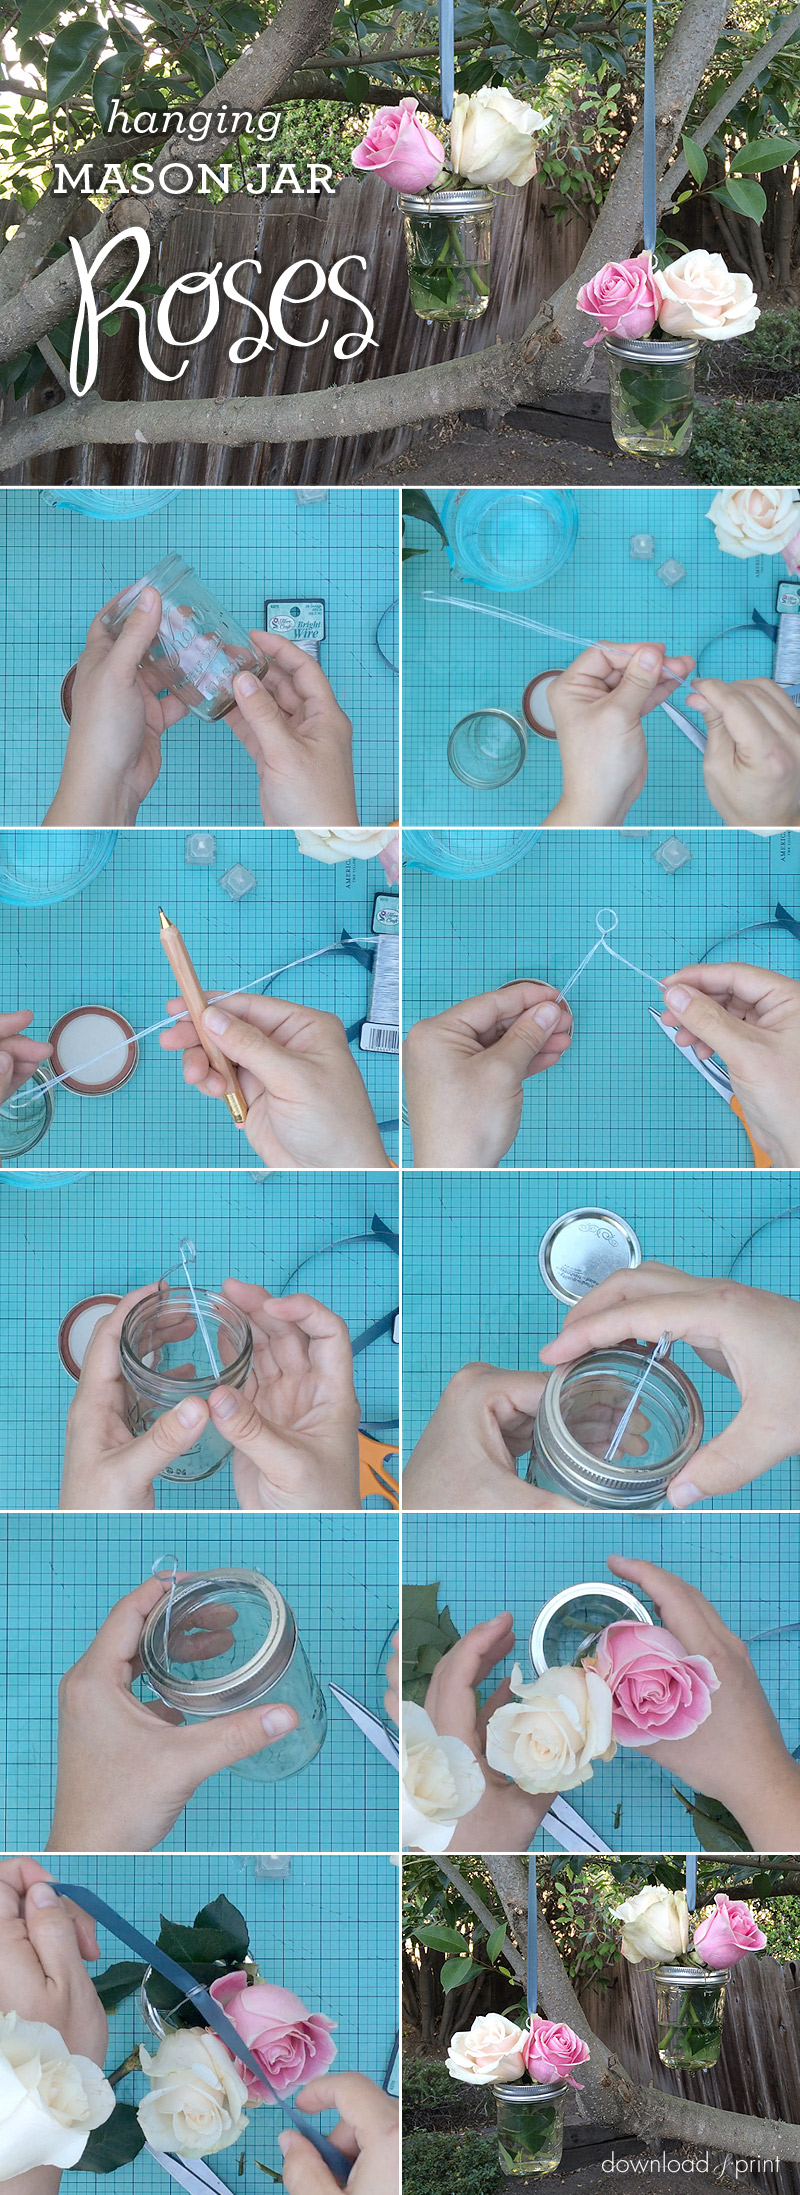
Cut a 36" length of floral wire and fold in half, and in half again. Find the center and create a small loop. I did this by looping the wire around a pencil and twisting to keep the loop in place. Hold the wire at the opening of a mason jar so that it forms a handle. The wire ends should fall just below the thread for the lid. Separate the lid and use just the part that screws onto the jar. Slip the ring over the wire handle and screw it to the jar. This will lock the wire in place. Fold the ends of the wire up and over the ring of the lid for extra security.
Pour water into the jar and place in your favorite blooms. I used two roses to coordinate with our Rose & Scrolls invitation templates, stripping the leaves off first and cutting the stem fairly short. I placed both roses on one side of the handle to give a fuller effect. I added some of the leaves to the opposite side.
Use ribbon, bakers twine or a hook to loop through the wire handle for hanging.
If you are a fan of roses also check out the giant paper rose tutorial. These flowers are ginormous. The sheer scale of them is so fun.
Until next time, with template love,

(Although all the products listed in this tutorial are products I personally use, I will be compensated if you make a purchase through some of the links provided.)