
I'm a closet wrapping extraordinaire. I love pretty parcels. I lean toward the unusual and the home-made. I like clean lines and DIYs. I have a Pinterest board full of wrapping inspiration. I have ribbon, and twine, and paper, and sparkles, hole-punches, scissors, and bows. Everything a crafty gal could need to create bundles of paper embellished bliss. Let me show you how a little wrapping paper can turn any envelope into a piece of art.
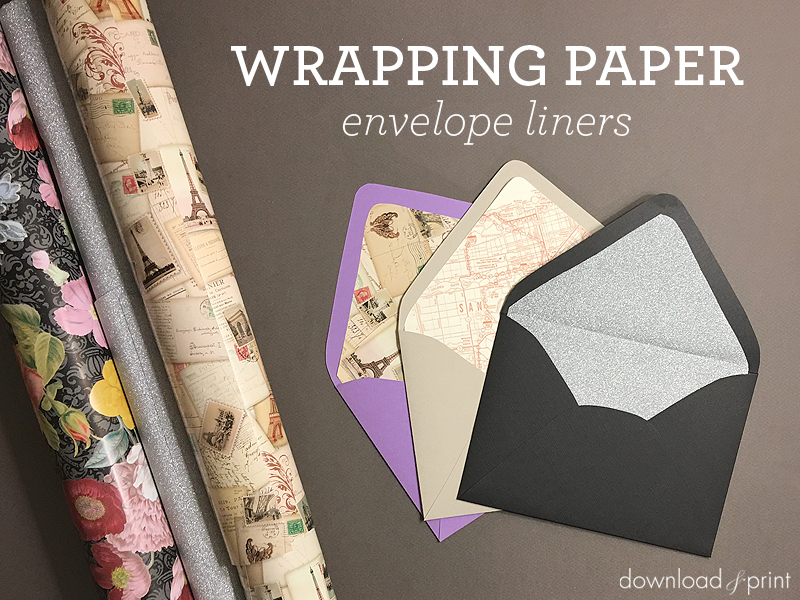
I'm a big fan of envelope liners. Being matchy, matchy is nice and definitely has it's place in the wedding world. However, sometimes a contrasting pattern or surprising hue can really set off your invitation package. The easiest way to introduce a new pattern, texture or color is in an envelope liner. It's front and center as soon as the envelope is opened and can make a fun statement.
Creating an envelope liner is easy peasy. You can use any paper, my personal preference is wrapping paper as it comes in large rolls, is cheap, and being thin works well in this application. So that's what I'm going to show you today.
If you are unlike me and don't have hoards of wrapping paper on hand I found some cute paper online that would work well for wedding envelopes. If you like the map paper I'm using in the video, I found one similar on Amazon. You can also do a search in Amazon for what ever style of wrapping paper you would like to find. For example, if you want bohemian style paper, type in "wrapping paper boho" and you will find lots of options for this theme. Your options for wrapping paper are endless, which is why I like using it so much. You could even buy a pack of paper and mix and match liners.
SUPPLIES:
- Wrapping paper
- Envelopes
- Double sided tape
- Pen and ruler
- Scissors
Step 1: Draw Out Template
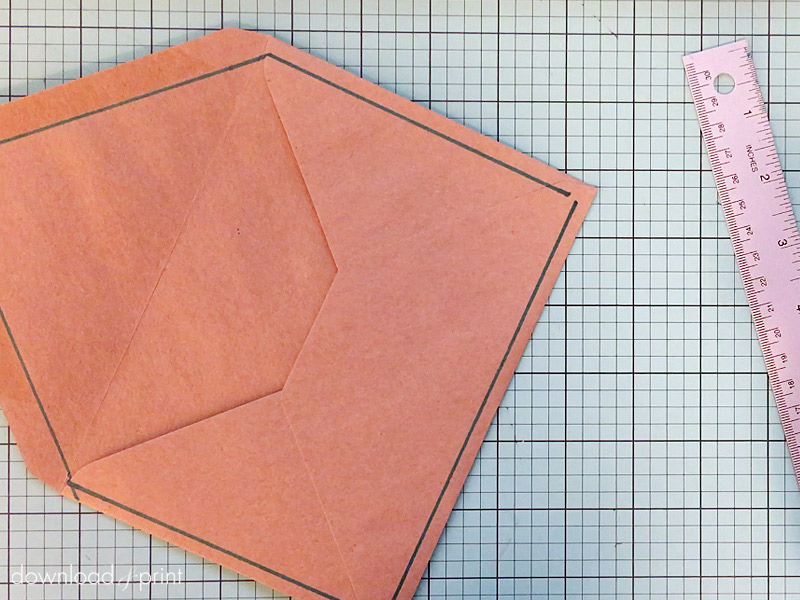
The first step is to turn one of your envelopes into a template. Mark along the flap on the inside edge of the adhesive. Continue to mark down around the pocket of the envelope, staying about half an inch in from the edge of the envelope.
You are aiming to end up with a template that is the same shape as your envelope, just slightly smaller.
You can do this with any size and shape envelope. If your envelopes have square flaps, the same steps apply, you’ll still draw your line on the inside edge of the adhesive.
Step 2: Cut Out Template
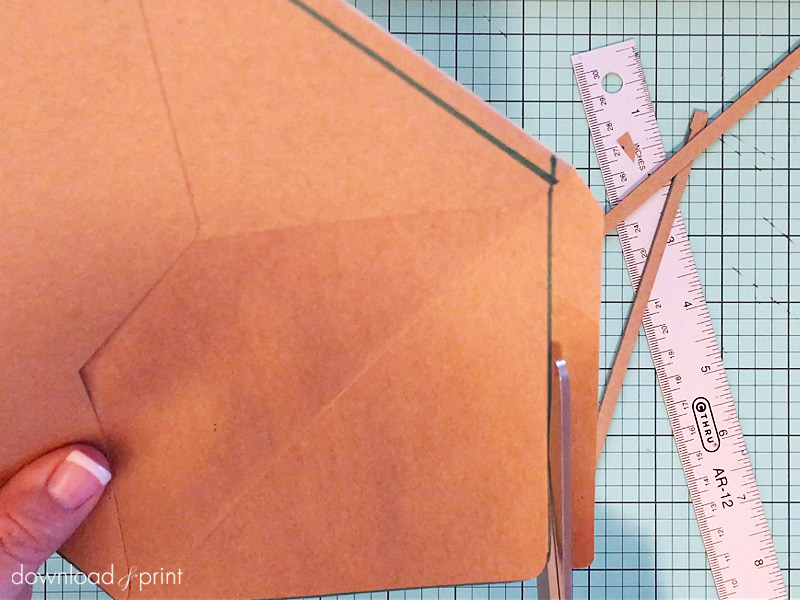
Cut along the lines you just marked. The front of the envelope will fall away, discard this.
You will be left with a single thickness envelope template.
Step 3: Trace Onto Wrapping Paper
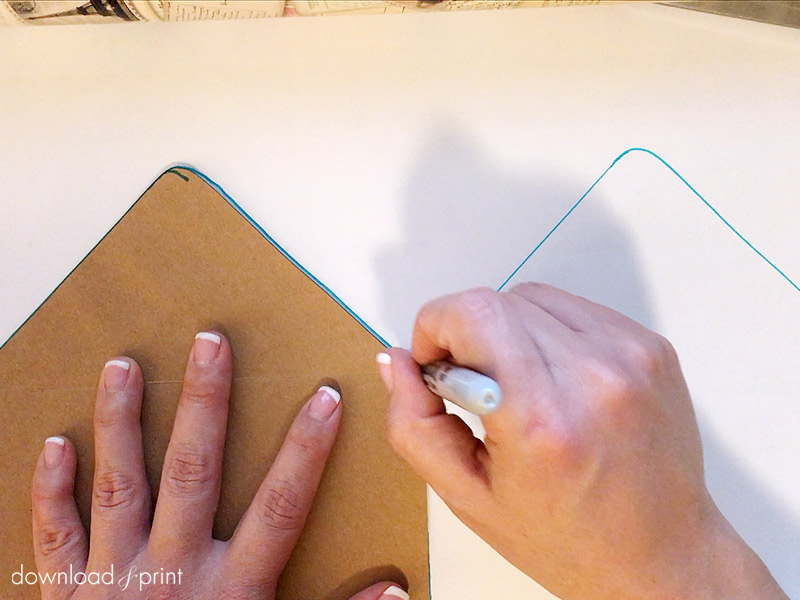
Use your template to trace onto wrapping paper. Butt the right and lower edges up to the corner of your wrapping paper and trace. Start tracing the next liner by butting your template up against your first tracing and the lower edge of your wrapping paper. This will limit wasted paper.
I like to draw out an entire row, then trim.
Cut around the templates you traced.
Step 4: Attach Liner
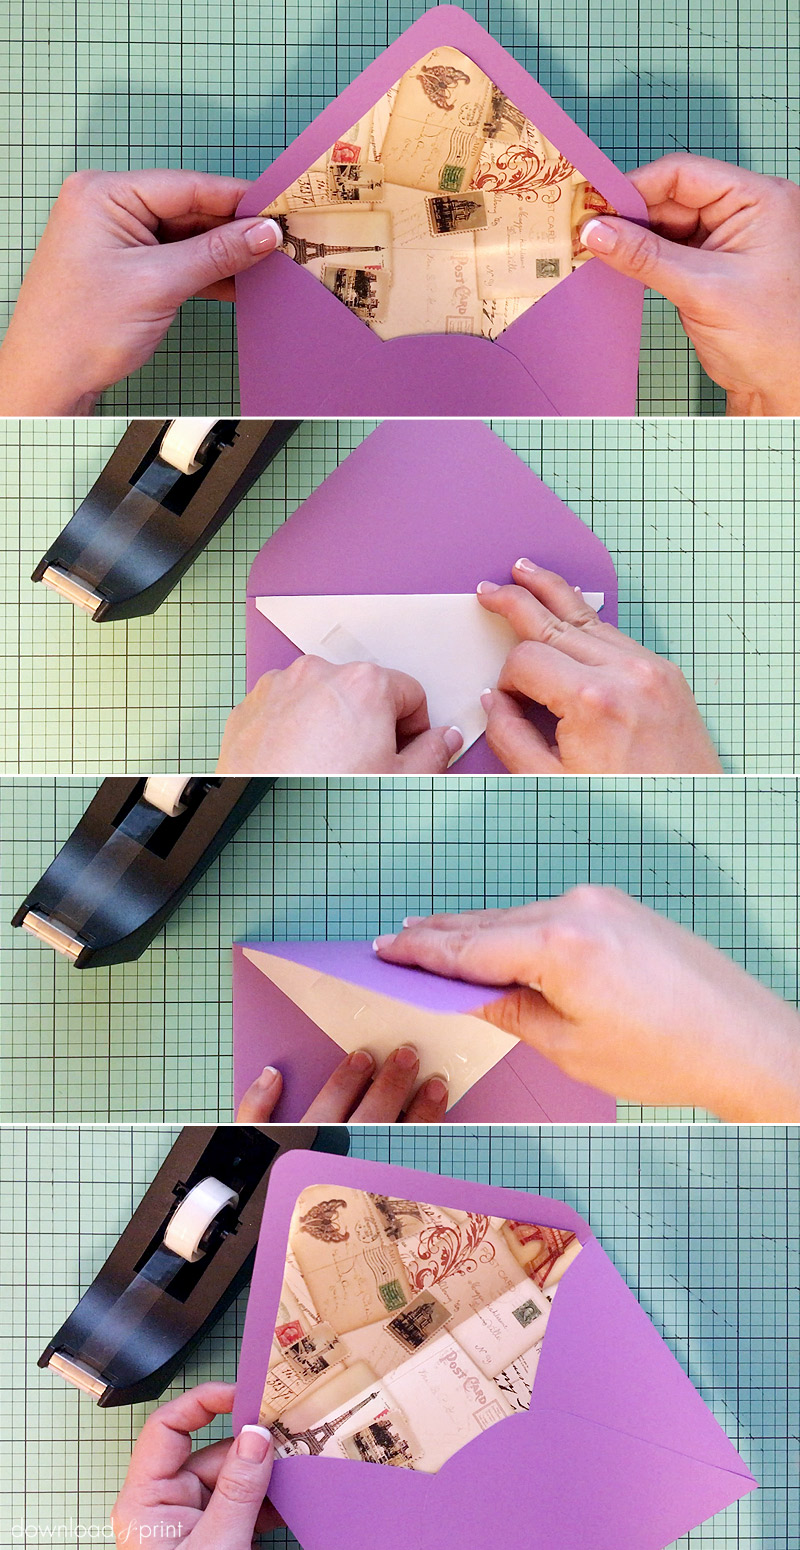
Slide your liner into an envelope. Push it all the way down, the top edge should finish just below the adhesive if you traced your template accurately.
Fold over the flap of your liner, matching the fold up with the fold on the envelope.
Stick double sided tape to the back of the liner flap. I find tape is the best option for adhering liners, a glue stick will wrinkle the paper.
Fold the envelope flap down and push firmly onto the liner. There is no need to adhere the lower section of the envelope liner to the envelope. That's it!
With template love,

(Although all the products listed in this tutorial are products I personally use, I will be compensated just a tiny bit if you make a purchase through some of the links provided. Thanks for supporting small biz!)