
Hi, I'm Lisa, the Aussie about the office here at Download & Print. Anna has asked me to run a series on invitation styling. Anna's designs are gorgeous on their own. You can simply download and print and have professional looking stationery with very little effort. However, a little pop or a little sparkle never went astray if you have the time and the inclination to embellish the designs. This could be in the form of a colored backing card, or a simple belly band, or oodles of glitter if you really like things sparkly. Over the next few weeks I'm going to show you three ways to style a few of the most popular templates on Download & Print.
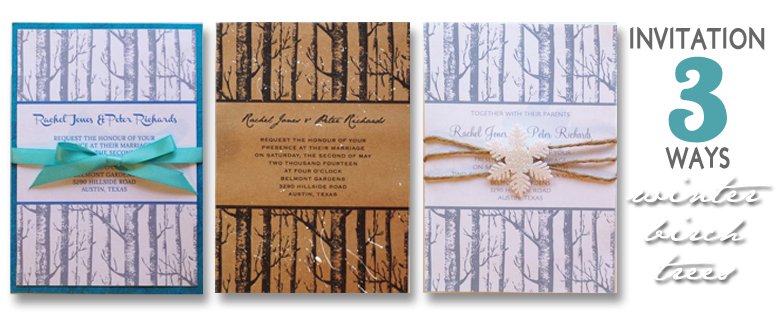
First up I picked the Winter Birch Trees wedding invitation, for no other reason that I like this design. Here's the template as you see it in our product catalog:
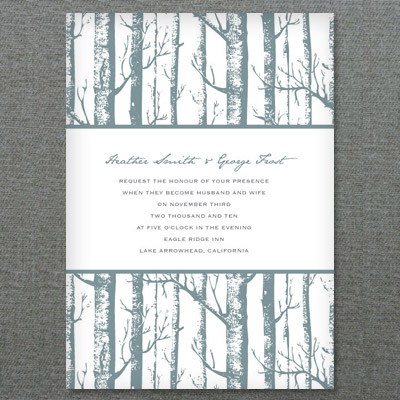
Simple, stylish, and perfect for a winter woodsy wedding or party. Now let me show you three ways to dress it up.
1. Kraft Paper and Snow
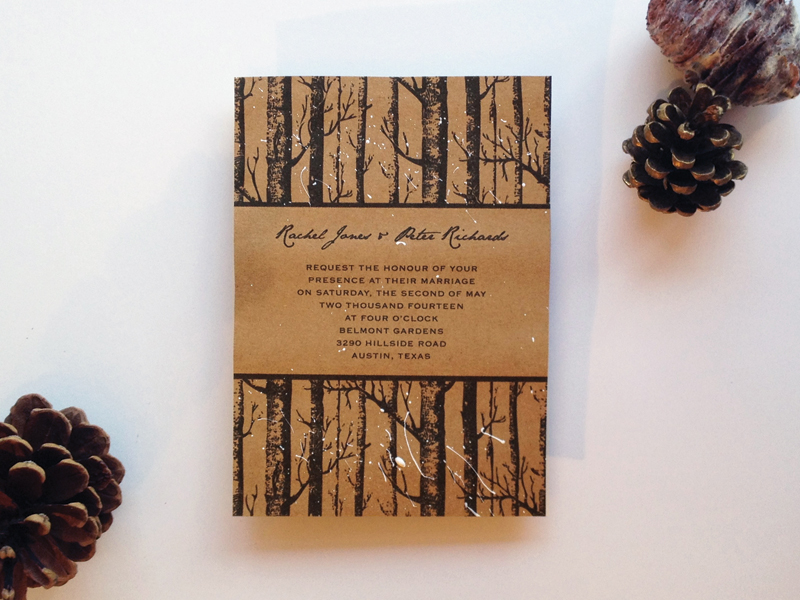
I love the kraft paper look that is popular right now with vintage invitations. I thought this look would also work with this winter invitation. And just for the heck of it I added snow in the form of white acrylic paint. This was easy to put together. The template needs to be customized to all black through our color change service. Print in black and white (hello super cheap copies) on kraft paper, which can be picked up online or at your favorite craft store. Splatter white paint on the trees to look like snow. I chose to keep the fonts the same as in the sample invitation, using Jane Austen for the names and Copperplate for the information text.
2. Blue and White
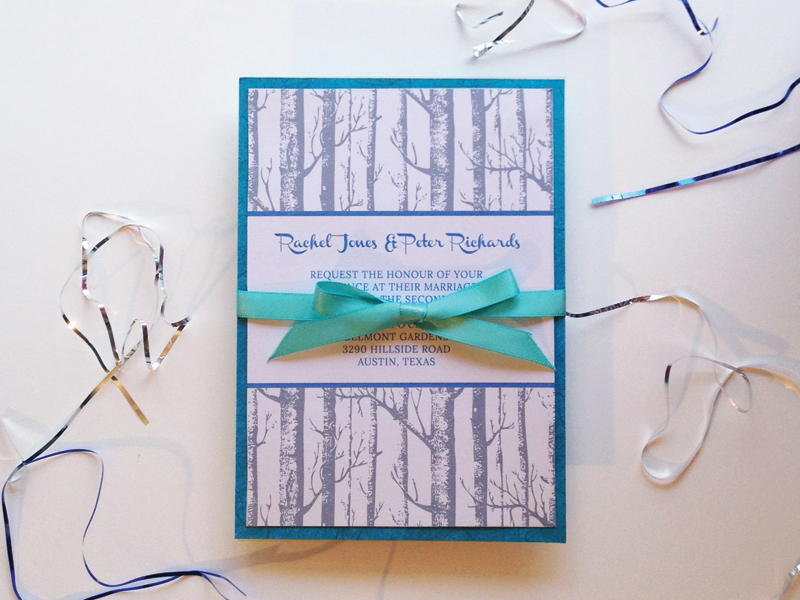
I love the kraft paper look, but I'm always drawn to bright colors and my favorite winter color is icy blue. For this look I also used the color change service and had the invitation shrunk to slightly smaller than 5 x 7", and I changed the text box border to blue. The text color can be changed yourself in MS Word to match the blue border. I changed out the fonts to Channel for the names and Lora for the information text. I stuck the entire invitation to a 5 x 7" blue backing card using double sided tape, and finished with a blue ribbon.
3. Twine and Snowflake
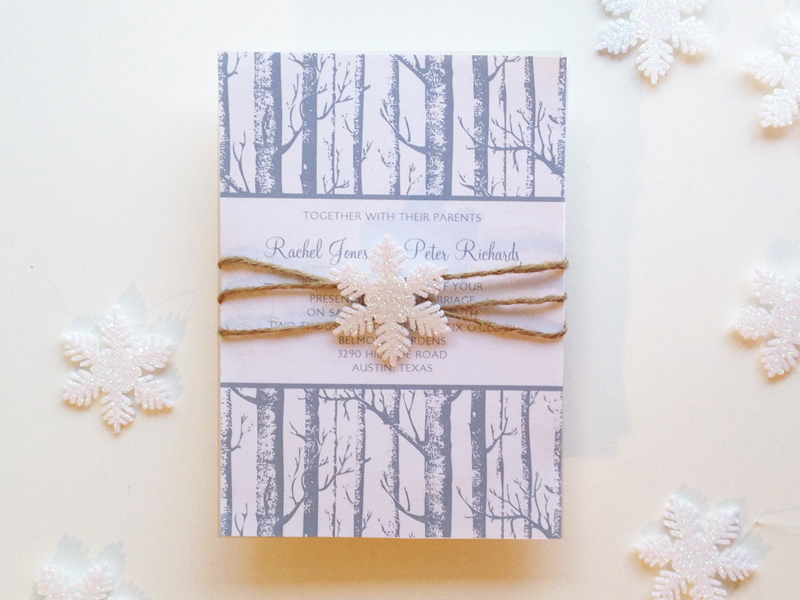
The final way that I dressed up the invitation is the easiest to put together. I made no design changes to the invitation. I did pick different fonts which you can do yourself in MS Word. You can also change the text color yourself in Word. I used the fonts At Mahogany Script for the names and LondonMM for the information text. All the fonts I chose can be downloaded for free if you follow the links. I simply wrapped garden twine around the invitation and added a snowflake embellishment which I found in packs of 10 for less than $2 at my local craft store.
Anytime you plan on winding ribbon or twine around your invitations you will need to make sure your paper is heavy enough to not bend easily when cinched. Anna recommends paper that is 65-90 lbs in weight, which will give a nice professional feel without jamming your home printer.
So what do you think, which style is your favorite?