
This week's DIY is another modern take on a traditional invitation formality. I've talked before about inner and outer envelopes, the inner envelope is used to address the specific invitees in a more casual manner, while the outer envelope will be addressed formally and could be sent to a household. See the tutorial on my Personally Invited Belly Band for ideas on how to address an inner and outer envelope.
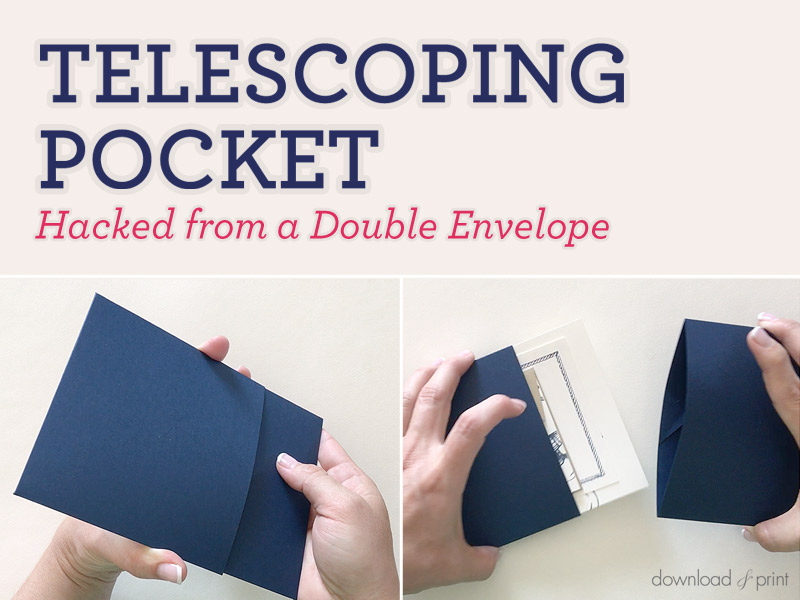
The telescoping pocket I'm showing you today is a modern take on the inner envelope. It's unique yet elegant, and gives you the chance to add your personal flair with how you choose to seal the pocket.
I'm no stranger to hacking envelopes into pockets, and today I'm taking two different sized envelopes to create a pouch that pulls apart.
I've given my invitation package a nautical theme, using our nautical anchor invitation templates and a navy and white color scheme. Rope also is a theme throughout, used to seal the pocket and as a border on the enclosure card. This telescope pocket can be adapted to any colors and theme, so go to town creating a unique invitation mailing.
Anchors aweigh, let's get to it!
SUPPLIES:
- A7 envelopes
- A7.5 envelopes
- String or ribbon
- Sealing wax or Mod Podge Melt
- Metal sealing stamp
- Ruler
- Scissors or paper trimmer
Step 1: Trim Envelopes
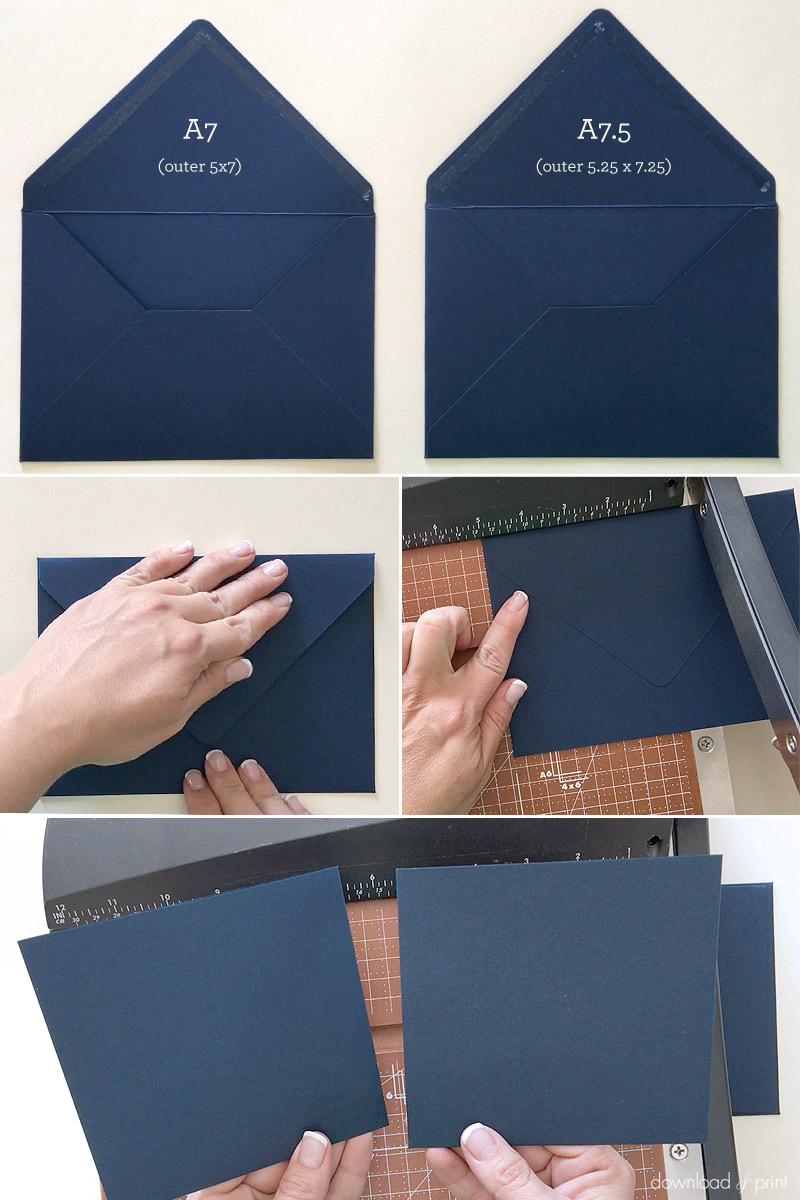
Each pocket is created from an A7 envelope and an A7.5 envelope.
Seal both envelopes closed, making sure to get a firm closure. I used tape, but you can lick the adhesive if you like and you haven't seen 'that' Seinfeld episode.
Using a paper trimmer or ruler and scissors, trim the end off each envelope at the 5" mark.
You'll want to make sure you cut from opposite ends on each envelope so that when they join together you have both the envelope seals on one side and the clean envelope fronts on the other.
Step 2: Stuff
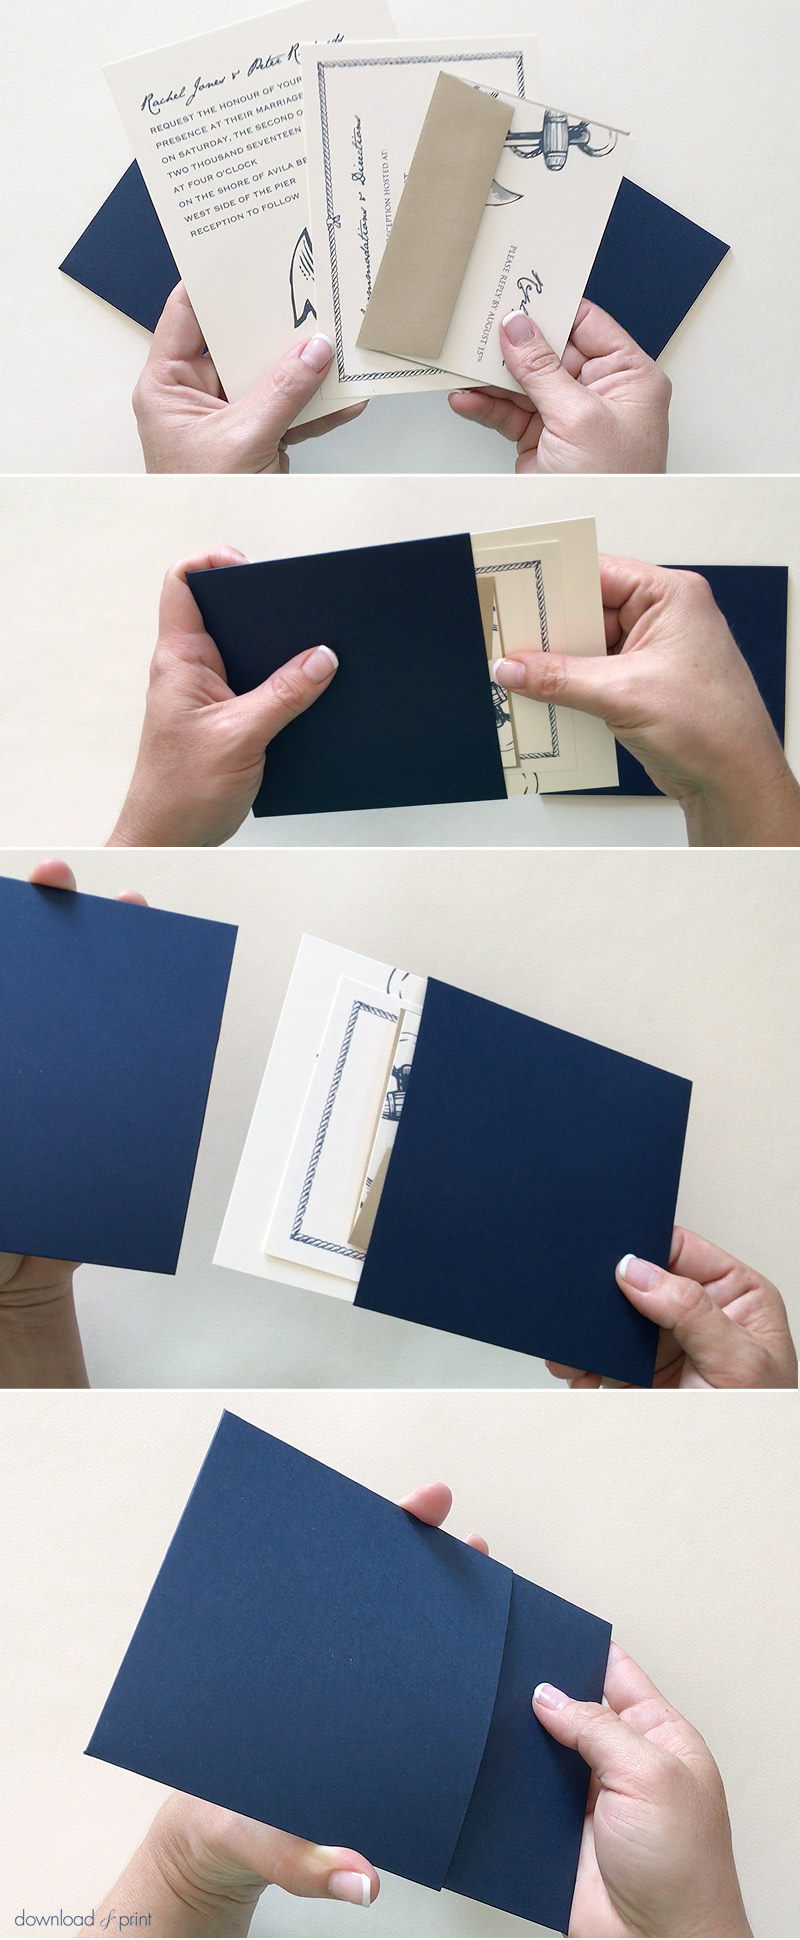
Insert your invitation and enclosure cards into the smaller envelope.
The correct order is to layer from the bottom: Invitation, enclosure card, RSVP card and return envelope.
Slide the larger envelope over the other end of the inserts and over the rim of the smaller envelope. This creates your pocket.
I'm using our Nautical Anchor invitation collection with metallic navy envelopes to create my pocket and a kraft RSVP envelope. Navy and white are a classic color combination and the kraft brings in an earthy tone. The string embellishment that is described in the next step ties in with the rope border on the enclosure card. It's an elegant, coordinated package.
Step 3: Seal
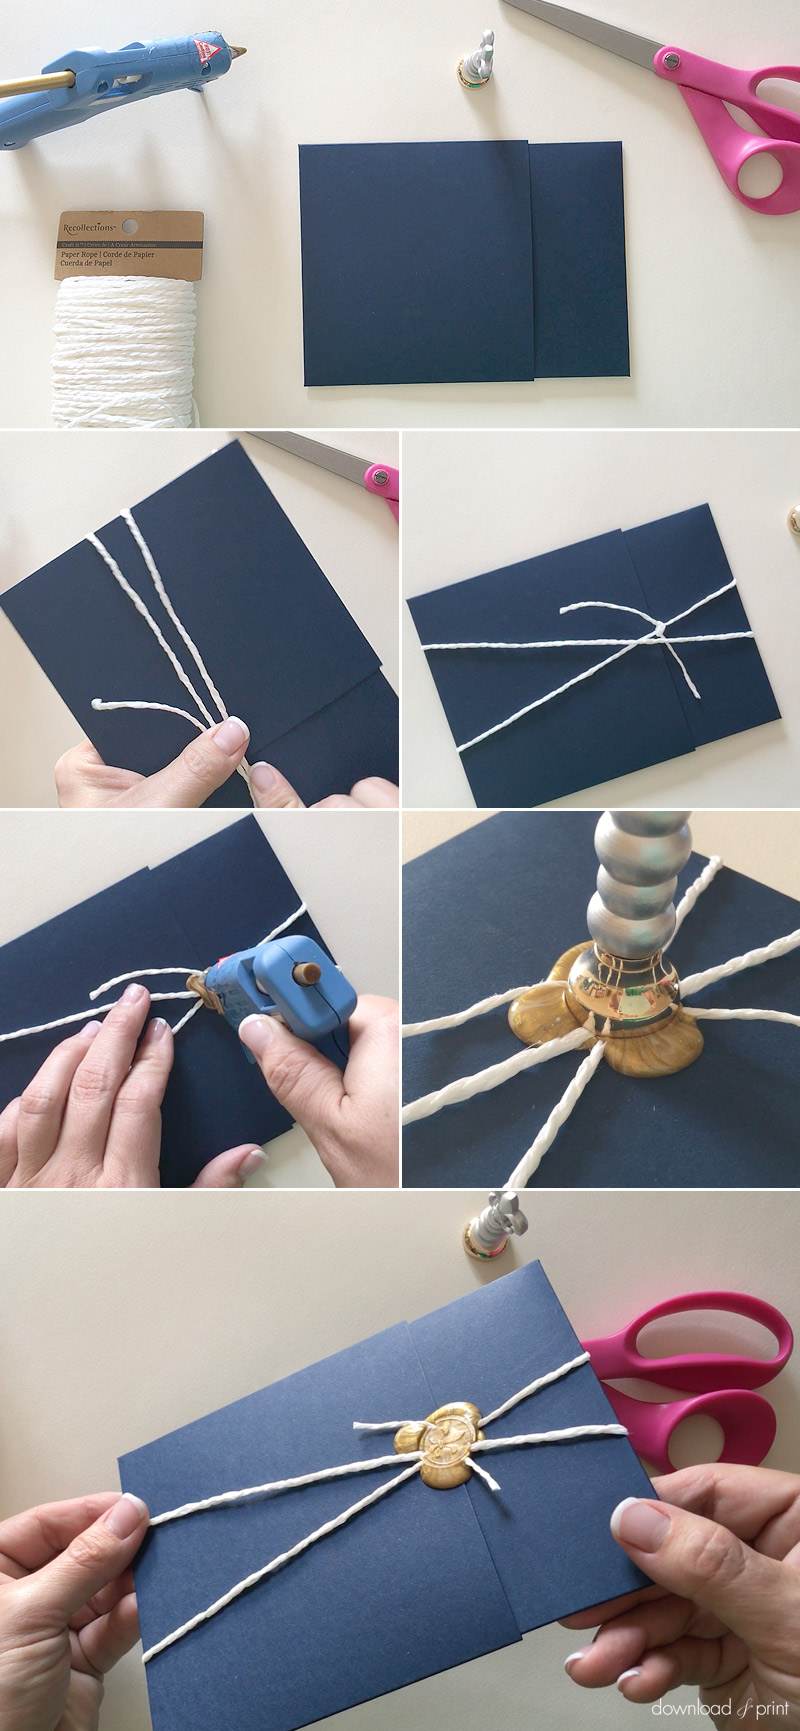
How you finish the pocket is a matter of preference, you have so many choices.
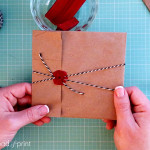
I chose to use white craft string and an embellished wax seal. I wrapped the string around twice and tied a basic knot over the join in the envelopes.
I used a gold Mod Podge melt in my hot glue gun to create a "wax" seal. You could use real wax here too.
I finished with a sealing stamp. Press the stamp firmly onto the hot wax, keep pressing for at least 30 seconds. The longer you press the easier the stamp will be to remove. You'll know when it's ready to lift off as it will come easily, remove it too soon and you'll pull off wax as well.
Trim the tails on the string when you have your wax seal in place.
The pocket fits into an A8 invitation for mailing.
YOU MAY ALSO LIKE:
Vintage Parcel Invitation Pocket
View Tutorial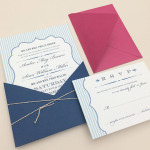
Nautical Stripes Invitation Pocket
View Tutorial
Personally Invited Belly Band
View Tutorial
With template love,

(Although all the products listed in this tutorial are products I personally use, I will be compensated just a tiny bit if you make a purchase through some of the links provided. Thanks for supporting small biz!)