
I'm on a roll this year with vintage inspired invitation pockets. There was the vintage album pocket (my fav), the lacy pocketfold, and now I have the easiest DIY of all! Well, it involves fire, so it's easy as long as you don't have anything flammable near you. Otherwise things could turn into a rather large headache rather quickly.
This was my first time using fire in a video, and well, lets just say I was a little nervous. I had so many things to think about.
Chit chatting with you...
Getting a perfect wax seal...
Not setting things on fire...
Trying to get it done in one take...
Making sure you could see what was happening...
And did I mention not setting things on FIRE!
Check out the video to see how I did.
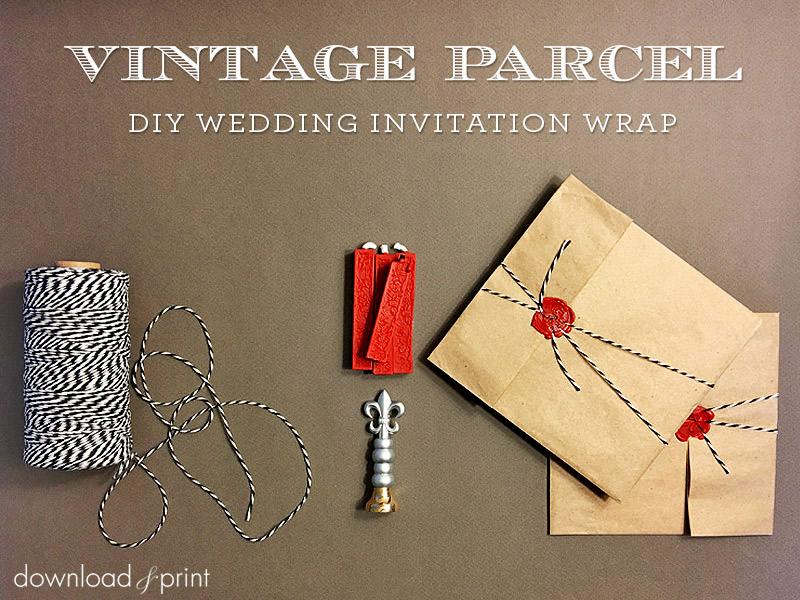
So aside from fire, this DIY involves a kraft bag, wax and some baker's twine. I thought it would be fun for your wedding guests to have to break through your official wax seal to get to the invitation. It doesn't get more old-timey than the same method that kings and queens used to seal their correspondence. Now if only you could have the official royal messengers deliver your invitations on their gleaming white horses the scene would be complete. But if you're like me, you're probably going to use USPS and their fleet of little white vans. If you squint it might be the same. Or not.
I'm liking this vintage theme at the moment so I picked our vintage poster inspired Amber invitation collection to stuff into the bags. The seersucker stripes come in five understated colors, but it's the gorgeous fonts that really pulls this design together. So yummy...
SUPPLIES:
- 5 x 7" kraft bags
- Red sealing wax
- metal sealing stamp
- Baker's twine
- X-acto knife
- Ruler
- Scissors
- 5 x 5" square invitation from the suite of your choice
Step 1: Trim Flap
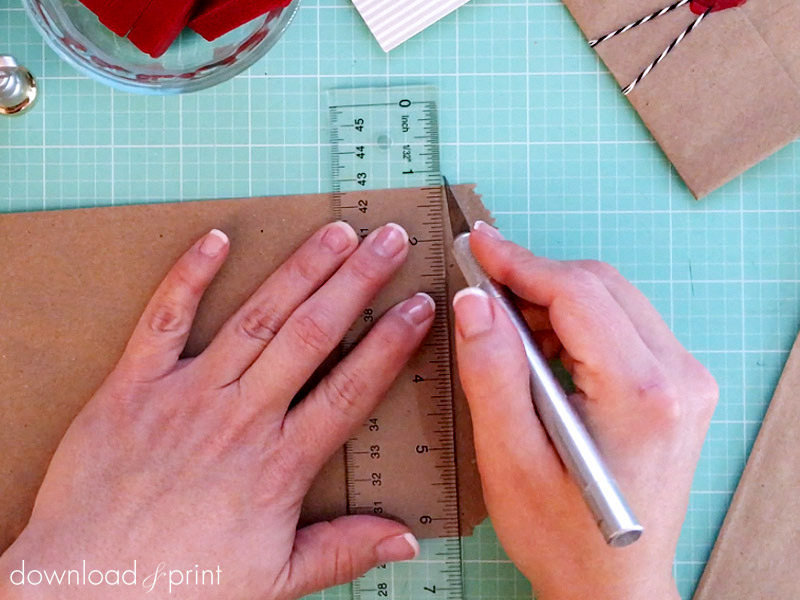
Trim the top off the kraft bags to give a clean edge. You can do this with an X-acto knife and ruler, or scissors, or even trim several bags at once with a paper trimmer.
Step 2: Stuff Bags
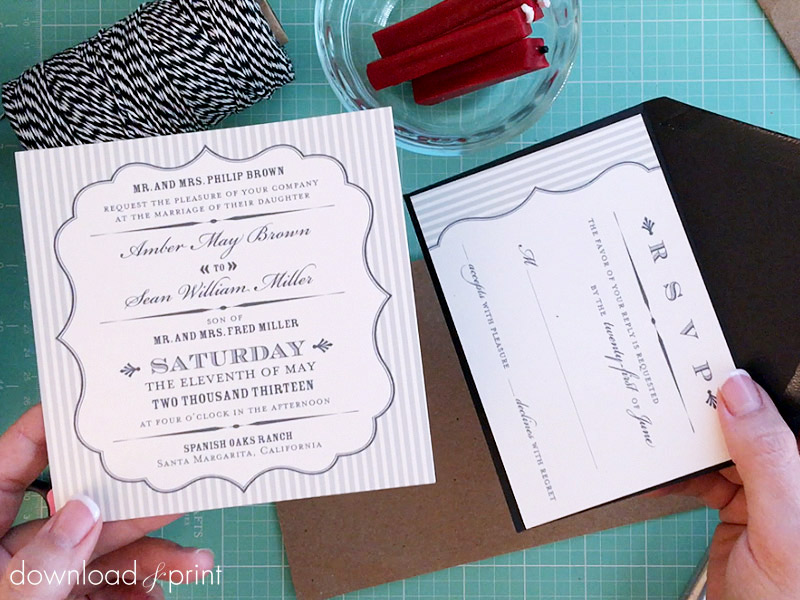
Stuff each bag with your invitation, RSVP and envelope, enclosure card, and any other stationery you are including. Make sure to push everything to the very bottom of the bag.
The invitation suite I'm using is Amber in silver from the Budget Savvy Bride Collection. This printable collection includes 18 templates, all the paper goods you need for your wedding day.
Step 3: Tie With Twine
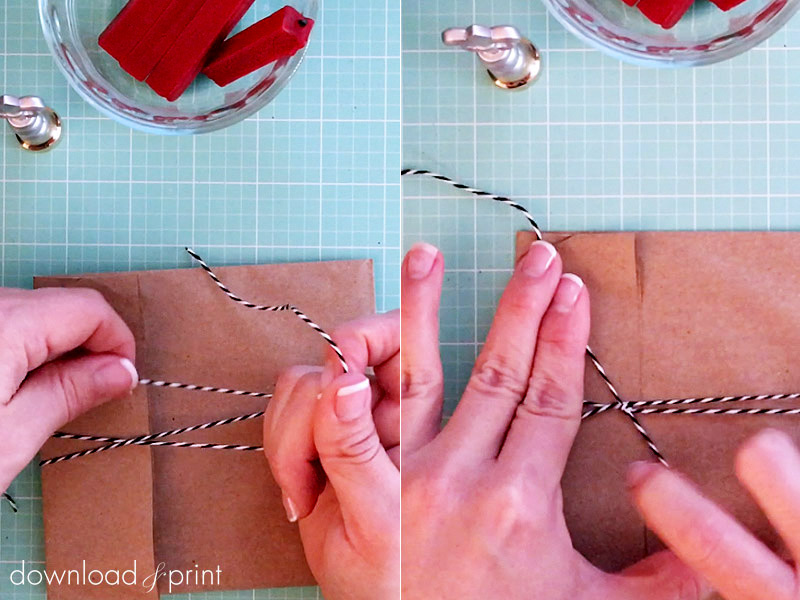
Fold the top flap over and crease. Cut a length of baker’s twine and wrap two or three times around the bag, before finishing with a knot near the edge of the folded flap. Your goal is to get the knot as close to the flap edge as possible. Spread out the twine along the top and bottom of the bag for greater decorative impact.
Step 4: Melt the Wax
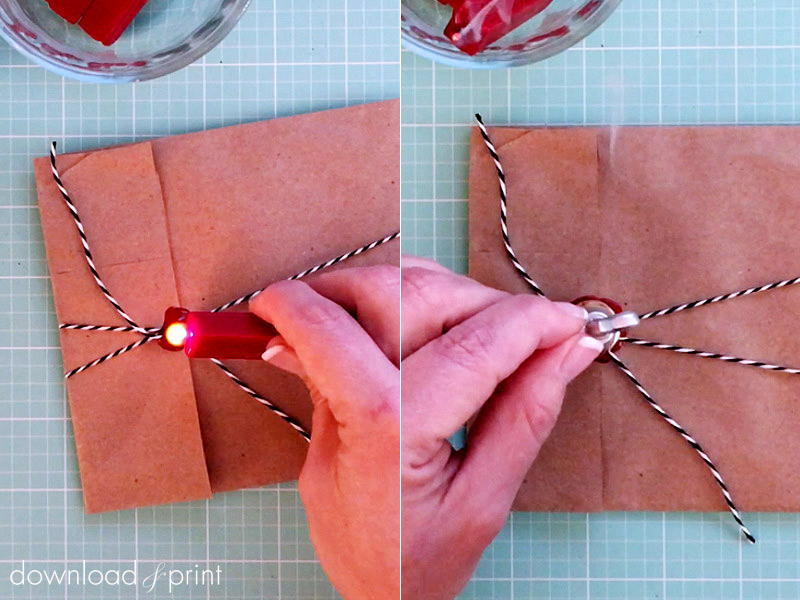
Now to play with fire! Light the wax and let the top get hot and begin to melt. Roll the wax in your fingers as it’s heating up so that it melts evenly. When the wax is ready to drip, angle it down and let the wax drip onto the knot. Drip the wax into a circle about the size of a nickle. You want the wax to cover the knot, as well as to span from the flap to the main bag, sealing the bag.
When you have a nice size wax circle grab your sealing stamp (first blowing out the wax and keeping the hot tip away from anything flammable!). Press the stamp onto the melted wax until the wax oozes from the sides. Keep pressing the stamp down, the longer you hold the stamp the easier it will be to remove cleanly. You want to press down the stamp for at least 30 seconds. If you remove the stamp too soon you’ll have pieces of wax stuck to the stamp.
Trim the twine tails to a length you like.
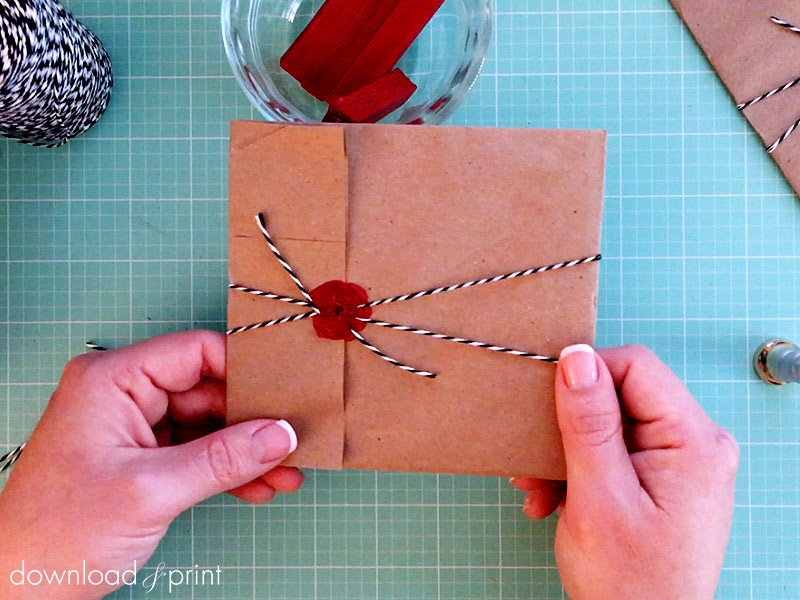
Now you have a timeless wax seal and a very easy and inexpensive DIY project that will be a little fun for your wedding guests to open. I can hear the trumpets saluting as these invitations fall into mailboxes.
With template love,

(Although all the products listed in this tutorial are products I personally use, I will be compensated just a tiny bit if you make a purchase through some of the links provided. Thanks for supporting small biz!)