
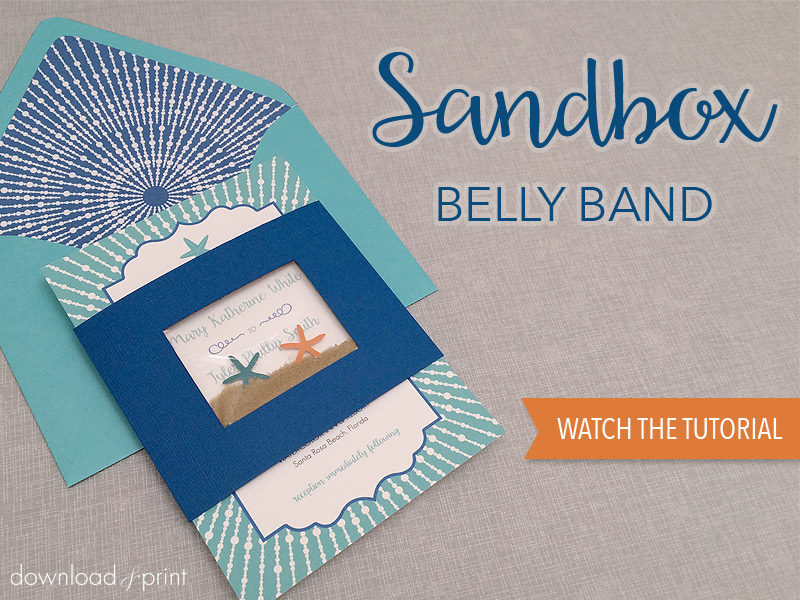
I sometimes feel I've never had to grow up. I get to play arts and crafts most days, and this weeks art project was so much fun. Sand, starfish, pretty colors, send me back to kindergarten please! Jessica has created an invitation suite that couldn't be more perfect for your beach or destination wedding, and in Anna Skye style I embellished it with a little pizzazz. The 17-piece invitation collection from the Budget Savvy Bride Collection is called Katherine, and features starfish in every color theme.
As summer is in full swing here on the California coast I didn't have to look far for embellishment inspiration to pair with the Katherine design. I came up with what I'm calling the Sandbox Belly Band. It's a wide belly band in any color you like with a big cut out window that the bride and groom's names can peek through. In the window of the belly band is... wait for it... real sand! And starfish, or any other accent pieces that take your fancy. Since moving to the coast Conan and I get to feel the sand between our toes on our morning walks and I'm thrilled to be incorporating a little of our daily ritual into a Download & Print design.
The belly band template is free for you to download, and as it's a generic design you can pair it with any 5 x 7" invitation. So 1... 2... 3... go crazy with ideas on what to fill the window with and what Download & Print invitation to pair it with.
This isn't a hard tutorial to follow along with. The video tutorial explains it best, or jump below to the pictorial.
SUPPLIES:Download Belly Band Template
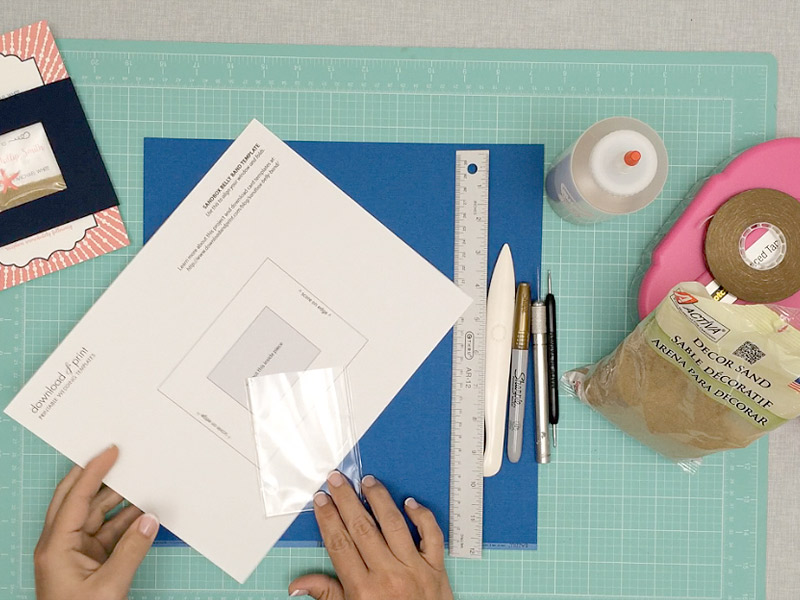
- Printable PDF template
- Printer (I like Epson Workforce ink-jet printers
- 12 x 12" scrapbook paper in three coordinating colors
- X-acto knife and ruler, or scissors>
- Scoring tool
- Bone folder
- 3 x 4 ¾” clear treat bags
- Décor sand
- Starfish / sand dollar punch or Starfish punch
- Double sided tape (here's the tape gun I'm using)
- Katherine 5 x 7" wedding invitation, RSVP and enclosure card
- A7 euro flap envelope
- Condiment bottle (optional)
Step 1: Download & Trim

Download the free PDF template for the sandbox belly band (you’ll need Acrobat to open this) and print on white or scrap paper. Cut along the lines of the outer rectangle and inner rectangle. The easiest way to do this is with an X-acto knife and ruler. You can use scissors or a paper cutter for the outer cuts, and scissors will even work for the inner cuts if necessary, but you’ll get much crisper corners if you use an X-acto knife and ruler. This forms the template for the window that you'll use on each belly band.
Step 2: Mark, Cut & Fold the Belly Band
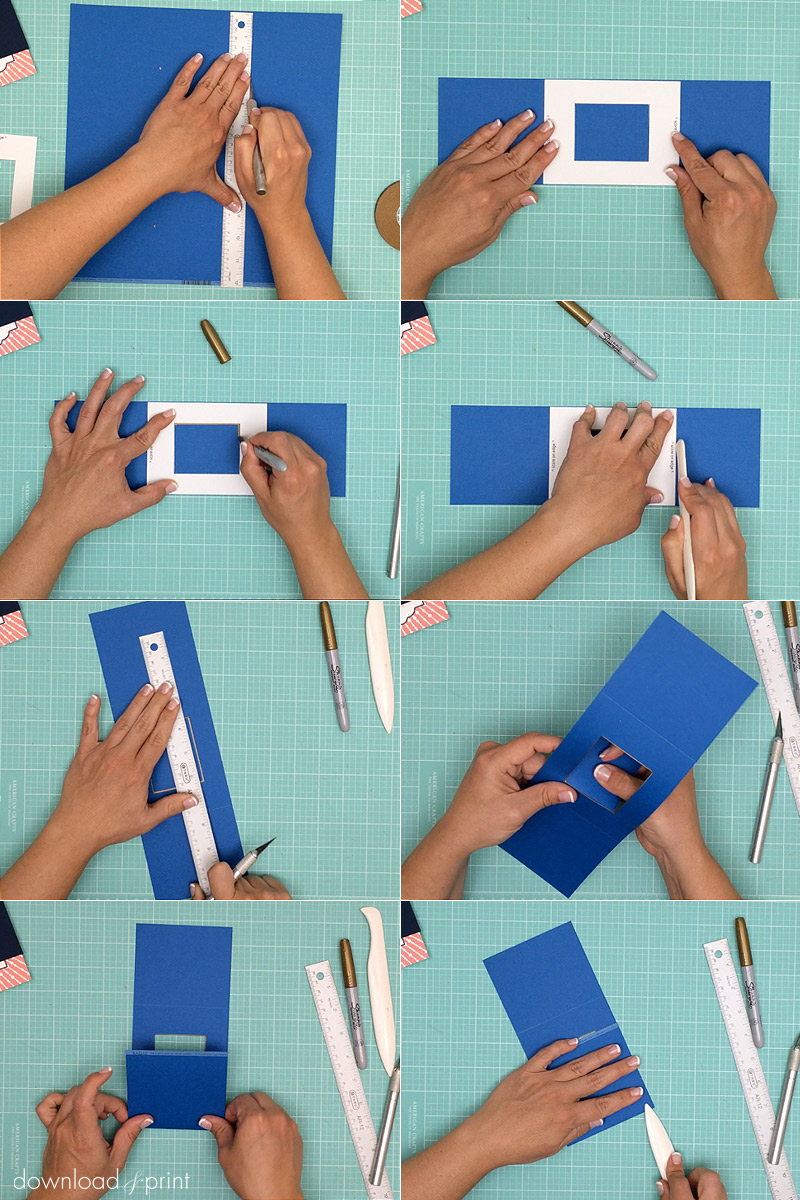
Mark 4” wide strips on the 12 x 12” scrapbook card that you plan to use for the belly band. You’ll get three belly bands from each sheet of paper. Cut the paper along these marks. You’ll end up with three 4 x 12” strips.
Place the template that you cut in the previous step onto the center of one strip of paper. It doesn’t need to be perfectly centered so just eyeball the placement.Trace around the inner rectangle/window of the template onto the belly band. Keep the window template in place!
Score the belly band along either side of the window template. This marks where the creases will fall and makes folding in the flaps much easier. If you don’t plan on using a scoring tool mark along the edge of the window template where you’ll need to fold.
Move the window template out of the way and cut out the window that you marked using a ruler and X-acto knife.Remove the window cut out and fold in the flaps along the creases that you started, or the marks that you made. If possible, use your bone folder to make the creases nice and crisp.
Step 3: Adhere and Fill Treat Bags
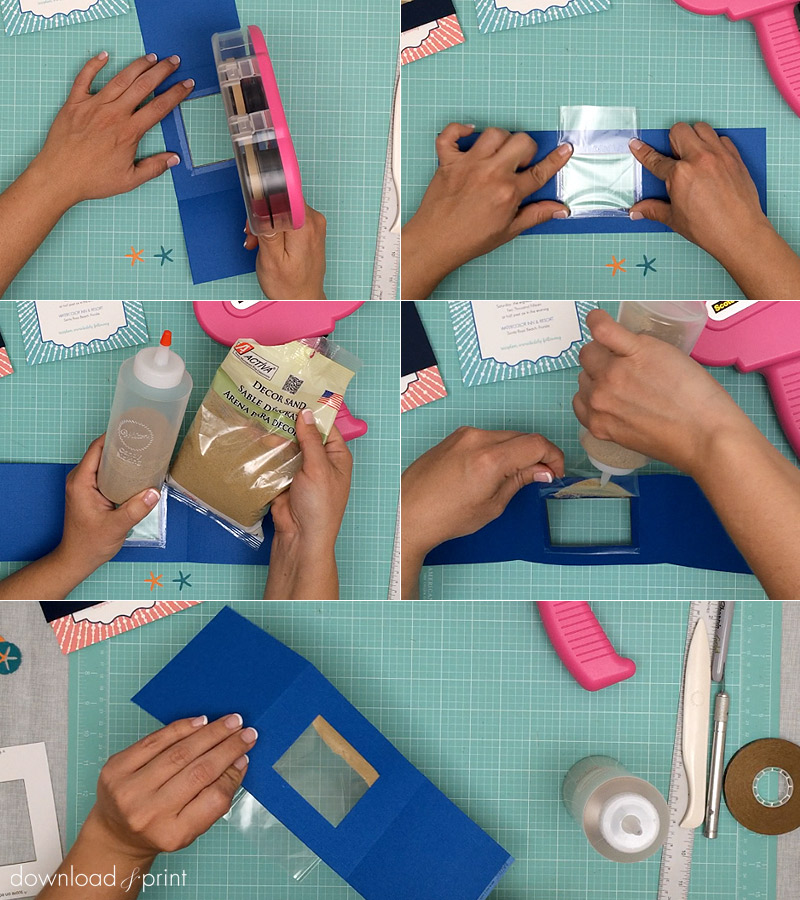
Place strips of double sided tape around the window cut out of the belly band on the reverse side of the paper. Adhere the bottom of a treat bag to a long strip of double sided tape, then press down the bag along the other three sides of the window, smoothing out the bag as much as possible.
Start filling the bag with sand. I first put the sand in a condiment container and squeezed it into the bag. Any way you can find to control the flow of the sand is going to make your life easier. Fill the bag with as much sand as you like, you’ll need to turn over the belly band to get a good look at the level of the sand. Just hold the bag closed while you flip it over so you don’t get sand everywhere! I liked just a small sliver of sand showing at the bottom of the window.
Step 4: Punch Starfish
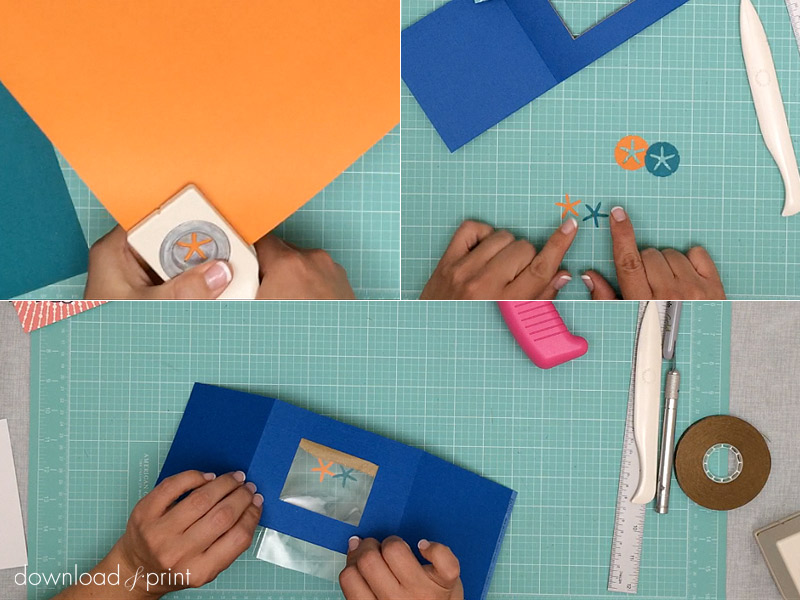
Using your two remaining colors of scrapbook paper punch out starfish using the Martha Stewart punch. I chose to use a starfish as it coordinates with the starfish on the Katherine invitation, however let your creative juices flow and fill the bag with anything that best coordinates with your wedding. I do like the idea of a punch as a paper embellishment will lie flat, making the invitation package easier to stuff in an envelope. If you use shells for instance your envelope will be much bulkier. Anything flat will look great in the sandbox.
The punch I used gave me a starfish and a sand dollar with the starfish silhouette. It’s kind of like a two for one deal! I placed two starfish in each belly band bag, and I could use the sand dollars to decorate the cake table at my wedding, on favor bags, as confetti, or in countless other ways.
Step 5: Seal Bag & Belly Band
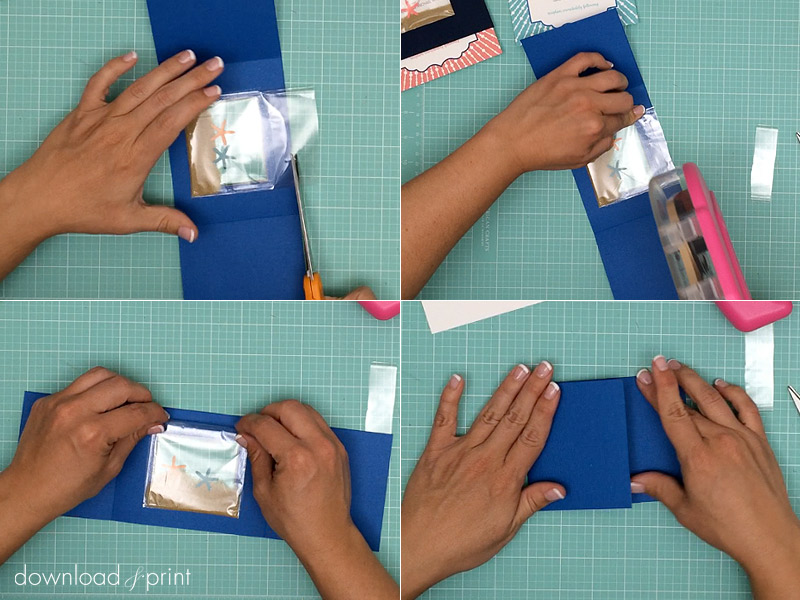
Trim the open edge of the treat bag about in line with the top of the belly band. You’re going to fold over the open edge to seal the bag, and you don’t want the open flap showing through the window.
Place a strip of double sided tape along the open edge of the treat bag. Fold over the top of the treat bag and press firmly. Use another smaller strip of tape on the inside of the treat bag to stick the two flaps together. This will help prevent any sand falling out.
Fold in one belly band flap. With the belly band lying face down, add a strip of double sided to the edge of the flap that is still open. Add a second strip of tape to the edge of the flap that is closed. Fold over the open flap and press down firmly to secure the belly band closed. You should end up with two strips of tape down each edge of the overlap to hold the band closed.
Step 6: Insert Invitation and Enclosure Card
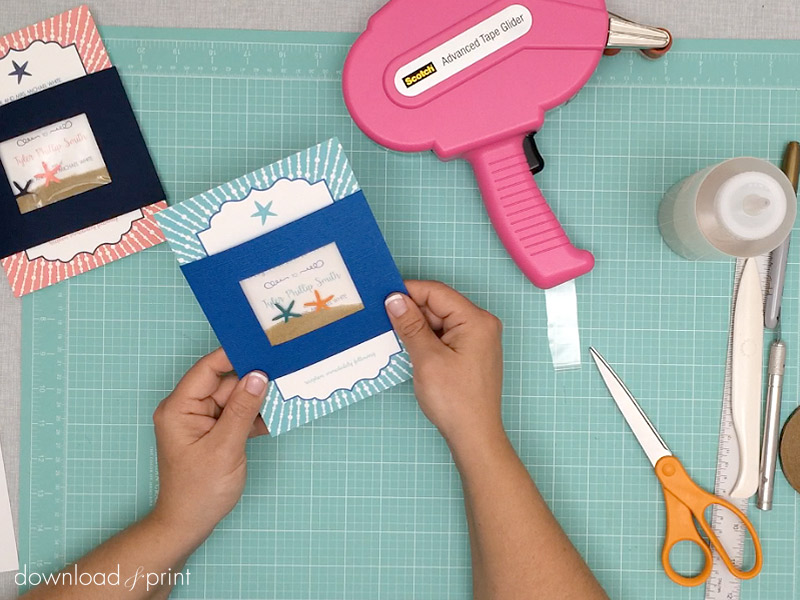
Slip an invitation into the band. I designed this belly band specifically to pair with the Katherine Collection. I like to place the band so that the bride and groom’s names show through the clear window.
You could however create the belly band in any color, use any embellishments in the widow, and slot in any 5 x 7” invitation. Bright confetti in the window would look fabulous with the dotty Olivia collection.
Slot your RSVP and enclosure cards into the band behind the invitation. Place the invitation package into an A7 envelope and mail away, mail away, mail away.
I hope you enjoyed this tutorial and I’d love to see or hear what ideas you have to fill the window with. Send me a note or let me know in the comments.
Until next time, with template love,

(Although all the products listed in this tutorial are products I personally use, I will be compensated if you make a purchase through some of the links provided.)