
Invitations are the pièce de résistance when it comes to sending out your wedding details, but envelopes are the opening act. I love a thoughtful envelope that ties in with the invitation theme. Around here I've talked a lot about envelope liners, either using the coordinating liner that comes with each Download & Print invitation collection, or making your own from wrapping paper. Today I have a different idea to dress up envelopes.
The idea started to form when I was searching for pretty envelopes to go with a party invitation. I searched high and low yet struggled to find an affordable option. Pretty envelopes are expensive!
White envelopes, however, are a dime a dozen
I can add an envelope liner to these (and I'm sure I will), but I really wanted the outside to make a statement so that my guests didn't have to open the envelope to reveal all the magic.
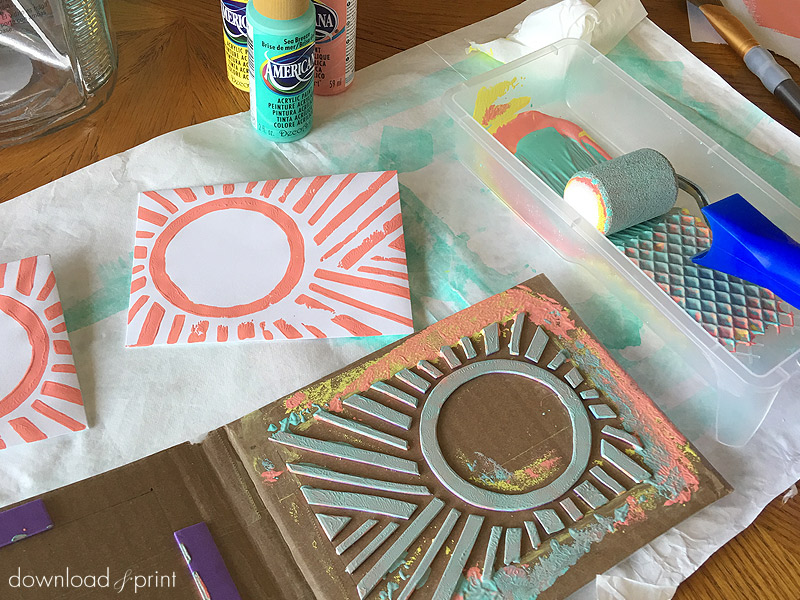
And so my Print-Tastic printing technique was born. It's the cure for boring white envelopes!
You get to come up with the design and create a stencil from craft foam. Chunky shapes work best, I'd steer clear from intricate line work. If you need inspiration try Googling geometric print.
SUPPLIES:
- Used cardboard box
- Packing tape
- Permanent marker
- Ruler
- X-acto knife
- Scissors
- Sticky back craft foam (one sheet should be plenty)
- Acrylic paint
- Foam paint roller (2"-6" wide depending on your design size)
Step 1: Cut & Tape Box
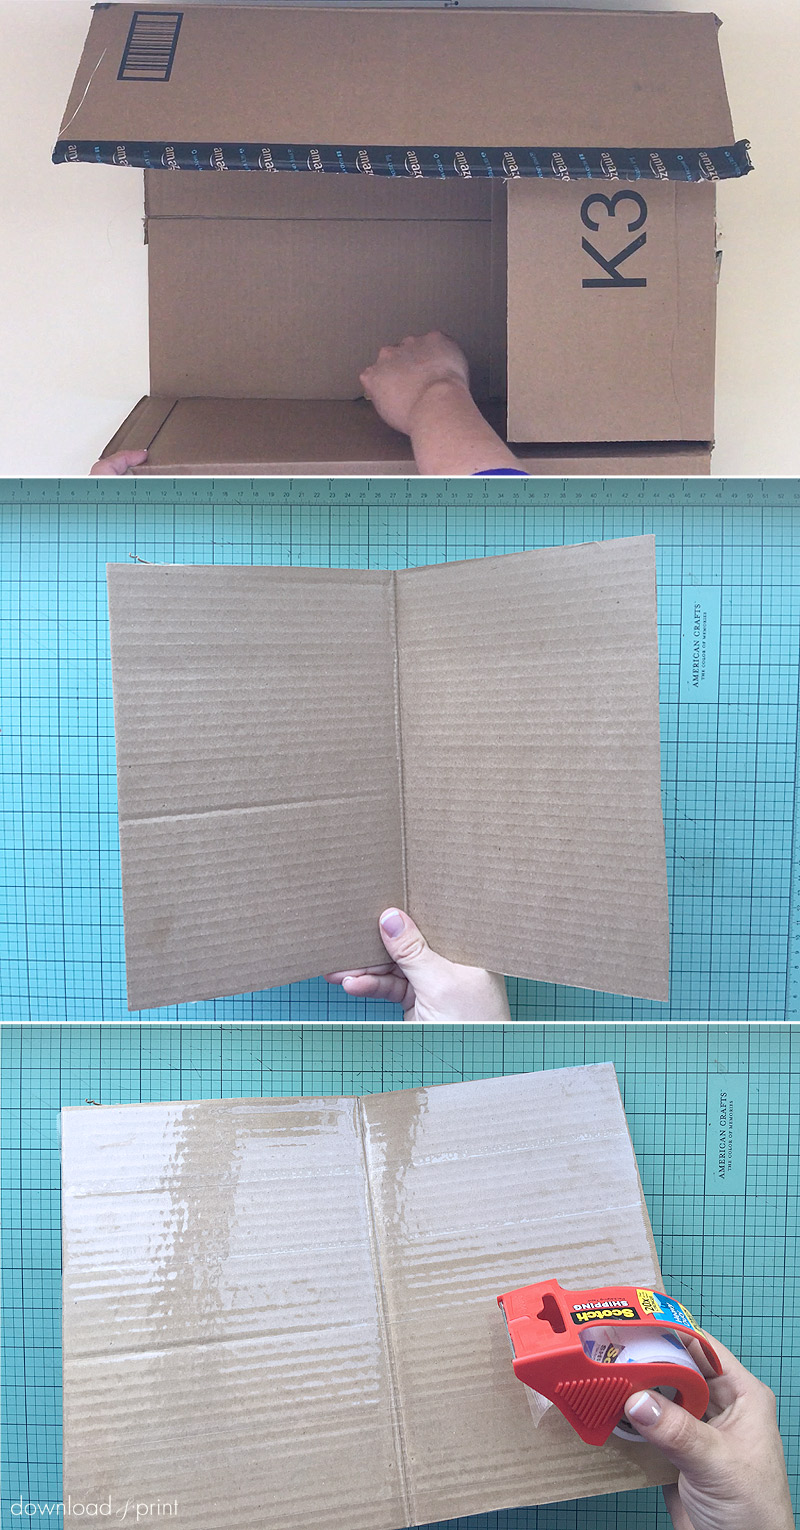
Make a work surface from an old cardboard box (thank you Amazon for all the old boxes in my house). You want to make a "book" that is a little bigger when folded than the envelope you'll be printing. Use one of the existing creases on the box to make your book fold.
Cover the inside of the cardboard book with packing tape. This prevents the paint from seeping into the card. We'll always be working with the inside of the book.
Step 2: Mark Envelope
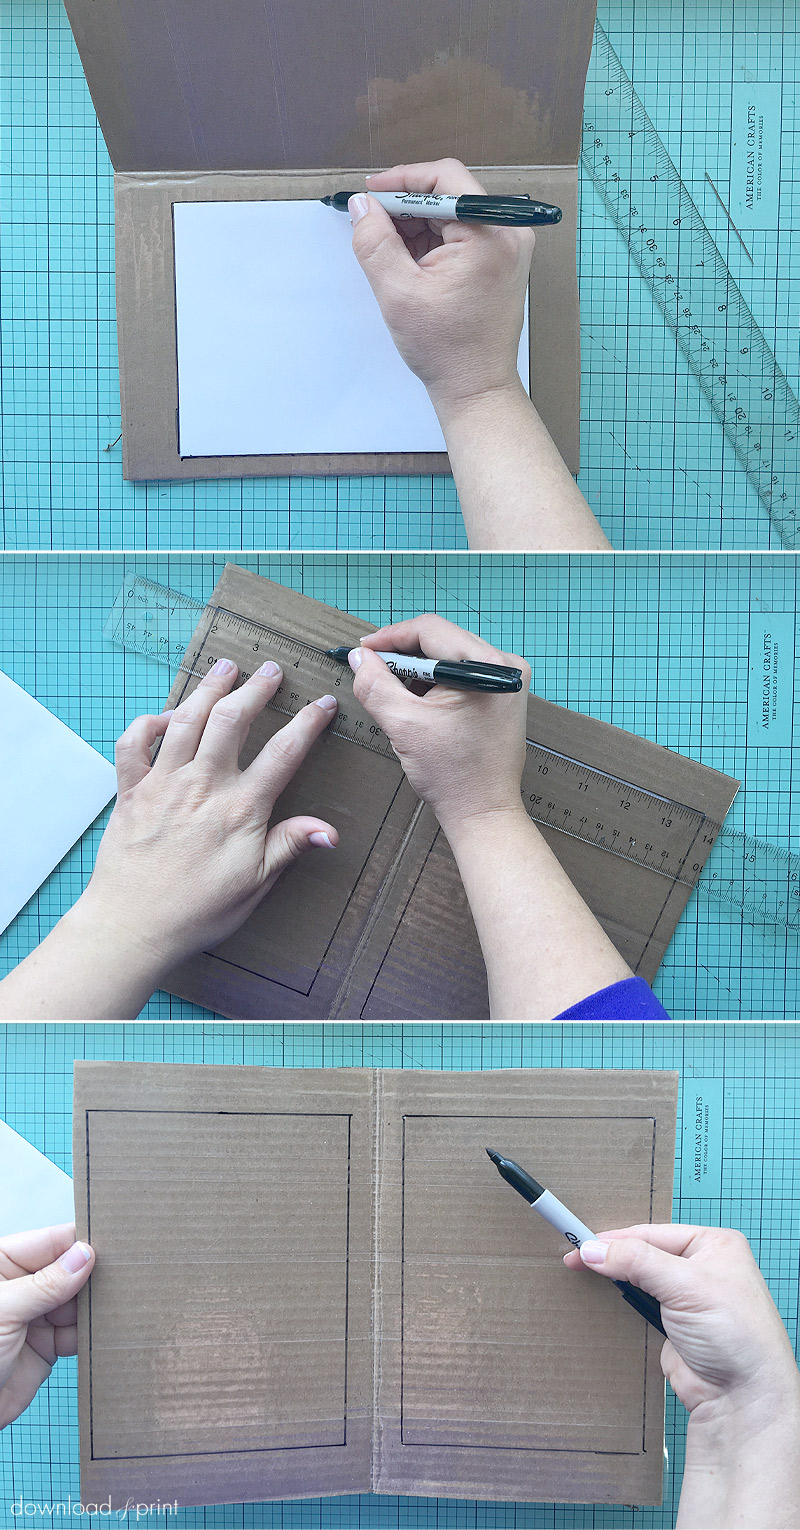
Roughly center an envelope on one side of the book and trace around it using permanent marker.
Mirror the tracing on the opposite side of the cardboard book by using a ruler to measure and draw another envelope outline.
Step 3: Create Design
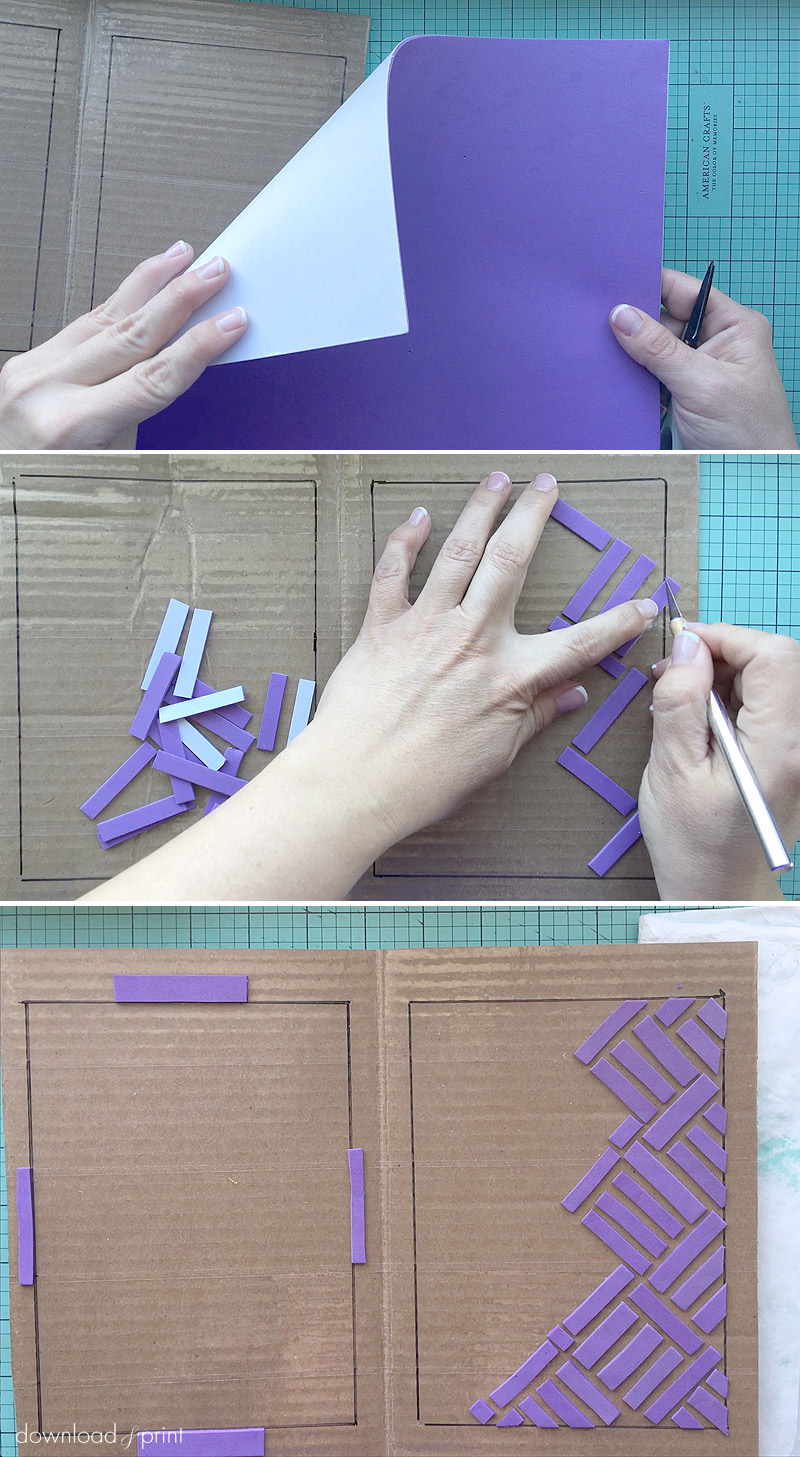
Create your design on one of the traced envelopes. Cut craft foam with an X-acto knife and stick in place
Pro tip: Chunky shapes will look best, this printing method does not work well with intricate designs.
Also place a piece of craft foam along each edge of the opposite envelope. These will be your guides and used to hold the envelope in place during printing.
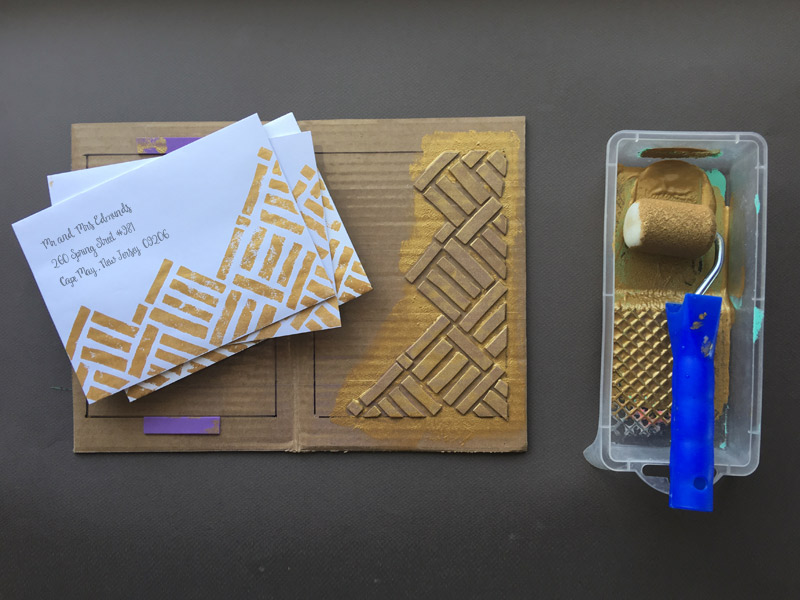
Step 4: Ink & Print
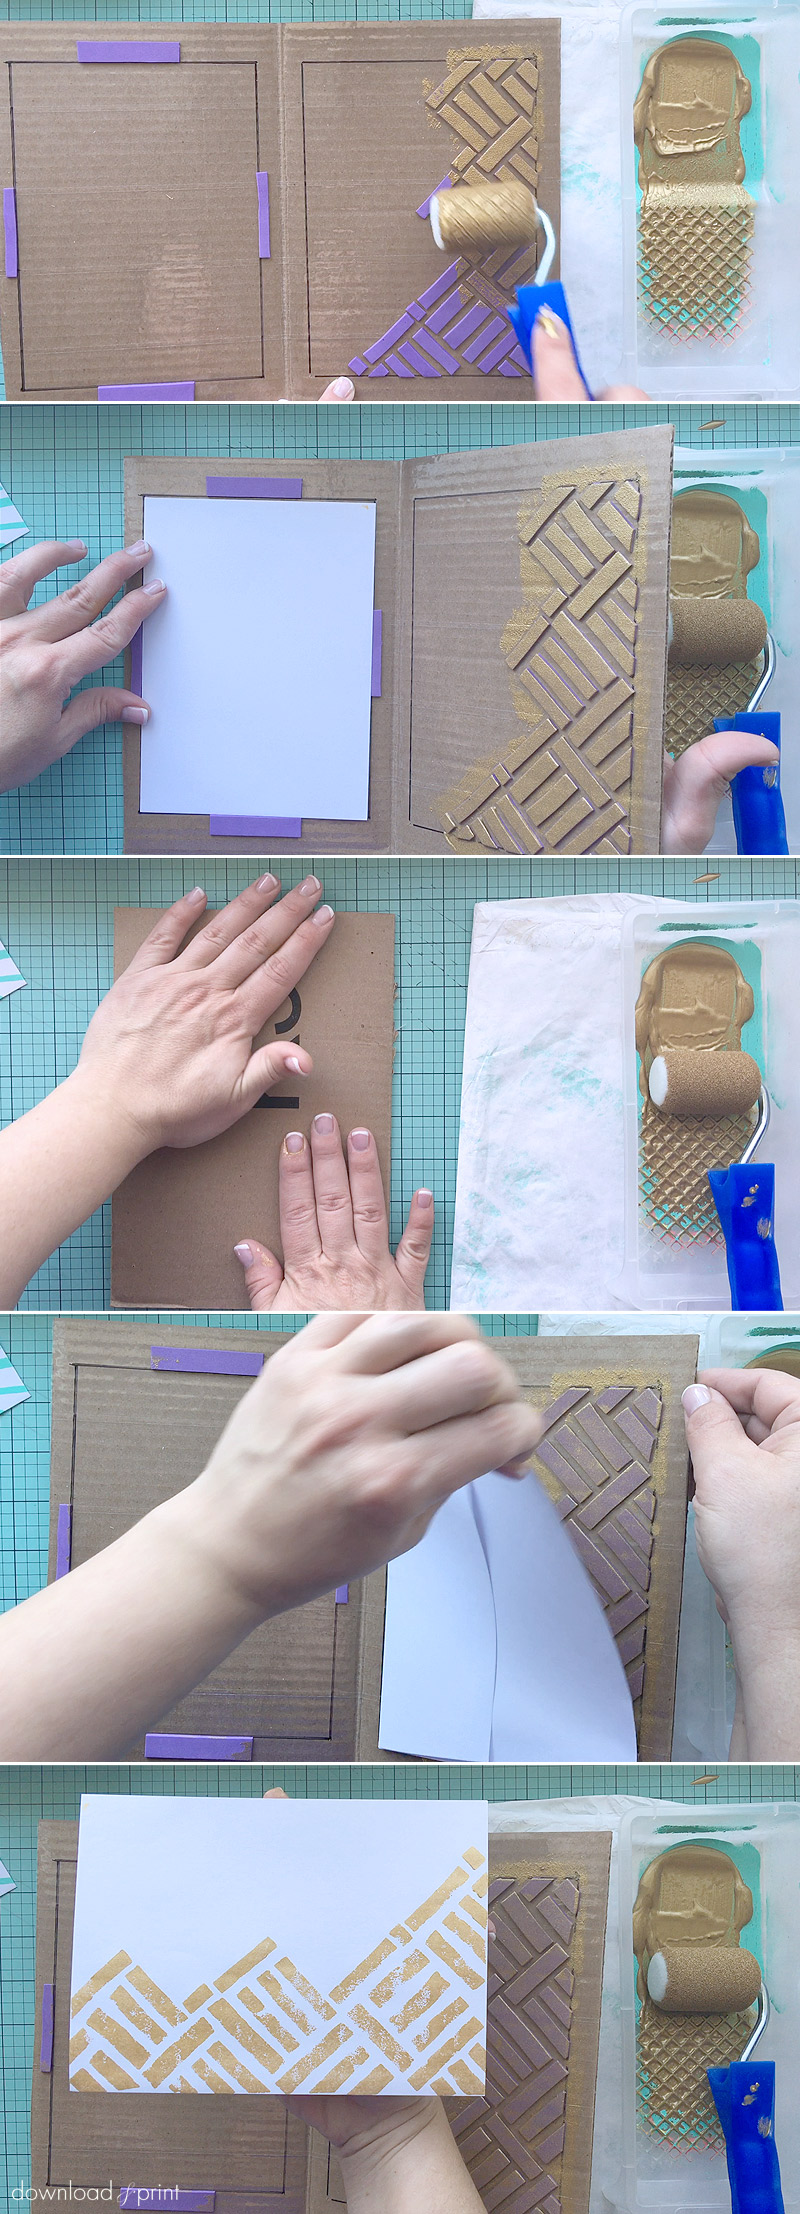
Now for the fun part! Ink up your foam roller with acrylic paint and roll over your craft foam design.
Place an envelope between the guides on the opposite side making sure it faces in the right direction. Close the cardboard book, pressing down firmly over the entire surface.
Open the book and remove the envelope. Voila! Instant pizzazz.
With template love,

(Although all the products listed in this tutorial are products I personally use, I will be compensated just a tiny bit if you make a purchase through some of the links provided. Thanks for supporting small biz!)