
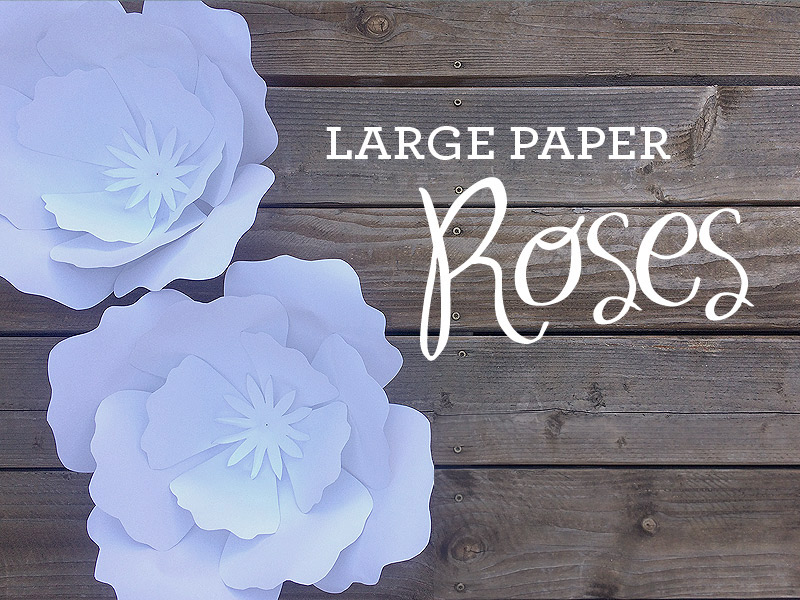
Weddings and roses go hand in hand.
If you are planning a DIY wedding I'm going to show you how to make roses. I know, I know... you're thinking 'but doesn't nature make roses??'. Stay with me.
For a spin on wedding roses try super-sizing them... out of paper. Giant roses however, don't have to go hand in hand with giant weddings. Just the opposite is true. Making your own giant paper roses is an economical way to add flowers to your wedding, and with the sheer scale of them, they are sure to be a talking point.
The giant paper roses in this tutorial will look amazing with almost any wedding theme. Even if you haven't picked roses as one of your wedding flowers, a wall of giant paper roses will still make a show-stopping backdrop for a photo booth.
You can make the rose in any color. I've gone with an elegant and understated (if you can call 20" roses understated) white on white. But you can liven things up with pops of bright colors, use a contrasting color center, and just have fun with these.
Scroll to the bottom for some gorgeous ideas on how to use giant flowers, thanks to my dear friend Pinterest. A single giant rose would make an eye catching centerpiece, have your flower girls carry a single giant bloom, use them to decorate the alter, there are any number of ways to use these. And did I mention how economical these are if you make them yourself? You just need paper and tape, so go crazy and put enormous flowers everywhere!
SUPPLIES:
- Card stock in any color (either US Letter or A4), I used 65lbs
- Glue
- Scissors
- Printable Template
Step 1: Download, Print and Cut Template
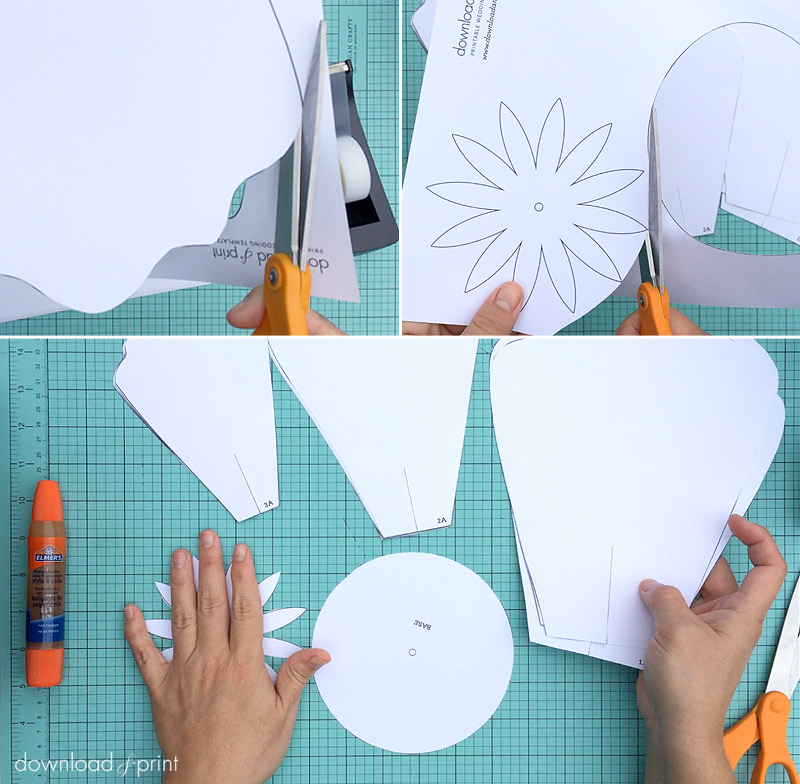
Print off the free petal template, it's a 13 page document so make sure you have enough paper in your printer. You'll want to use paper that's heavier than standard copy paper, any weight up to 90lbs should work in your home printer without jamming, and you can use any color. Even consider printing the center stamen in yellow to contrast with the petals. Cut around the petals and along the line at the base.
Cut out the petals, the stamen and the base.
HINT #1: When cutting the circle for the base, keep your scissors still and turn the paper.
HINT #2: When cutting the stamen, first cut a circle using the edge of each long finger as the edge of your circle (cut close, you'll want to touch each long bit). Then cut V's in toward the center to finish the cut. This will give you crisp V's and make your life a whole lot easier.
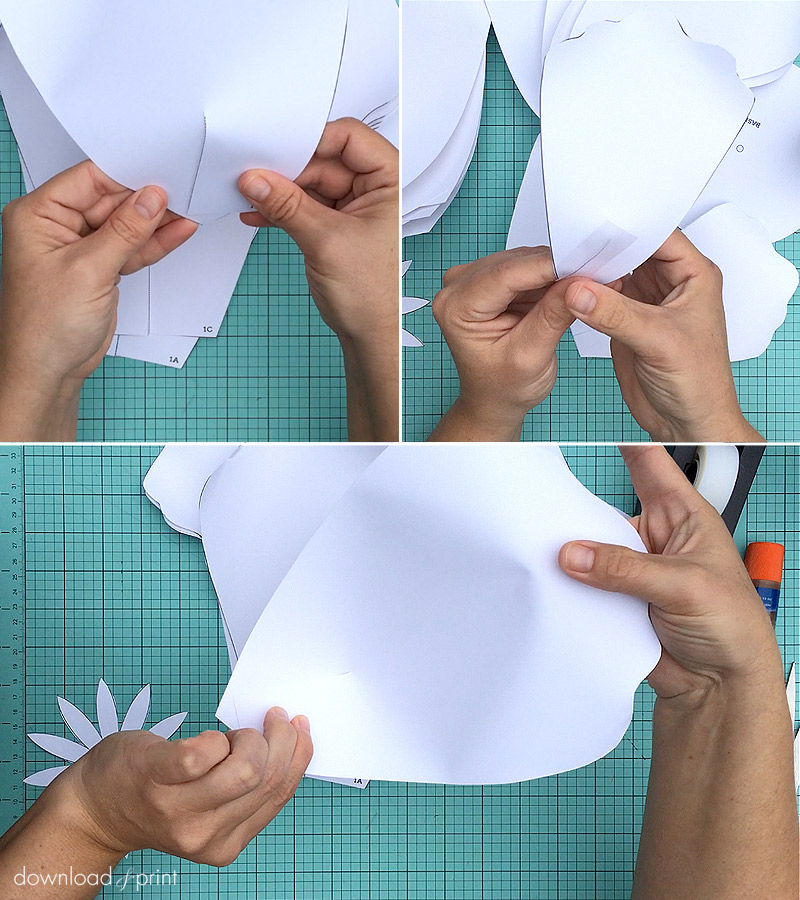
Step 2: Shape Petals
Make three stacks of petals according to their size, printed side up. Find something you can roll the petals around. I used my glue stick. You don't want to create tight curls, so a pencil will be too narrow, but something about a 1/2" in diameter will work well.
Curl the tip of the petal stack around your rolling tool, rolling about 2" of the petal tips. Move to the left of the tip and the right of the tip and repeat the roll. You are aiming to curl the petal tip from different angles to give it a more realistic look.
Curl each stack of petals, always toward the printed side.
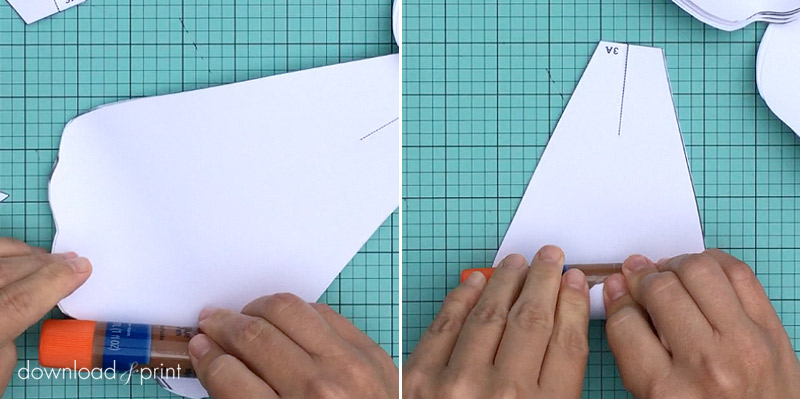
Step 3: Tape Petals
Cross over the two flaps at the base of each petal, and secure with tape on the printed side. You'll end up making a V at the base of the petals. Try to keep this V the same size and shape on each petal. You'll end up making an S curve on the petal because of the curls you created in the last step.
Each petal should have the same S curve, with the petal tips curling down.
Step 4: Attach Petals
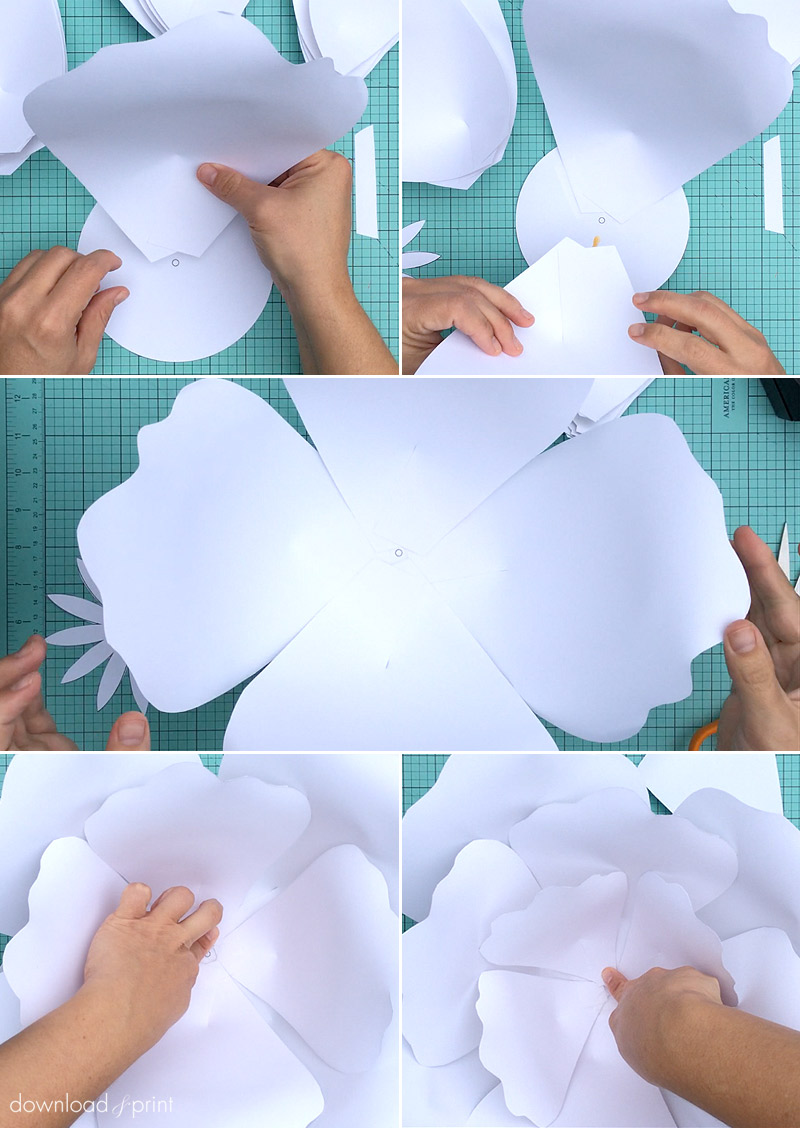
Now lets start creating a flower from these random pieces of paper!
Lay the circle base down with the center circle up. The center circle is your guide which you'll use to lay the petals around.
Start with the biggest petals. Attach one large petal to the base using glue or tape, or a combination of both. On the first layer I like to put down a strip of glue on the base, then reinforce by tapping down the petal. You won't see the tape as more petals are going on top. You can also use a glue gun.
When you place the first petal remember to hug the center circle guide. Place the second petal opposite the first, also hugging the center circle. Then fill in either side with the two remaining petals.
Move onto the medium petals. These should be placed to hug the center circle, and also centered over two larger petals. You want to hide the join between two large petals. The second medium petal should be placed opposite the first, then fill in the sides just like on the large layer.
The small petal layer should start between two medium petals, hiding the join. Then go opposite and fill in the sides. Don't worry about tape showing as the stamen will hide this.
Always place the petals printed side down, they should have the same curve with the tips curling down.
Now your flower is really starting to take shape!
Step 5: Finish with the stamen
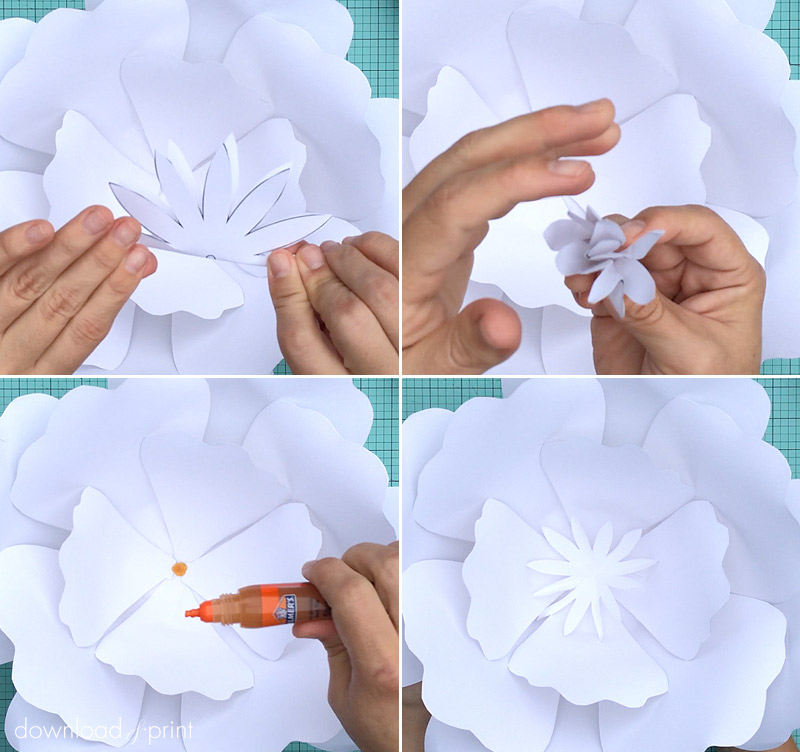
The last step is to attach the stamen. Before adhering this I like to crumple it up a little to give it a more realistic finish. Fold the stamen in half then unfold, fold it in half the other way then unfold. Keep folding and creating creases until you are happy with the effect. Don't go for perfection!
Place a dot of glue in the center of the flower and stick down the stamen. Now go oooooh... so pretty!
If you plan on making multiple flowers to create a photo backdrop or other decorative element, grab your maids and make a fun night of it. Cut all the petals first and arrange them according to size. Curl them and shape them, then start assembling. If you use the production line method things will move along quickly.
And now for some pretty pictures to get you inspired. Thanks Pinterest!
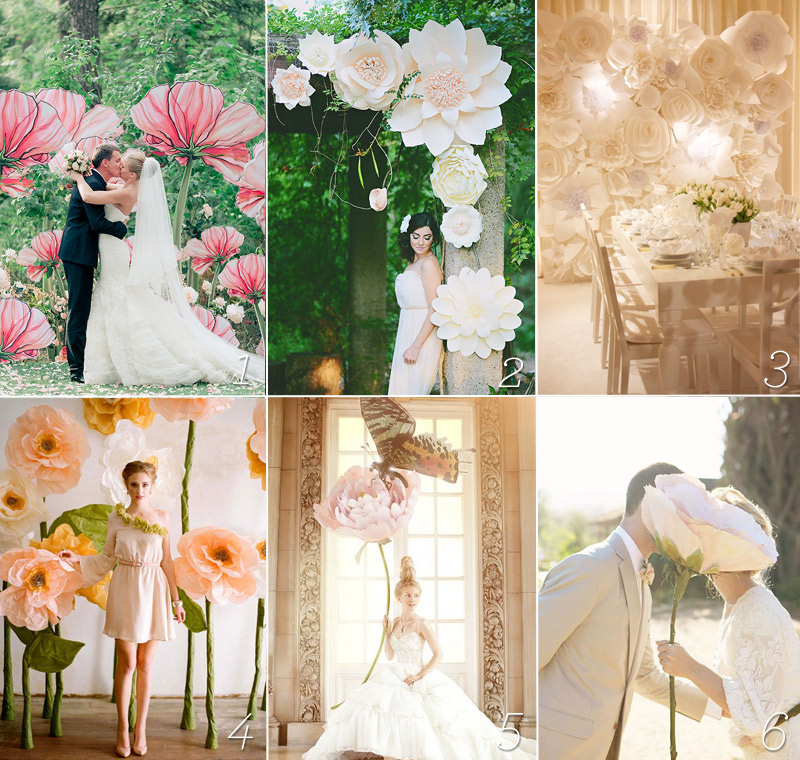
1. Hey Wedding Lady | 2. 100 Layer Cake | 3. Intimate Weddings |4. Maven Bride | 5. Storyboard Wedding | 6. via Pinterest
YOU MAY ALSO LIKE THESE WEDDING DIYS:
Watercolor Flowers Invitation
View Tutorial
Tissue Paper Floral Letters
View Tutorial
Envelope to Pocket Invitation
View Tutorial
With template love,

(Although all the products listed in this tutorial are products I personally use, I will be compensated just a tiny bit if you make a purchase through some of the links provided. Thanks for supporting small biz!)