
I feel like it's time to throw in a masculine project. With all the bows, lace, and gilding of late I'm not doing justice to half the engaged couples out there (that is the soon-to-be-grooms).
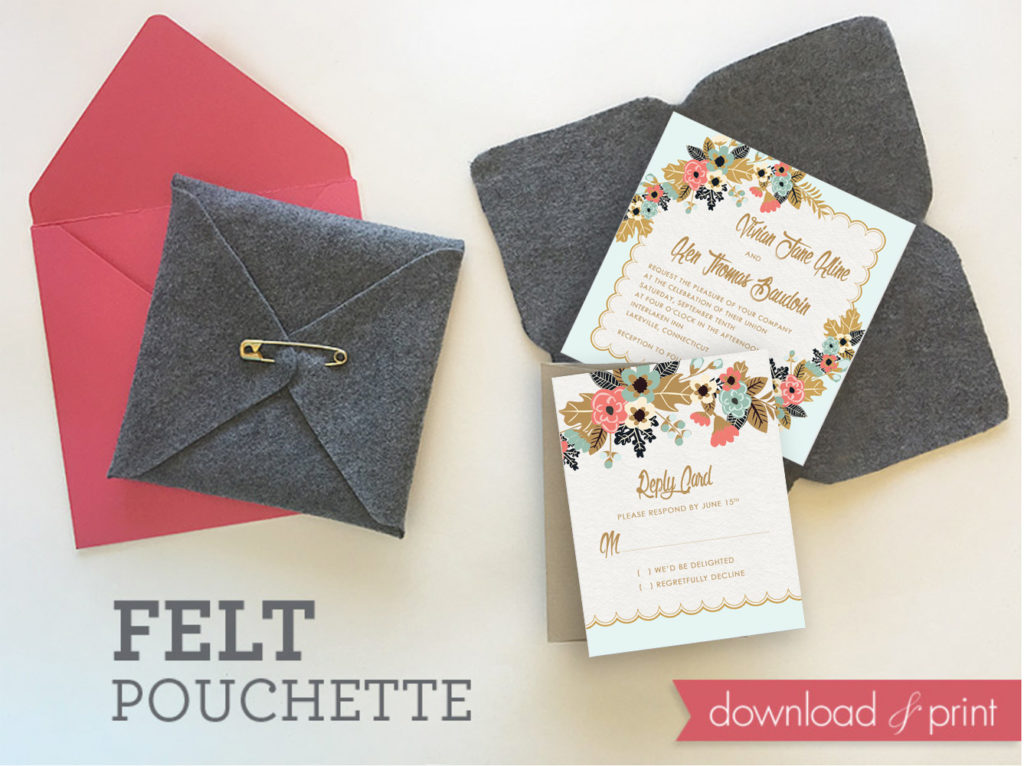
I've come up with a felt pouch to wrap your invitation loveliness in. I chose to go with an industrial look... steel gray pouch and brass safety pin. I like the surprising contrast between the androgynous pouch and the pretty vintage blooms on the invitation.
As a bonus to you the pouchette template is FREE. Score! I figured out how to create a printable for the pouch on standard size paper. You will need a sheet of 12 x 12" scrapbook card to trace the full template onto, but this doesn't have to go through your printer.
If the industrial look isn't for you I'm betting the felt pouch would look fabulous in citrus colors with a contrasting bright ribbon tied around. Is anyone else thinking pineapple motif?? Or a white pouch with a silver or red embellishment would be so fitting for a winter wedding. Like a warm sweater for your invitation.
I digress...
If you dig the look I've chosen, check out our amazing design invitation collections. There are so many options that would look great with this felted pouchette.
SUPPLIES:Download Free Pouch Template
- 12 x 12" card stock
- Felt
- 3" brass safety pin
- Scissors
- Sharpie
- Printer - I like Epson printers
- 5.25" square invitation
- 6" square envelope
Step 1: Download, Print + Trim
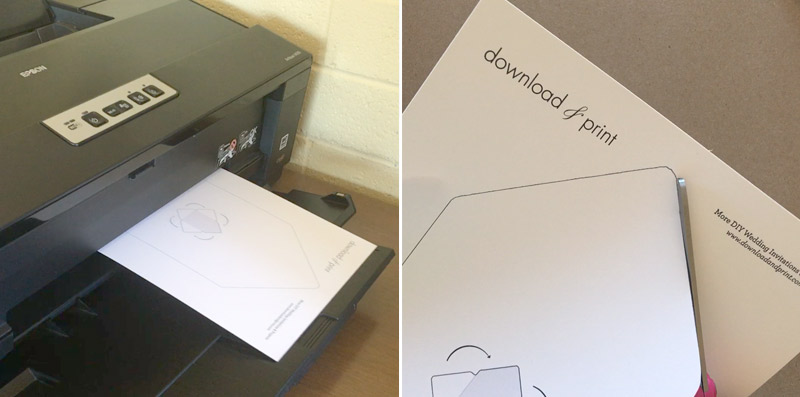
Download the free pouchette template using the big green button below, and print on regular paper. Cut it out.
Step 2: Create Template
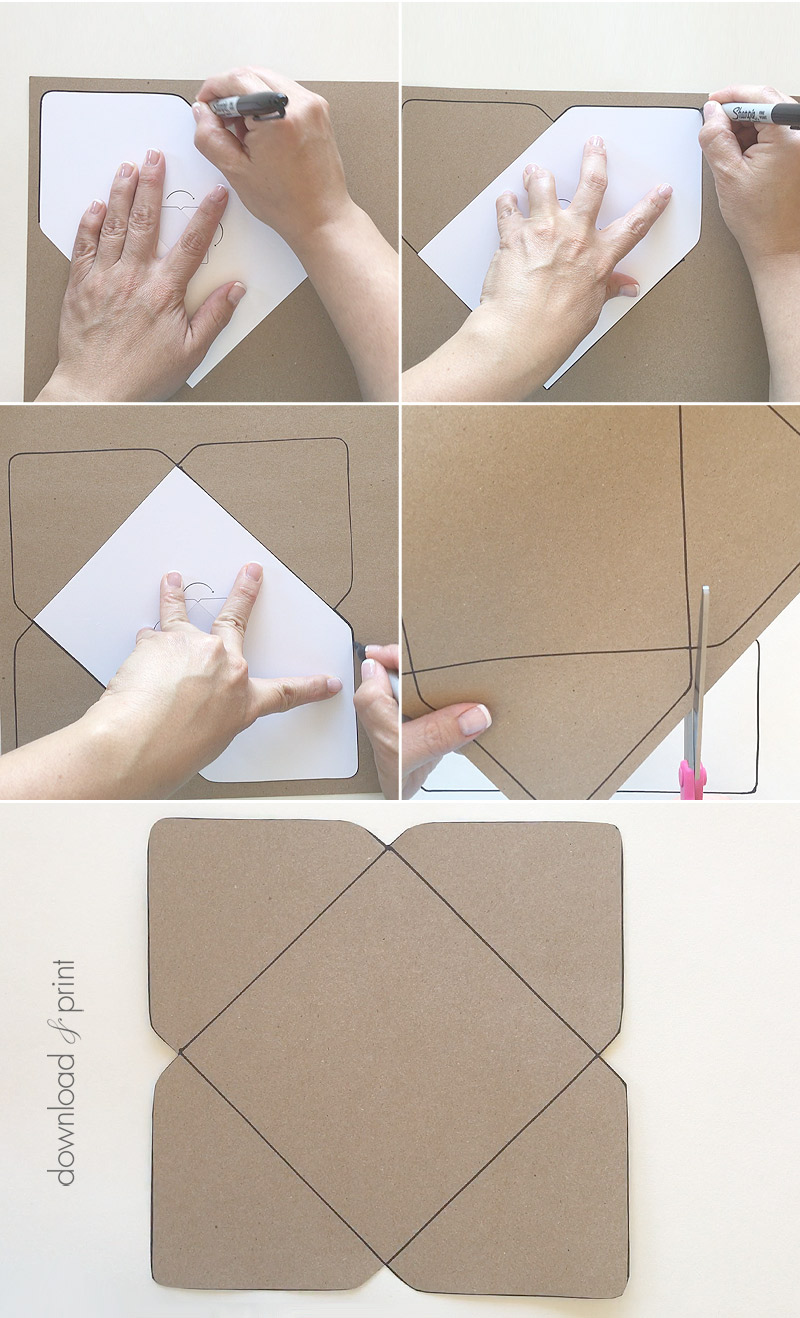
Trace the pouchette template onto 12 x 12" card stock (this is found in the scrapbook section at your craft store). The point on the template should fit into the corner of your paper.
Rotate the template 90 degrees and trace again. The lower edge of the template should butt up against a line you just drew.
Repeat two more times, rotating the template 90 degrees each time.
You should end up with a large square with notches half way along each side. Cut this out.
Step 3: Trace onto Felt
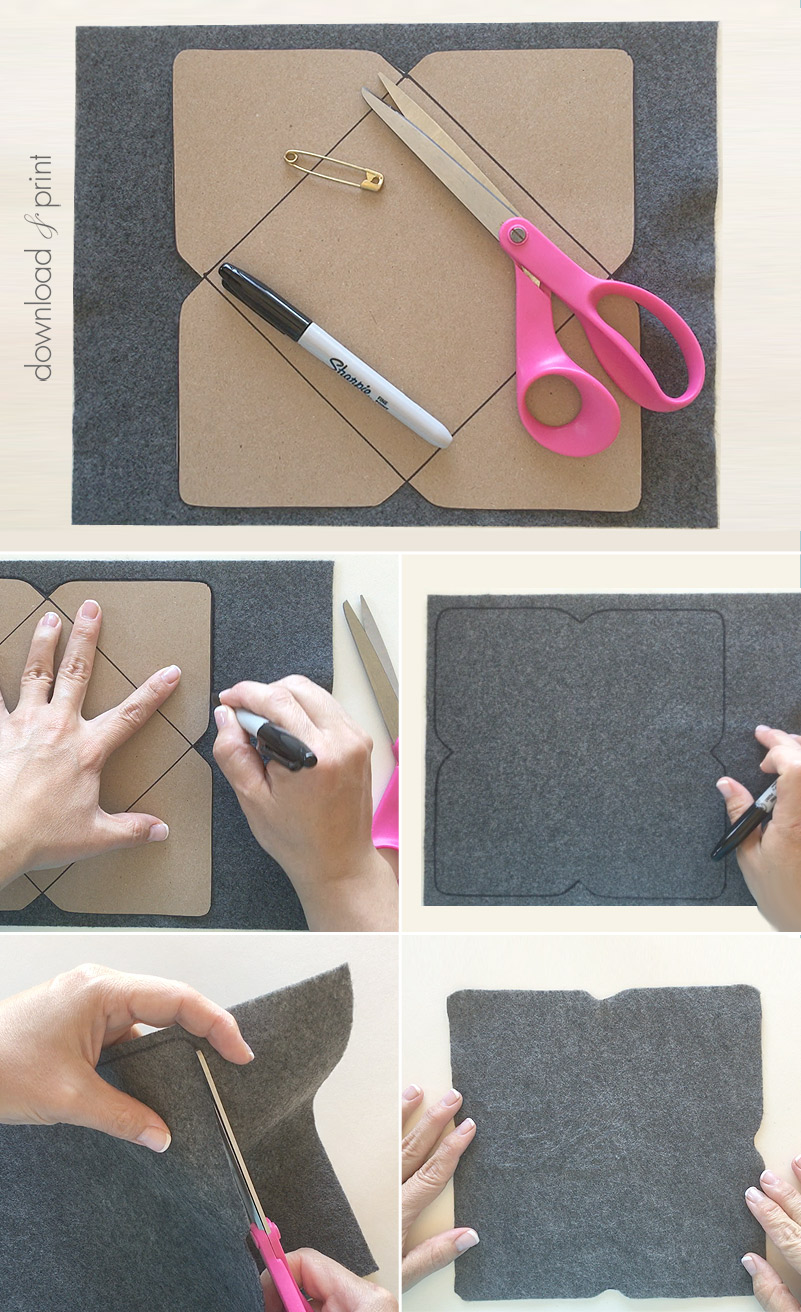
Trace the template onto your felt using a sharpie and cut it out.
Step 4: Assemble + Close
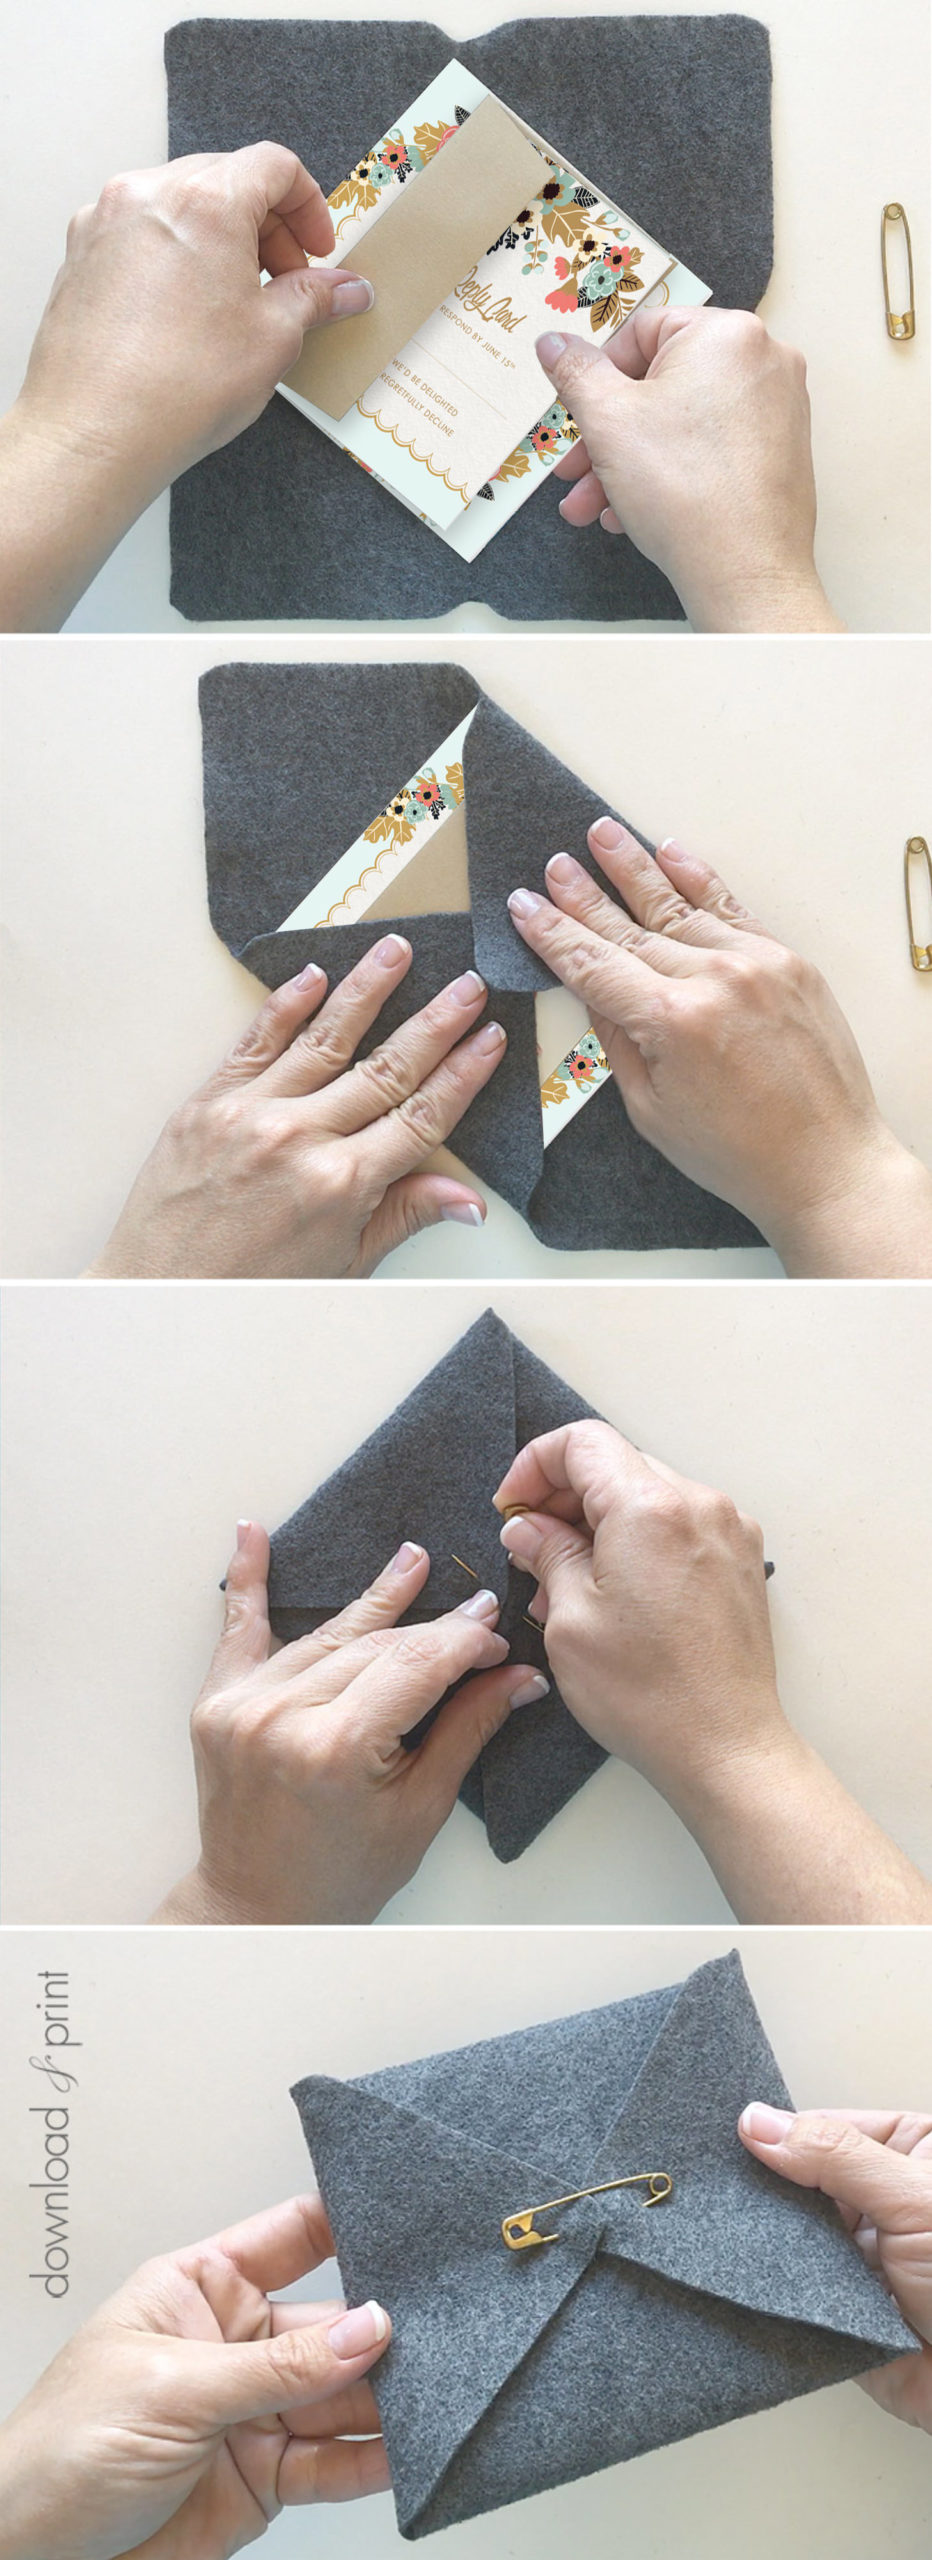
Place a 5.5" square invitation onto the pouchette on the diagonal. Include your RSVP card and return envelope, and any other enclosure cards you are mailing out.
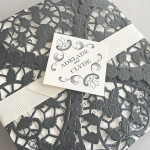
Fold two opposite flaps in from the pouchette.
Fold the remaining two flaps in and use a brass pin to seal the pouch shut. You can also tie a ribbon around the pouch to keep it closed or use a more decorative pin if the industrial look doesn't tie in with your theme.
I'm using templates from our Artisan Botanical invitation collection. I like the contrast of the androgynous pouch with the bright blooms on the inside. I added another pop of color with the outer mailing envelope to contrast again with the felt. I'd love to hear what color combinations you come up with. Let me know in the comments.
View our invitation collection >
YOU MAY ALSO LIKE:
Vintage Iron & Lace Doily Invitation Pouch
View Tutorial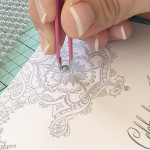
Elegant Pearl Encrusted Lace Wedding Invitation
View Tutorial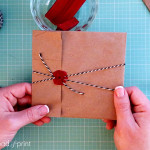
Vintage Parcel Invitation wrap
View Tutorial
With template love,

(Although all the products listed in this tutorial are products I personally use, I will be compensated just a tiny bit if you make a purchase through some of the links provided. Thanks for supporting small biz!)