
Go big or go home came to mind when Jessica Bishop sent across her latest design for the Budget Savvy Bride Collection at Download & Print. The Joanna collection is full of big, bold stripes. Stripes are such a timeless pattern yet when paired with bright pops of color or metallic accents you get something that feels modern and fresh. The Joanna bundle comes in three classic colors: Black, Navy and Gray, and each bundle includes 16 coordinating templates to carry the theme from your save-the-date, to reception seating charts, table numbers, and place cards. Leave as is, or add those pops of color through bright envelopes and embellishments. Tie in the stripes on your paper goods to a striped ribbon around your bouquet, or go really bold and have your girls wear stripes.
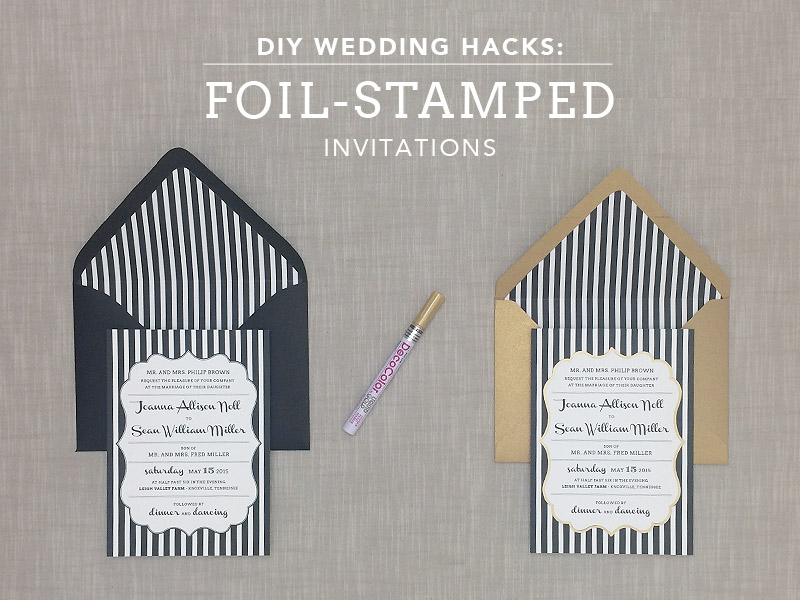
Today I'm going to show you a super simple trick to add gold metallic accents through a faux foil technique. The black and white stripes look so chic with a shimmering gold border. The only tool you'll need is paint pen. You don't even need a steady hand, I promise. The video tutorial shows you just how quickly you can add the foil-stamped border, or continue below for the pictorial.
SUPPLIES:View the Template Collection
- Printable templates
- MS Word or Mac Pages
- Printer
- Deco Color fine tip liquid gold paint pen
- A7 antique gold stardream envelopes
- 8.5 x 11" white card stock
- Paper cutter or scissors
Step 1: Download & Customize
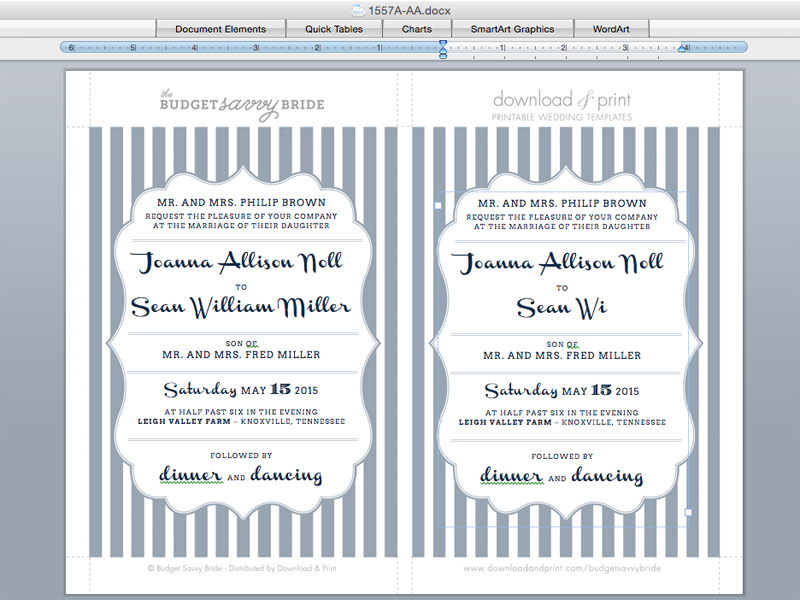
Download the Joanna invitation file and save it to your computer. The design comes in three classic colors: Black, Navy and Gray. Select a color and open the template in MS Word or Pages.
This faux foil technique will work on any template in our collection, so if bold stripes aren't your thing let yourself loose in our invitation catalog and find the design that perfectly describes your wedding day.
If you choose to use the Joanna invitation, download and install our recommended font pairings. You will need to download and install the fonts on your computer before starting work on the template. We chose the fonts Arvo, Channel and Ecuyer DAX, so get these installed on your computer then open Word and the template.
Add your names and wedding details. The text formatting can be changed. All the text can be customized and the divider lines can be moved or deleted, so make the template suit your needs.
TIP: Print one copy and check for spelling, formatting and grammatical issues. Double check the dates! Have your fiancé check the invitation, and your mother, and mother-in-law, and anyone else you trust. You don’t want to print a silly mistake!
Step 2: Print & Trim
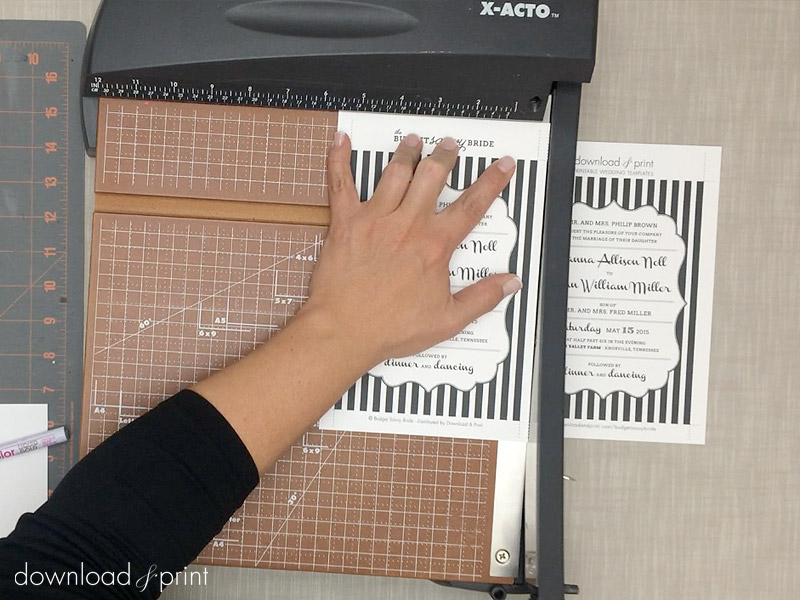
Print the invitation on 8.5 x 11” card stock. We like paper between 65 lbs and 90 lbs as most home printers can handle this paper weight. If you want to use heavier paper do a test print first, you may find you’ll need to make duplications at your local copy shop.
The good news is if you choose to print at a copy shop the invitation I’m using is a black and white file. Hello cheap copies!
The invitation prints two per page. Trim the invitations along the dotted lines using a paper cutter or scissors.
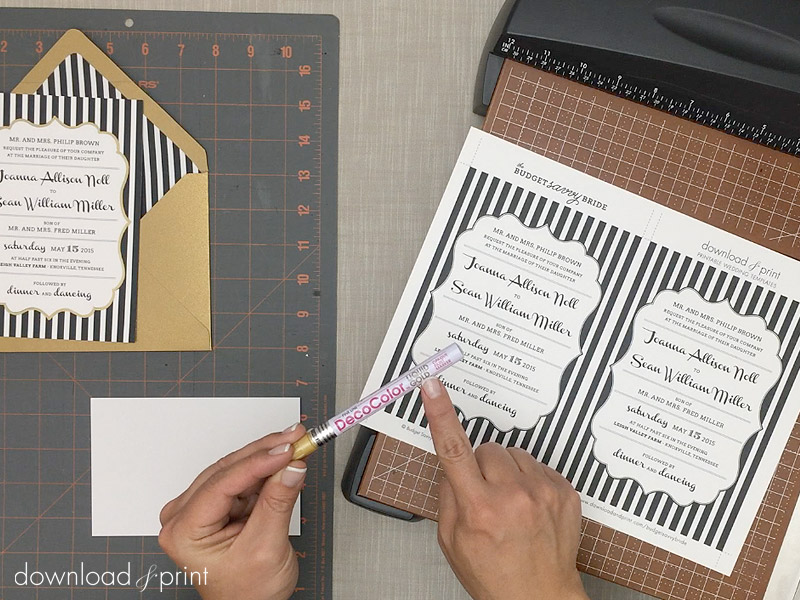
Step 3: Test the Paint Pen
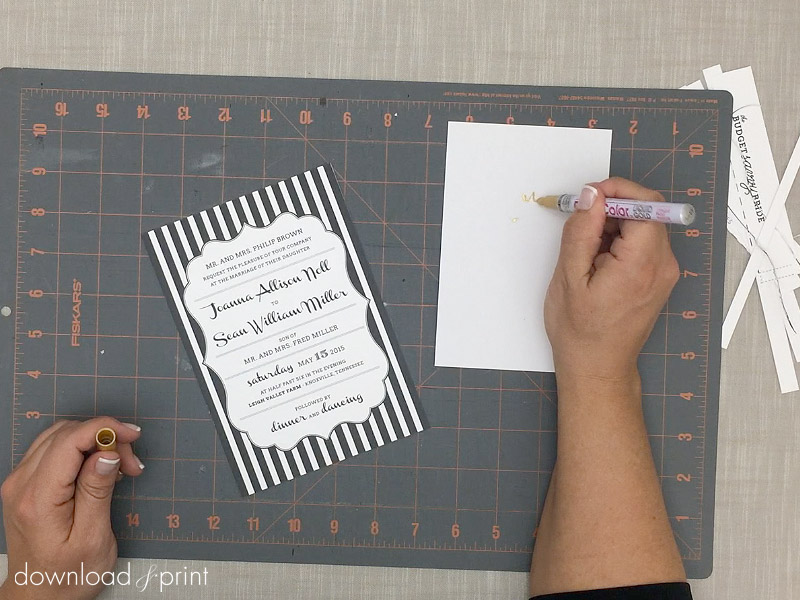
If you are using a brand new paint pen or the pen hasn’t been used in a while, get the paint flowing by dabbing the tip a few times on a scrap sheet of paper.
Step 4: Add Faux Foil
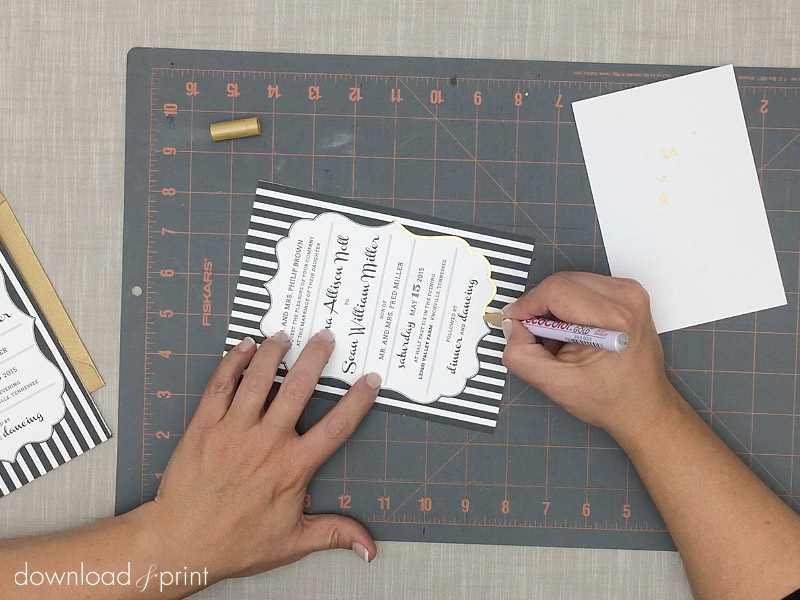
Trace along the scalloped border using the gold paint pen. Don’t be daunted by this, it’s easier than you think. Paint small sections at a time. On the Joanna invitation it’s best to trace from one point to the next, lift the pen up before moving on to the next small section. This doesn’t have to be perfect. Your guests will focus on the overall look and feel of the invitation and will hardly notice that your were a little wobbly in the lower left corner!
Step 5: Stuff & Send
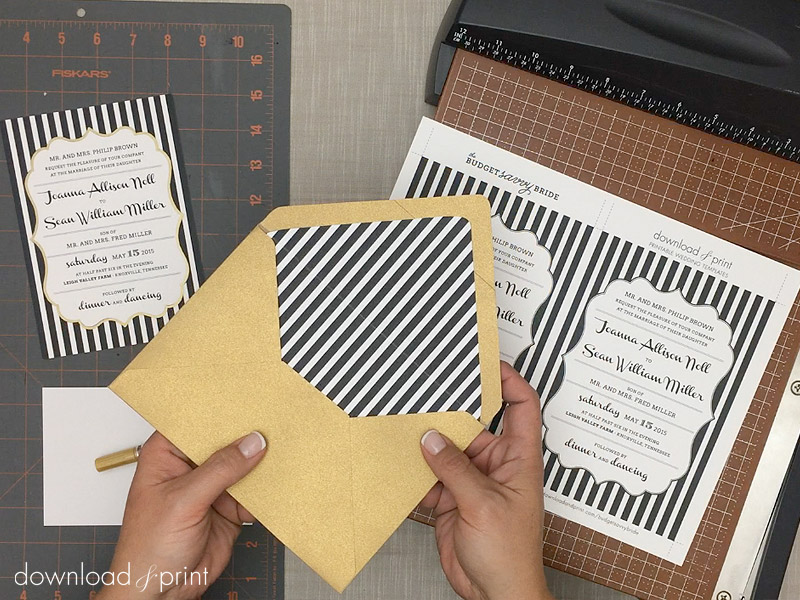
Let the faux foil paint dry for 24 hours. It’s dry to the touch after about 5 minutes, but I feel comfortable giving your gorgeous invitations ample drying time before sending through the rigors of the mail system. Stuff the invitation into an A7 envelope and say bon voyage.
I paired the black and white stripes with an antique gold envelope to coordinate with the gold faux foil. I find it so modern yet classy. I’ve dressed up the envelope with the coordinating Joanna envelope liner, and will stuff in the matching Joanna enclosure card and RSVP. All the pieces plus many more can be found in the Joanna bundle.
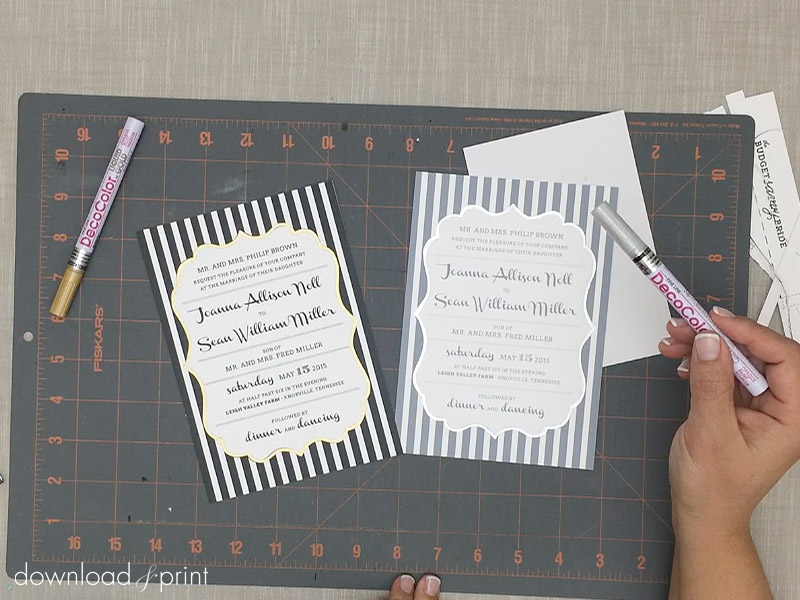
If gold doesn’t coordinate with your wedding color palette the paint pen also comes in silver, which I think pairs wonderfully with the Joanna stripes in gray.
Now you can have your cake and eat it too. Or at least love luscious metallic accents and not have to spend the Earth to get them!
(Although all the products listed in this tutorial are products I personally use, I will be compensated if you make a purchase through some of the links provided.)