
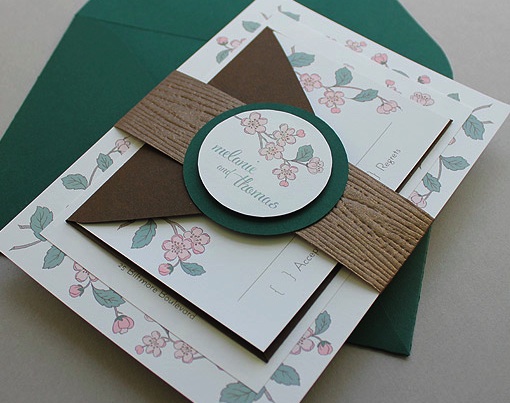
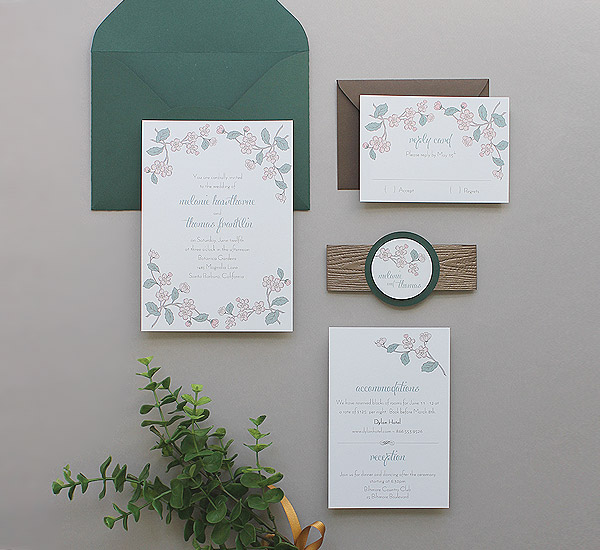
If you are a Spring bride, sending out your invitations is going to be pretty high on your to do list. Today I’m here to help you cross that task off your list with a printable invitation set I call ‘Spring Branch’. The set includes a 5x7" invitation, RSVP card, and coordinating belly band and badge. There are a couple of optional embellishment steps that really make this set stand out, but if you are tight on time (or craft motivation!) feel free to skip these. The set would look lovely with many color envelopes and belly bands, so choose these according to your wedding colors. You’ll need to pick up some scrapbooking paper and download the templates. Ready? Then lets get started.
Supplies:
- Printable templates
- Color printer
- White or cream card stock (8.5 x 11")
- Wood grain scrapbooking card stock (as seen here) - cut into 12" x 1.5" strips
- A7 forest green envelope (as seen here) - for the invitation
- 4-bar envelope in chocolate (as seen here) - for the RSVP card
- 2.5" circle punch (as seen here)
- 2" circle punch (as seen here)
- Metallic gold Sharpie
- Scissors
- Paper trimmer - optional
- Double sided tape
- Craft foam (as seen here) - optional
Step 1: Download and Print

Download the template files, add your wedding details in MS Word, and print on white or cream card stock. The invitation template yields two invitations per sheet, the RSVP yields four per sheet, and the circles will print 16 per sheet. The script font used in the sample is Voluptate Script, and the information text is in Penna, both of which can be downloaded for free.
Step 2: Trim

Trim the invitation and RSVP card along the cut lines using your paper cutter or scissors.
Step 3: Embellish the Invitation
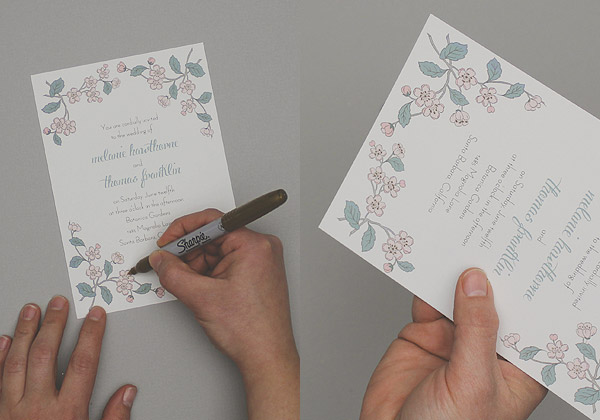
This is an optional step, but I think the result is worth the effort. Using a gold Sharpie, highlight the stamens on the flowers by dotting them with the Sharpie. This gives the flowers a lovely metallic sheen and makes the invitation look a little special.
Step 4: Cut out the Badges
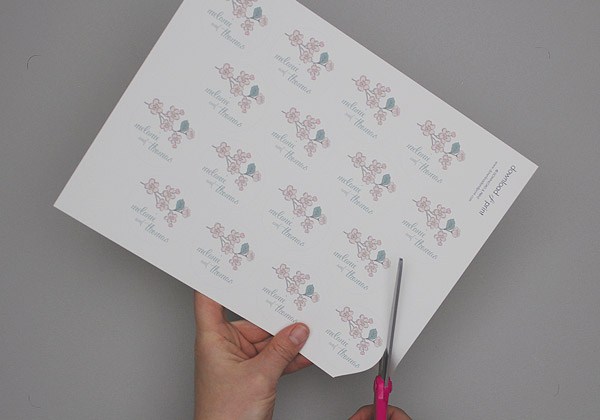
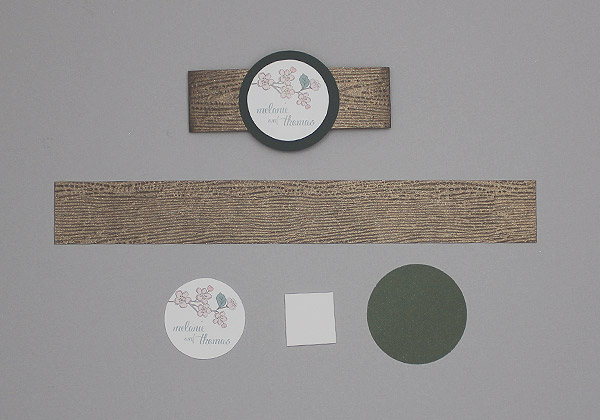
Circle punches will make this step soooo much easier for you. Punch out the floral badges using the 2” circle punch. Punch out coordinating circles from your green card stock using the 2.5” circle punch. If you decide to cut the circles with scissors, the trick to getting smooth round circles is to hold the scissors still and move the paper. Make long, sweeping cuts using the entire blade of your scissors rather than small snips.
Cut your craft foam in 1” squares.
You will end up with:
• Floral circle
• Green circle
• 12” x 1.5” wood grain strips
• Foam squares
Step 5: Assemble the Belly Band
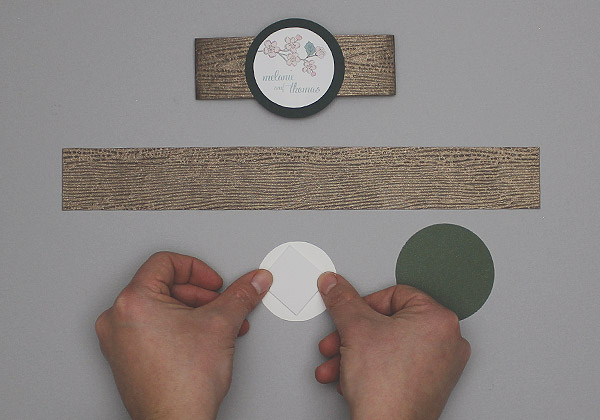
Attach a foam square to the back of a floral circle using double sided tape. Attach this to a green circle. Stick the circle badge to the middle of a strip of wood grain paper.
The foam is optional, you can just tape the floral circle to the green circle. However, the foam gives a little lift and dimension to the badge without adding weight, giving the set an added touch of professionalism.
Step 6: Assemble the Invitation Set
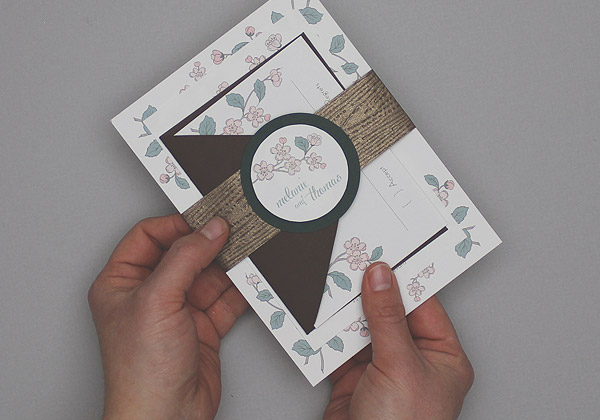
Layer all the pieces together, with the invitation on the bottom and RSVP and coordinating envelope on top. Wrap the belly band around the set and tape the band together at the back with double sided tape. The set is now ready for stuffing into your A7 envelope and mailing.