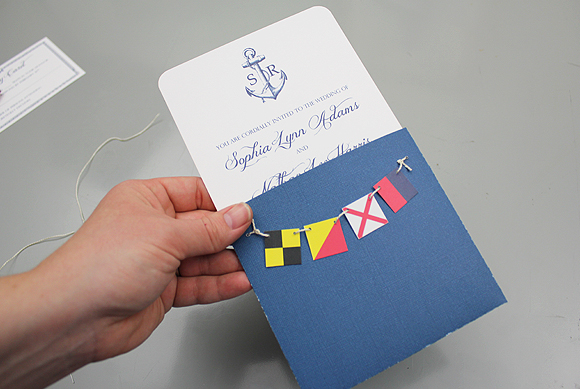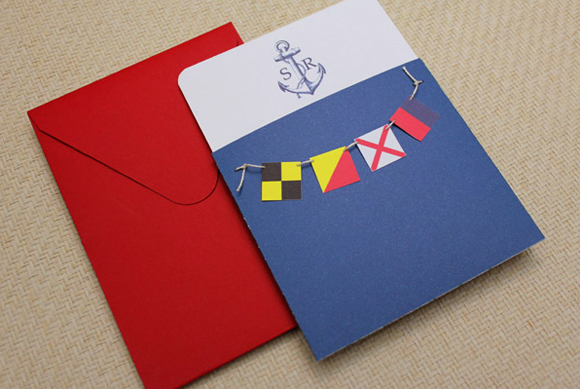
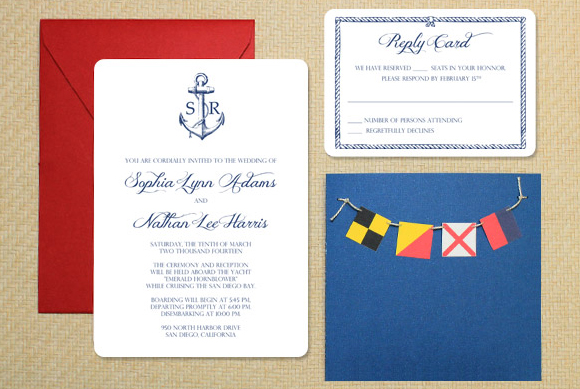
Hello thrifty, crafty, gorgeous brides! Today I have a nautical themed invitation and RSVP pocket set. The pocket has a maritime flag bunting stitched across the front, with the flags spelling out LOVE in nautical signal speak. Cute right. You can read more about nautical flags and signaling and where I got my inspiration from here. This set has a very polished look to it and when you follow the simple steps below you’ll see how easy it is to put together yourself. There are a few steps involved so it’s going to take you some time to put all your mailings together, but I think the end result is worth the effort. Plus you get to save a ton of cash by doing this yourself, without compromising on style.
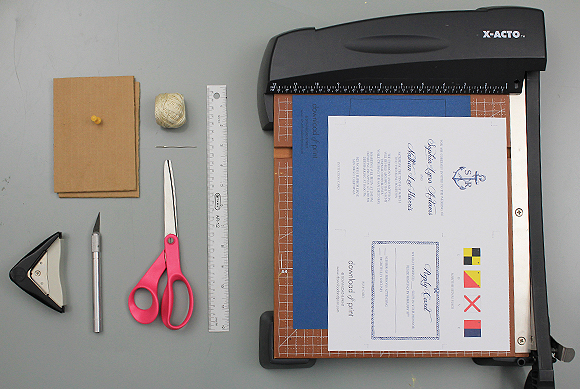
Supplies:
- Printable templates
- Color printer
- Navy and white card stock (8.5 x 11")
- Paper trimmer and scissors
- Ruler
- Scoring tool or X-acto knife
- Double sided tape
- Cotton twine
- Embroidery needle
- Push pin
- Cardboard
- Corner rounder (optional)
Step 1: Download and Print
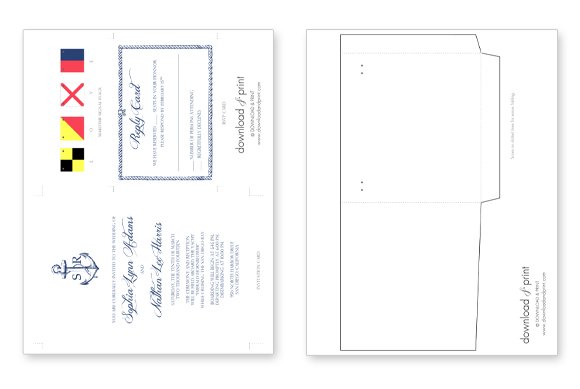
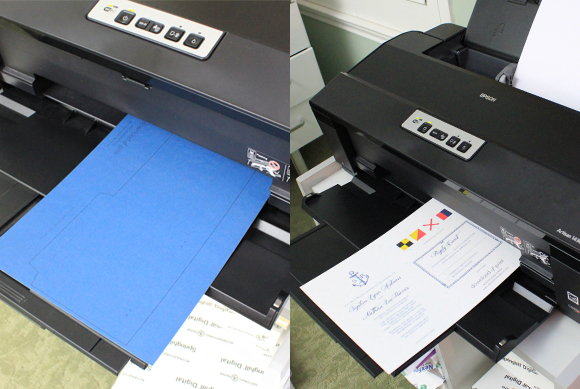
Download the template files, add your wedding details in MS Word, and print on card stock. The invitation, RSVP, and flags will open in MS Word. The pocket will open as a PDF. Print the pocket template on navy card, print the invitation, RSVP and flags on white. The script font used in the sample is Jellyka Delicious Cake which can be downloaded for free if you follow the link. The information text is in Perpetua Titling, which will already be loaded on your Mac or PC. Feel free to use any fonts of your choosing though.
Step 2: Trim
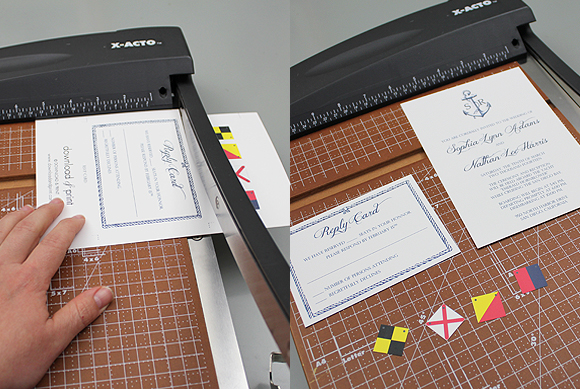
Cut out each piece using your paper trimmer or scissors. You will end up with the invitation, RSVP, four flags, and the blue pocket.
TIP: A paper cutter will produce straighter cuts and will be faster as you can cut more than one sheet at once, but regular old scissors will also do the trick.
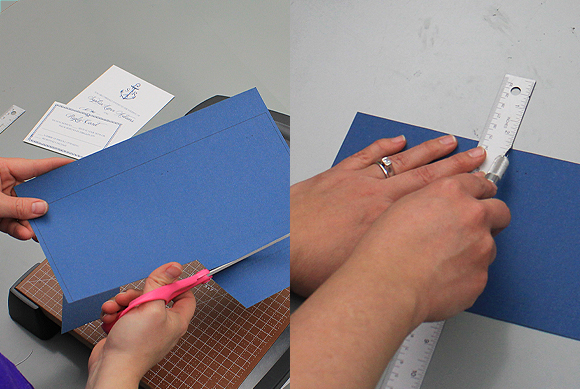
Score the pocket along the dotted lines using a scoring tool or the back of your X-acto knife. Be careful not to accidentally cut through!
Step 3: Punch Holes on the Flag and Pocket
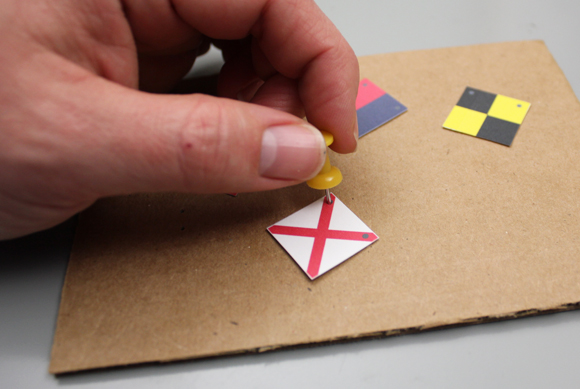
Using a push pin and a piece of cardboard as your work surface, punch holes in the flags on the marked dots. Do the same with the blue pocket. These holes will be used to thread the bunting.
Step 4: Thread the Bunting
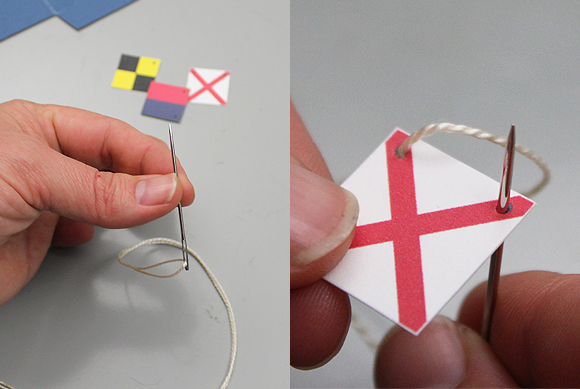
Now the fun begins. Thread your embroidery needled with the cotton twine and stitch the flags in L-O-V-E order.
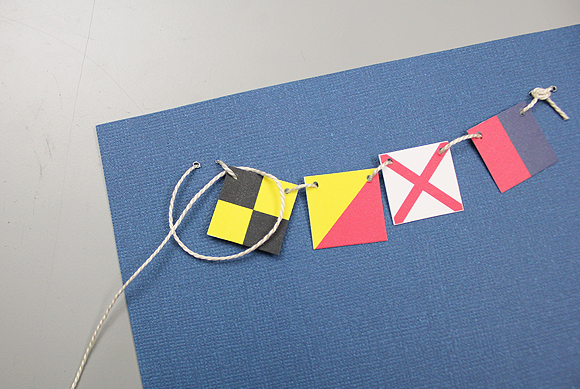
Step 5: Stitch the Flags to the Pocket
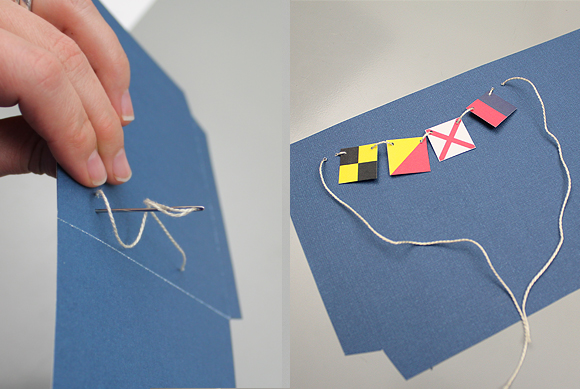
Stitch the flags to the pocket using your push pin holes as a guide. Tie off the twine toward the front of the invitation using a double square knot, and trim the twine tails.
Step 6: Seal the Pocket
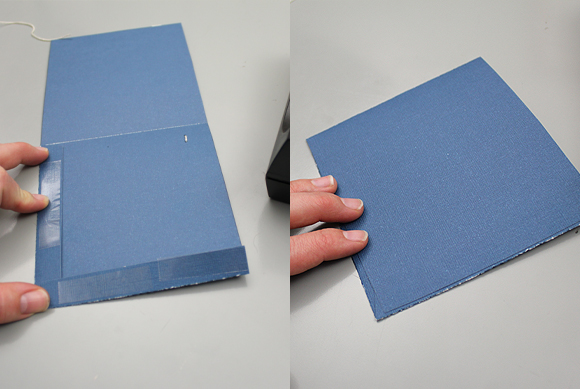
Fold the pocket flaps back along the score lines, run double sided tape down each flap, and fold the pocket over, pushing down firmly to secure the pocket in place.
Step 7: Round Corners
Optional step: If you have a corner rounder, round the corners of the invitation.
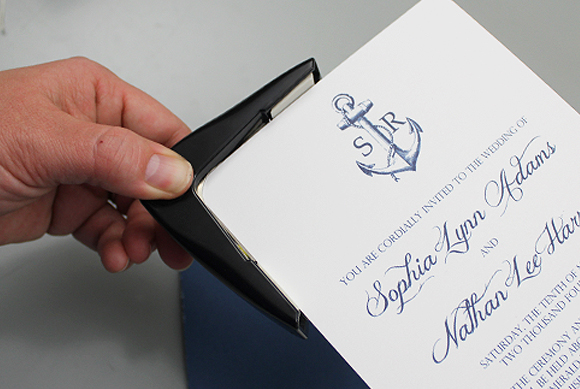
Insert the invitation and RSVP into the pocket and your set is ready for mailing.