
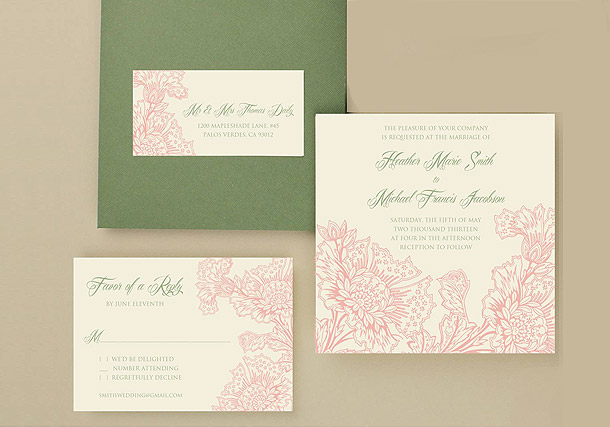
Hello D&Pers… Happy New Year to you all! I don't want to alarm you, but if you are planning a wedding for 2014, this is your wedding year! I'm starting the year off with a pretty printable that you can embellish with Tulip Beads. You may have seen this puffy paint on t-shirts, but I bet you never thought you could use it to make sophisticated invitations. Well I'm here to show you just how it's done. If you are short on time you can leave off the embellishments and simply download and print. I call the set Sophia Flowers, and I just love the pastel pink flowers and cream card together. So very romantic. Grab the free download and follow along with the steps below.
Supplies:
- Invitation and RSVP Template File
- Label File
- Card Stock in white or cream (I used cream)
- 5.75” square envelope for invitation (as seen here)
- 4-bar envelope for RSVP
- Printer
- Microsoft Word
- Scissors or paper cutter
- Gold Tulip Beads in a Bottle (optional)
- Avery labels , 2” x 4” (10 labels per sheet)
Step 1: Download and Customize
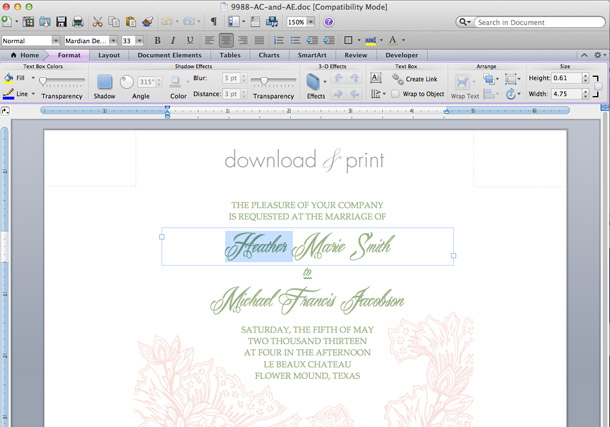
Download the invitation and RSVP, and label files and open in MS Word. The invitation and RSVP will download in one Word file, the address labels are a separate download. Customize with your wedding details.
The script font used in the template sample is Mardian, and the information text is Trajan Pro, both of which are available to download for free. If you do not have these fonts installed on your computer Word will substitute different fonts. You can pick any fonts that you like.
Step 2: Print and Trim
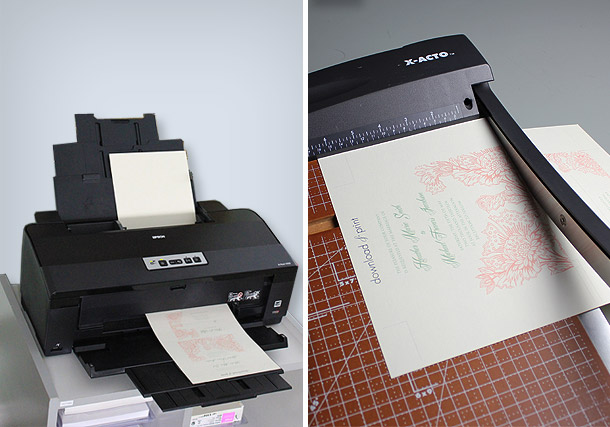
Print your files using your home color printer, take the files to a copy shop, or send them to an online printer (here’s my favorite online printer) for reproduction. If you use a copy shop be prepared with our print release showing that you have permission to reproduce the files.
TIP: If you choose to use a copy shop, print one copy at home and review the spelling, punctuation, and spacing. Have a second set of eyes look over your proof to be extra certain that everything is perfect before committing to printing all of your invitations.
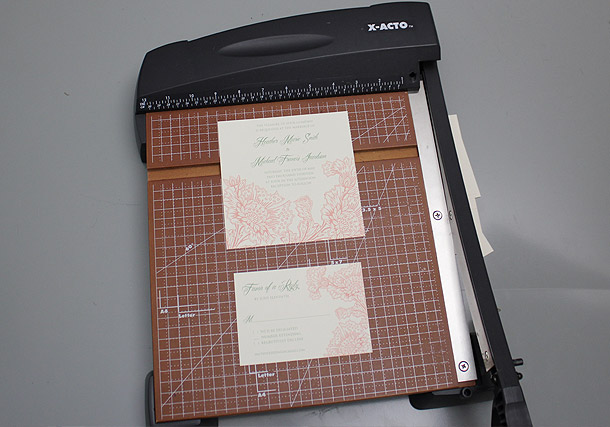
Cut the files along the trim lines using your paper cutter or scissors. A paper cutter will be faster and will produce a straighter edge, but scissors will work just fine too.
The invitations are now ready for stuffing and mailing, or keep reading and add a touch more pizzazz.
OPTIONAL Step 3: Embellish
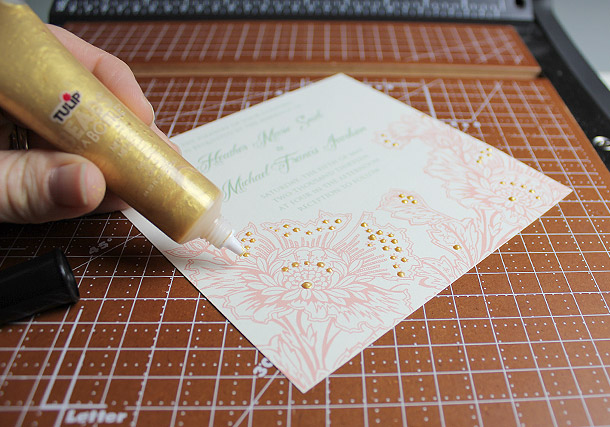
If you are feeling crafty and have some extra time on your hands, these invitations look wonderful embellished with Tulip Beads in a Bottle. The beads are available online and at your local craft store. I used beads in gold. They are super easy to use, just dab the tip of the bottle to your invitation to highlight areas of the floral design. Try not to overdo it with the beads, this is a case where less is more. Leave the invitation to dry for at least an hour before touching it.
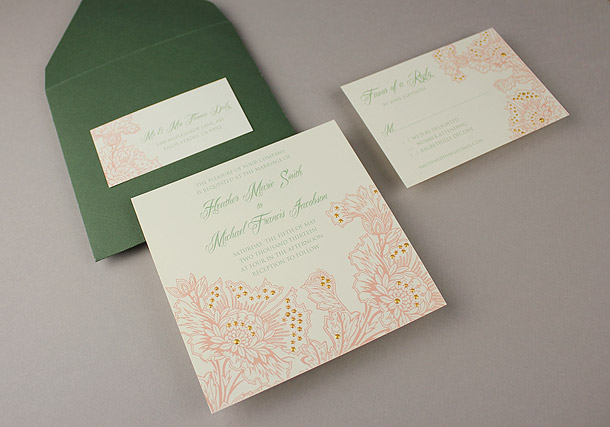
Here’s my stationery set after the embellishments. You’d never guess I DIY’d them on a budget*.
* not to be held responsible for the spontaneous oooohs and aaaahs these lovelies are bound to elicit!
Step 4: Print Labels
Type in your label details and print the file on 2x4" Avery labels.