
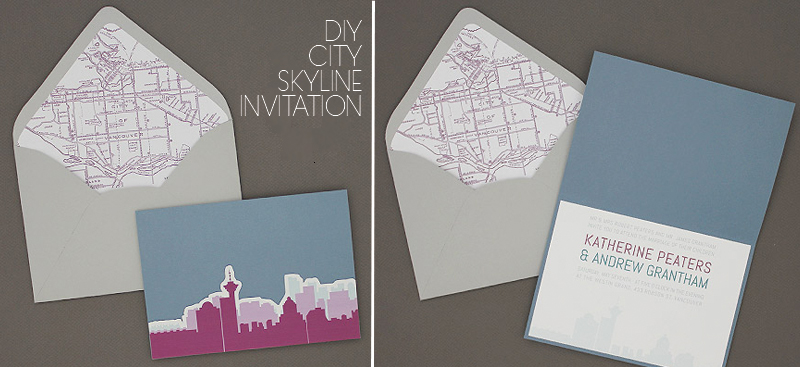
I love a big city. I especially love exploring a new big city. The hustle and bustle just feels exciting to me. Today's tutorial is for all the urban brides out there. If you are getting married in your favorite big city this ultra modern and ultra cool invitation might be for you.
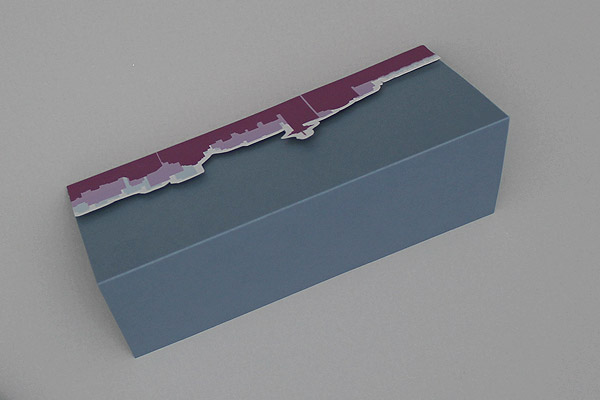
The skyline on the invitation is slightly three dimensional thanks to some carefully placed craft foam, giving this invitation a bit of extra pop. Open the flap to reveal the details to your big day.
All the steps involved in putting this chic invitation together are below. 5 points for anyone that guesses the skyline!
(Drop us a note if you'd like to see your favorite big city on an invitation. I might start putting together a collection of skylines based on your feedback.)
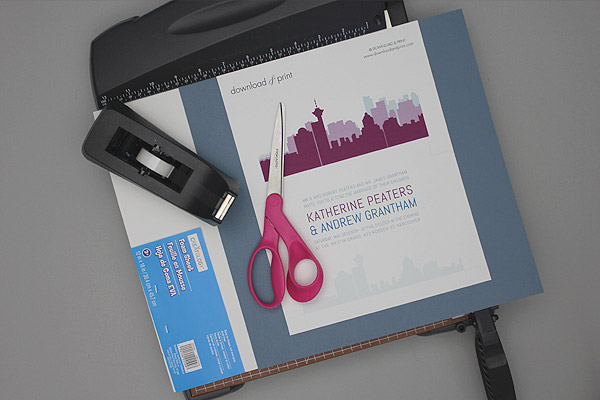
Supplies:
Step 1: Download and Print
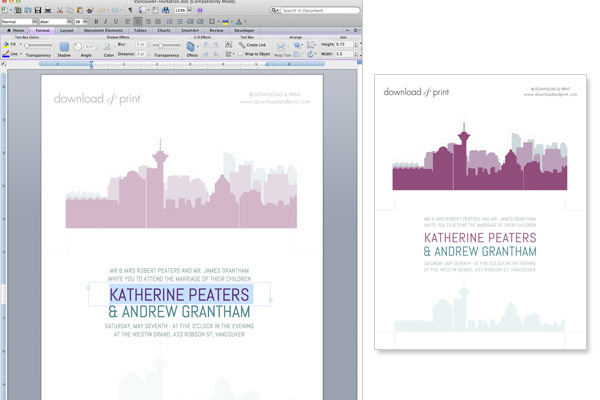
Download the template files, add your wedding details in MS Word, and print on white card stock. The font used in the sample is Abel. If you don’t have this font loaded onto your computer, Word will substitute a different font. You can choose any font that you like.
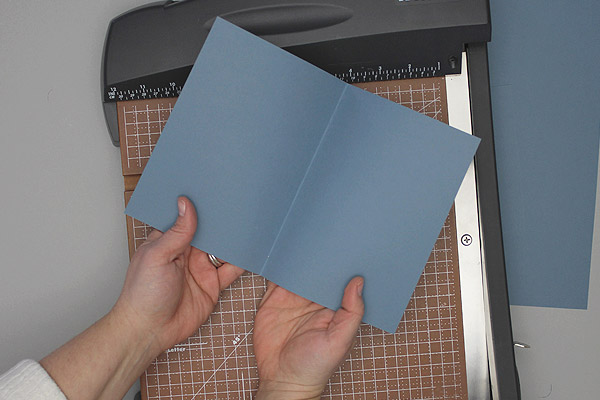
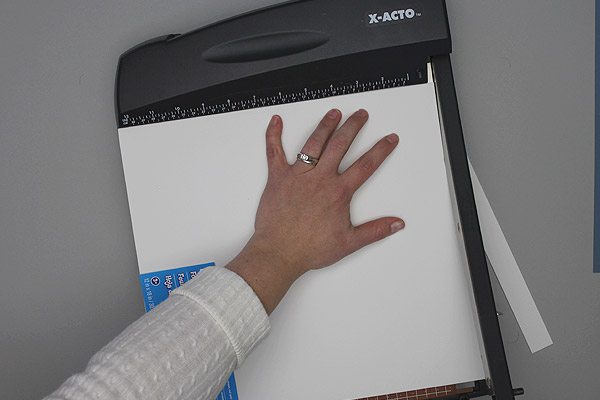
Step 2: Trim and Fold
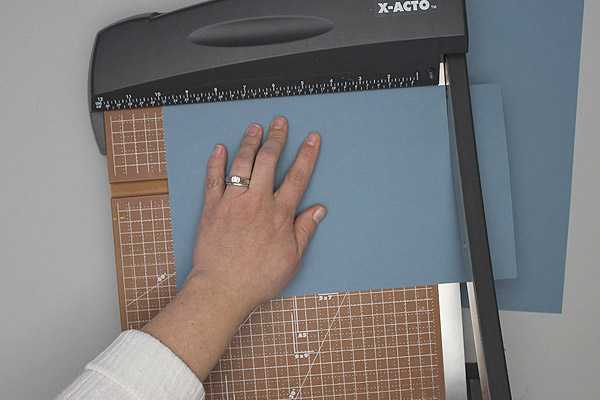
If you are using pre-cut cards skip this step.
Trim the slate card to 10 x 7” and fold in half. This will produce a 5 x 7” folded card, which is a standard invitation size.
Step 3: Trim the Invitation Insert
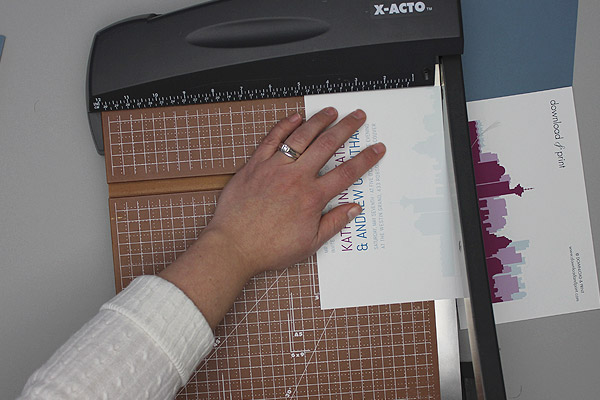
Trim the invitation insert along the cut lines. A paper cutter will be faster (you can cut more than one sheet at once) and will produce straighter cuts, but scissors will work just fine too.
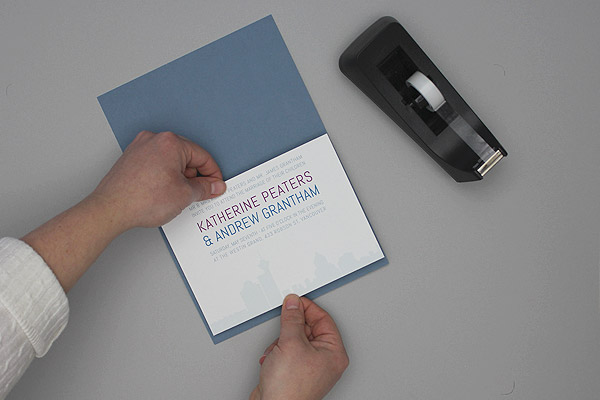
Attach the invitation to the inside of your blue card using double sided tape.
Step 4: Cut out the Skyline
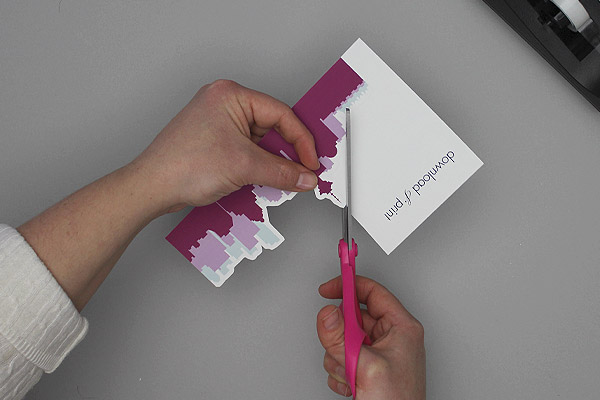
Grab your scissors and cut out the skyline along the trim line. This is going to be the most time consuming step in assembling the invitations, so if you can engage help, do so!
I find forming a production line helps the work flow enormously. Throw an invitation party, and have your mom, maids, fiancé, mother in law, help you put the set together. Give each person one task, such as to cut out the skylines, and make a fun afternoon of it. If your fiancé isn’t the crafting type, at least have him keep your wine glasses filled!
Step 5: Cut out the Skyline
Cut the craft foam into 7x1” strips.
The foam is optional, you can just tape the skyline to your blue card. However, the foam gives a little lift and dimension to the card without adding weight, giving the set an added touch of professionalism.
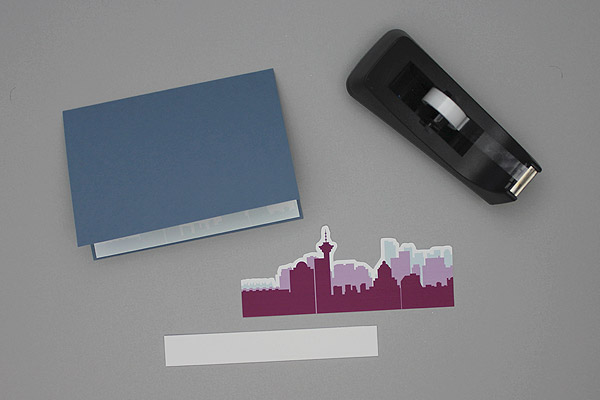
You now have all the pieces ready to assemble:
• Folded blue card with your wedding details on the inside;
• Vancouver skyline;
• Craft foam strip.
Step 6: Assemble the Invitation
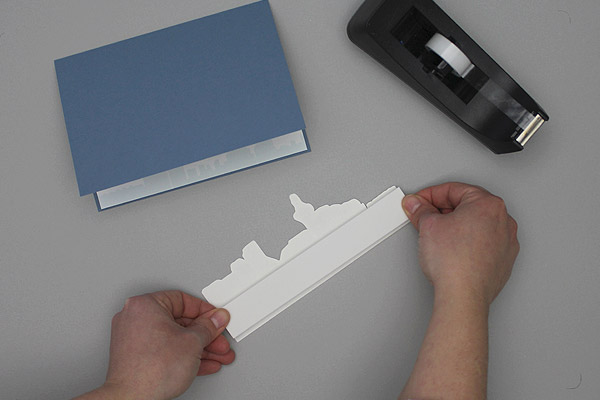
Tape the craft foam to the back of the skyline with your double sided tape. Tape the skyline to the lower front edge of your blue card. Step back and admire your handiwork as the invitation is now ready for mailing.
Step 7: Bonus Envelope Liner
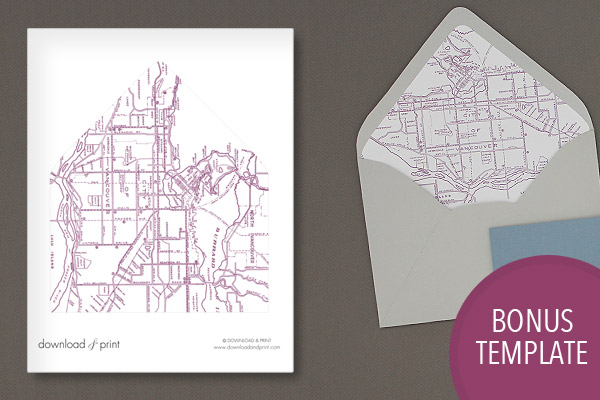
Print the envelope liner onto white card stock and cut out around the trim lines. Place the liner into an A7 envelope, lining up the top edge just below the outer edge of the envelope’s flap. Hold the lower half of the liner in place and fold over the flap, creasing the liner flap along the fold of the envelope. Give the fold a nice sharp crease by pushing along it with the palm of your hand. Attach double sided tape to the back of the liner flap, and fold the envelope flap onto it to secure into place.