
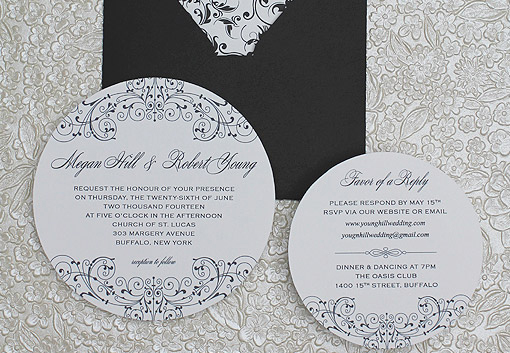
While sitting, contemplating, staring at my computer screen, tracing the lip of my coffee cup with my finger, it dawned on me that we don't play with shapes enough in wedding invitations. So while the round shape of this invitation set may be a little left field, the classic color scheme and elegant scroll detailing and fonts keep these pieces well grounded in wedding tradition. You could print on any color card, though I don't think you can go wrong with black and white. This set is sure to make a bold statement in the mail, and with just three easy steps to put together, you will be patting yourself on the back for your bold choice to make them at home.
Supplies:
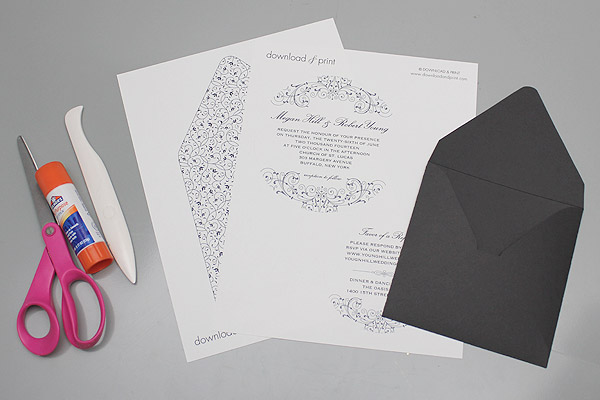
- Printable templates
- White or creme card stock
- 5.75" square envelope for invitation (as seen here)
- Scissors
- Printer
- Glue stick or double sided tape
- Bone folder (optional)
Step 1: Download and Print
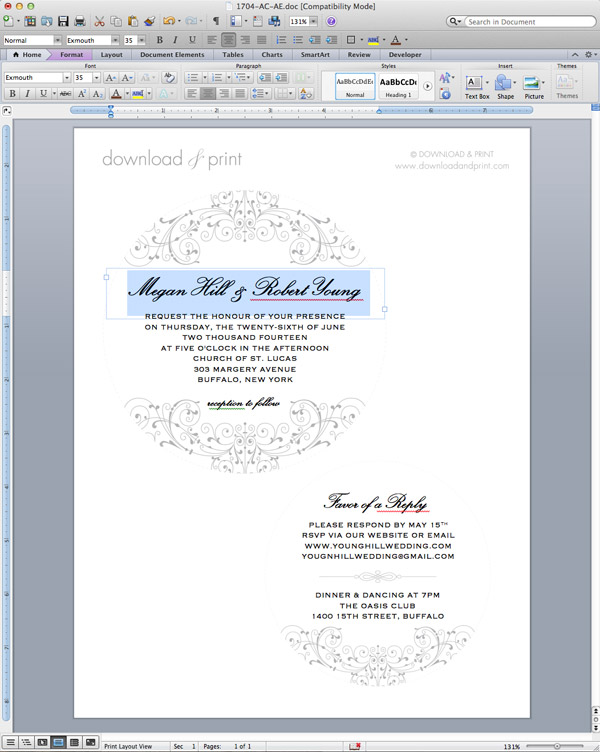
Download the template files and open the invitation and RSVP in MS Word, and the envelope liner in Acrobat. Customize the Word files with your wedding details.
The script font used in the template sample is Snell Roundhand, and the information text is Copperplate Light, both of which are available to download for free. If you do not have these fonts installed on your computer Word will substitute different fonts. You can pick any fonts that you like.
Print the files on white or cream cardstock.
TIP: I recommend printing one sample of the invitation and RSVP to check for spelling and punctuation errors. Have a second set of eyes look at the sample before you commit to printing them all!
Step 2: Trim the Circles
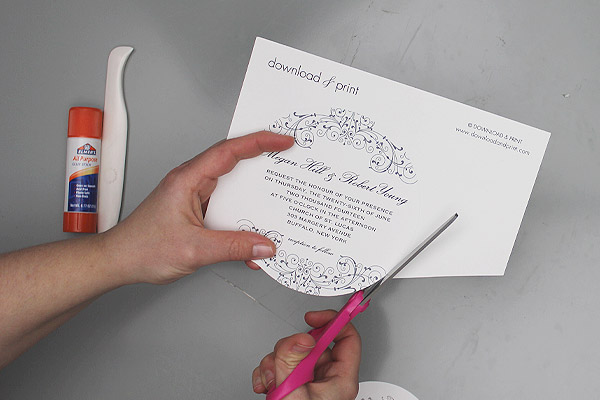
Cut the invitation and RSVP circles along the trim lines using your scissors. The trick to cutting circles is to keep your scissors stationary and move the paper. For smooth circles use long, deep cuts along the entire blade rather than small snips.
Also cut out the envelope liner.
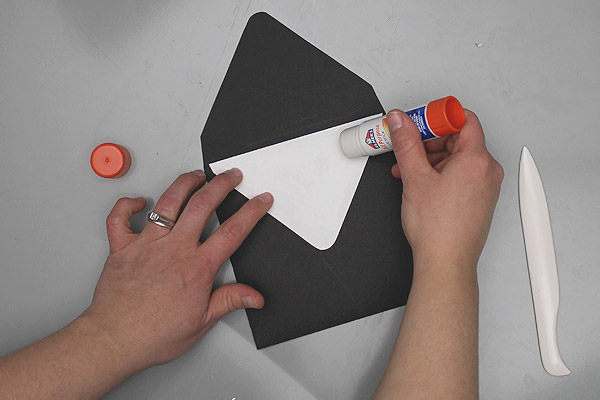
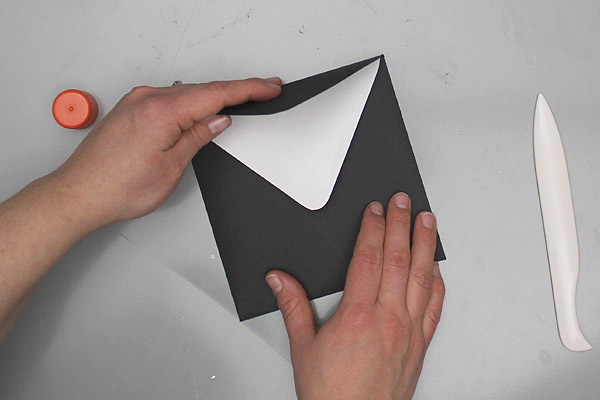
Step 3: Glue the Envelope Liner
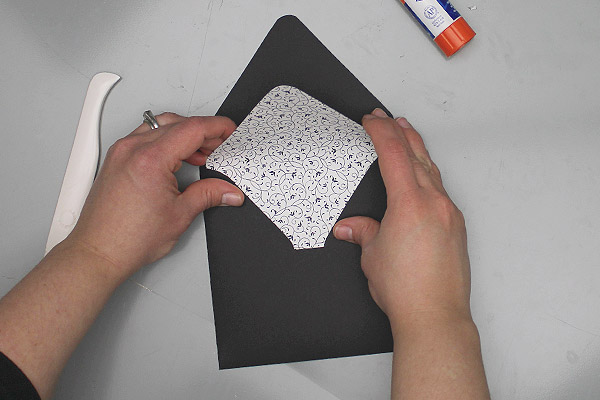
Place the envelope liner into a 5.75” square envelope. Line up the top flap so that is sits just below the edge of the envelope. Fold over the liner along the fold line of the envelope, using a bone folder if available for a sharp crease. Add some glue or double sided tape to the back of the liner flap. Fold the envelope flap over and onto the liner and push down firmly to attach the liner to the envelope.
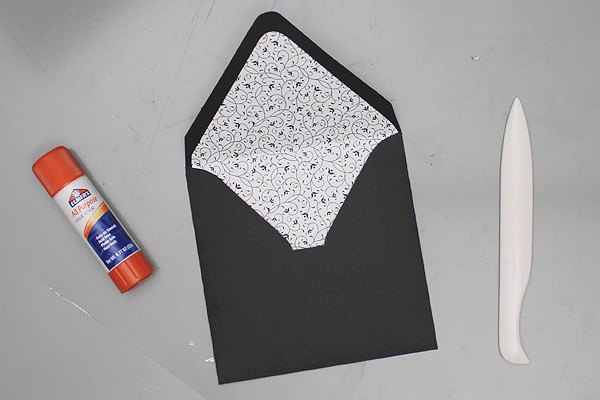
The invitations are now ready for stuffing and mailing.