
DIY weddings are often thought of as colorful and whimsical, and around here we love these type of 'love conquers all' celebrations. If you have your heart set on a magical day steeped in formality and tradition, there's no reason you can't jump on the DIY bus too! Don't mistake DIY for quirky. And we love these weddings too!
I smile when I get to break down barriers, and today I'm going to help you break down the formal-is-out-of-my-price-range barrier.
Wedding invitations are traditionally formal with a capital F. The number of things to consider still sends my mind into a spin. In this day and age of social media, abbreviations, emoticons and e-vite, it sure is a welcome change to receive an invitation through the mail, that's written in long hand without a smiling face in sight! To put together a text book formal wedding invitation you'll need:
- Cream card
- A tissue liner
- Black ink
- Name/s of who's hosting
- An outer envelope
- An inner envelope
- Correct capitalization...the list goes on.
I for one, know this type of invitation precision would be lost on most of my friends, so I'm going to show you how to create an elegant invitation with enough formality to still knock the socks off anyone in your family that is clueless to what a meme is.
The invitation I'm using is from our Pearls & Lace collection. You can change the colors online to any color under the sun. The DIY showstopper here is the name plate belly band, which you personalize with your guests names. This is in lieu of an outer and inner envelope.
Traditionally the outer envelope uses an address that the mailman will appreciate. The inner envelope should list each person being extended an invitation. It's your chance to indicate whether kids are invited, if your single friends can bring a +1, or if crazy Aunt Midge's fling of the moment is on the guest list or not.
My personally invited belly band is a modern twist on the inner envelope, allowing you to extend, or not, invitations per your wishes and your budget.
It's really quite quick and easy to put together. The video shows the threading method the best, it was harder to explain in writing than it is to put together!
SUPPLIES:Customize Free Belly Band Template
- White or cream card stock
- Hole punch
- 1/2" or 3/8" ribbon
- Paper trimmer or scissors
- Free Belly Band Template
Step 1: Customize online, save, Download & Print
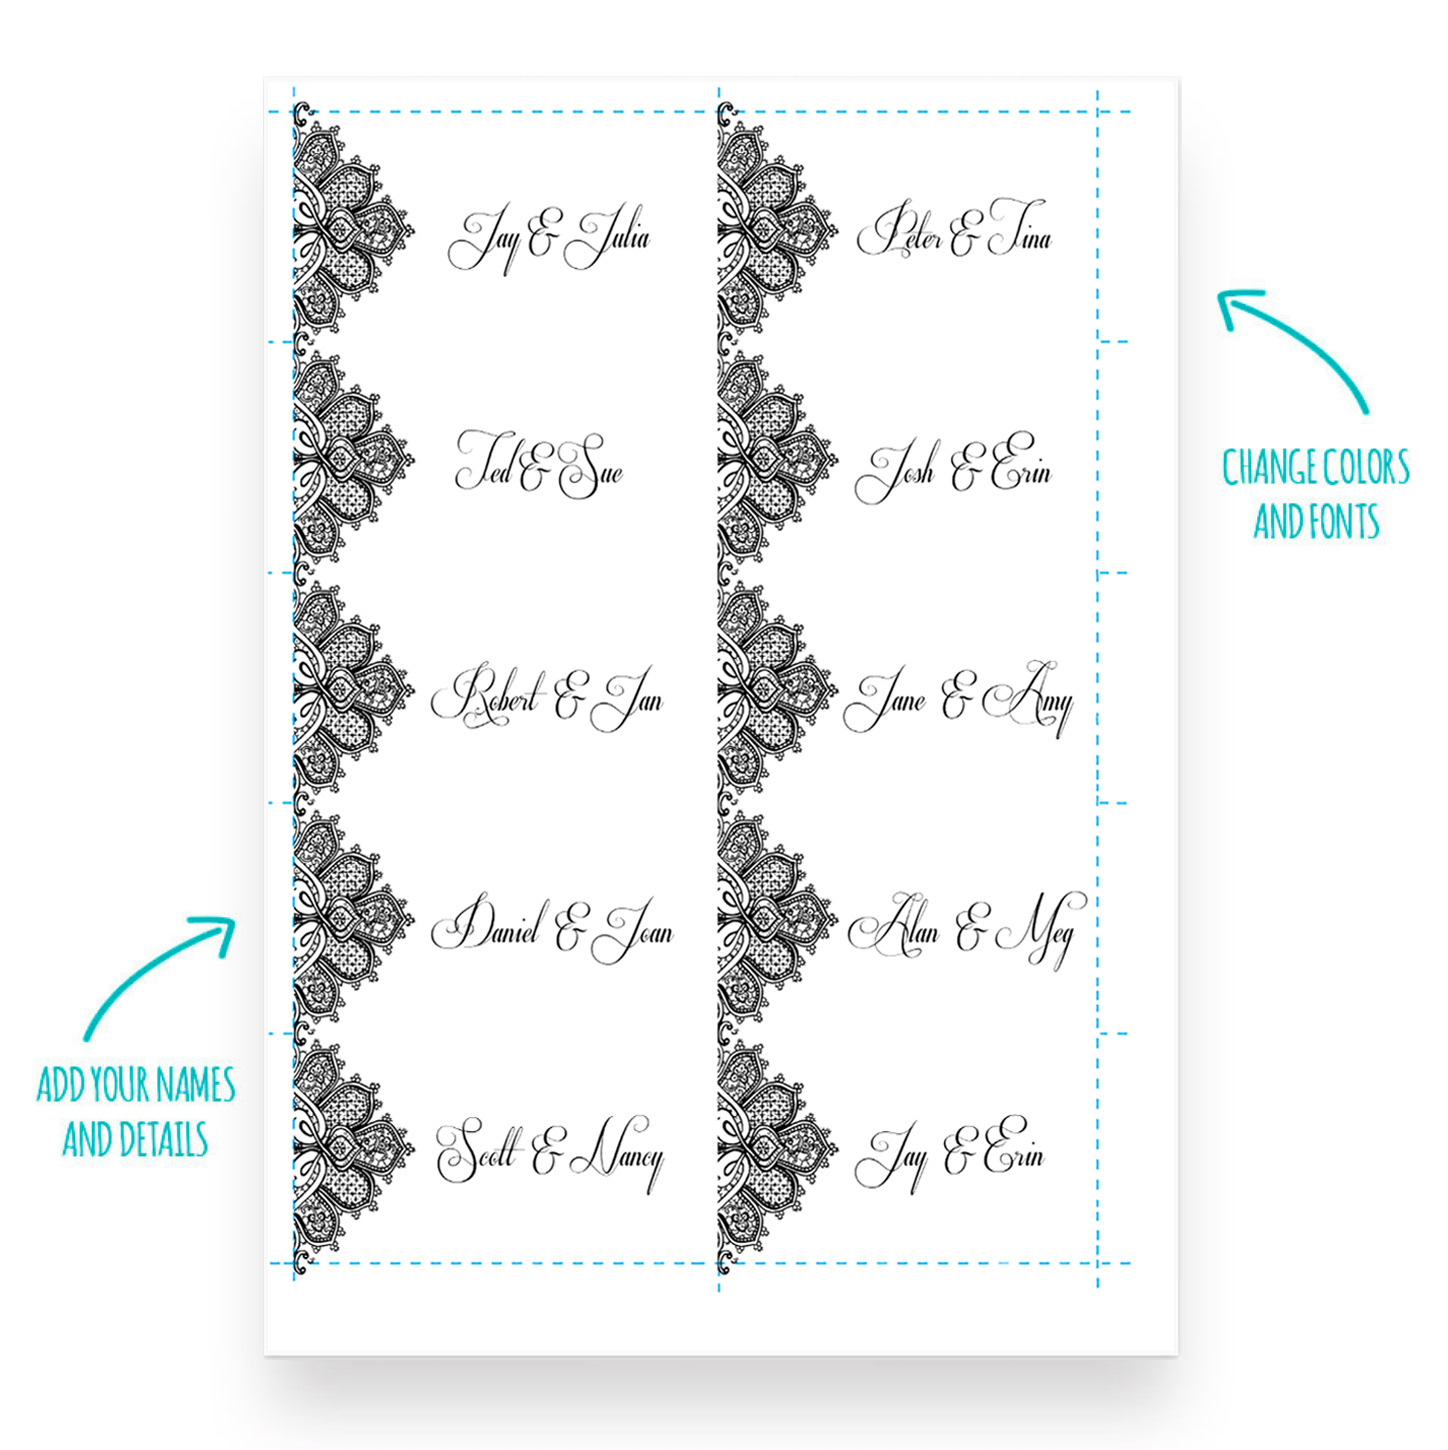
Change the color, text and font online. Name the template, save it and download it on to your computer.
The belly band should list everyone being extended an invitation to your wedding, so will probably read differently to the outer envelope. Some ideas for addressing include:
Belly Band: Paul & Heather
Outer Envelope: Mr. Kevin Sharp
Belly Band: Kevin & Guest
Outer Envelope: The Johnson Family
Belly Band: Sean, Sara, Olivia and Sophia (listing kids if invited, ordered by age)
NOTE: Print the template onto white or cream card stock, I prefer paper between 65 lbs and 90 lbs in weight.
Customize free belly band template
Step 2: Trim
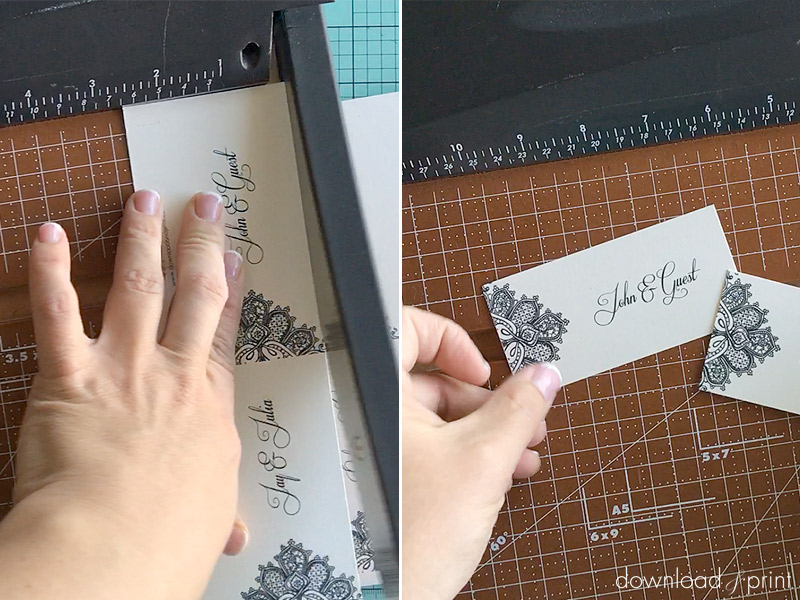
Trim the name badges along the cut lines. I prefer to use a paper cutter as I get straight cuts and can easily cut more than one sheet at a time. Scissors will work just fine too.
The finished size of each badge is 2" x 4".
Step 3: Punch Holes
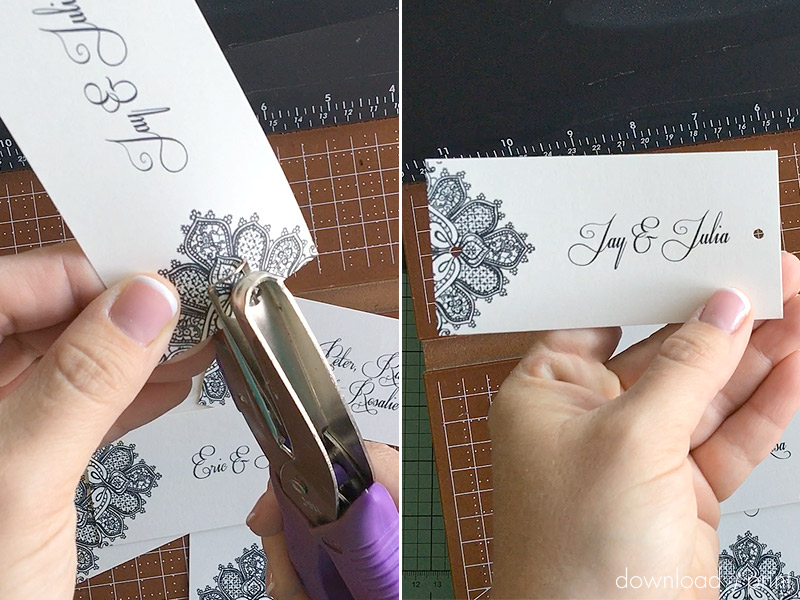
Punch a hole on either side of the name badge, approximately half way up. I eyeballed the placement and it worked fine, you can measure if you like. I used an 1/8" punch which is smaller than a standard paper hole punch.
Step 4: Assemble Band & Invitation
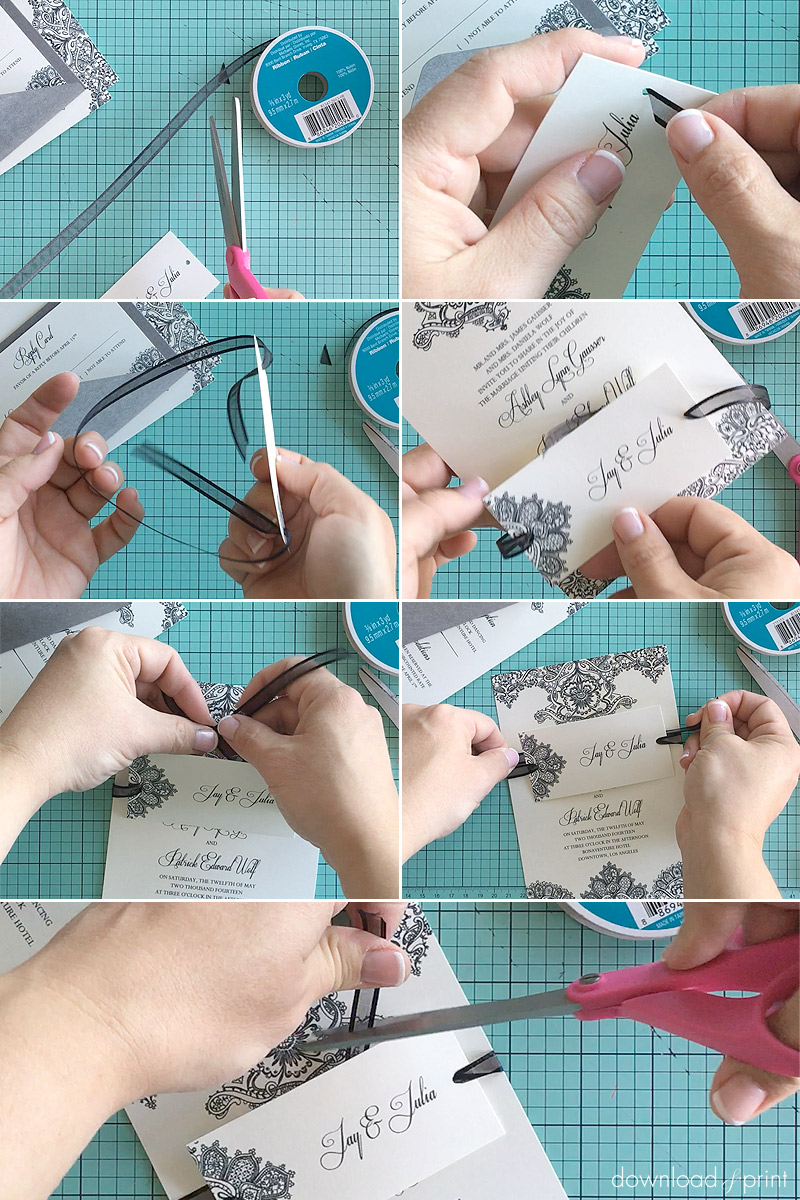
Cut a length of ribbon about 12" long, cutting the ends into a sharp point. This will make threading easier.
Thread one end of the ribbon down through a hole, front to back. Thread the opposite end of the ribbon down through the other hole, front to back. All the ribbon, both tails and the middle loop should now be behind the name card.
Slip an invitation into the band and pull the ribbon tails snug. Tie a simple knot to secure the band and trim the tails so that the knot and tails are tucked neatly behind the name card.
Slide your RSVP card and envelope along with any enclosure cards into the band on top of the invitation. I'm using coordinating pieces from the Pearls & Lace collection. The entire invitation package gets placed in an outer envelope and is ready for addressing and mailing.
With template love,

(Although all the products listed in this tutorial are products I personally use, I will be compensated just a tiny bit if you make a purchase through some of the links provided. Thanks for supporting small biz!)